
AT Last
COLOR!
 |
| oldnewgreenredo |
At last color----well, here's planning color first anyway.
Wanting to get away from Barbie magenta/pink and purple in all the furnishings and after consulting my daughter-in-law, we talked about a contemporary look with some fun things in a wider color family. Like a real house, and real people.
But, still using as many materials we already have. We both love green, and I had the green and white contact paper which is perfect for the kitchen. The gray tile which looks blue here, is really gray silver which is perfect as appliances and some furnishings will be stainless steel. The gray/silver tile will run through the living/dining room with white walls and the green and teal blue for furnishings and also on the third floor bedroom and bathroom.
The 'hardwood' flooring, brown bath tiles and beiges are on the bottom floor in Ken's man cave.
Barbie's bathroom/closet and bedroom on the third floor will be pink/white in the bathroom, with the pink tiling, and the other fabrics, purple, pink and stripes for the bedroom in the linens and furniture. With the silver gray floor that should work really well. And there will be green touches here also, there are two shades of green in the striped fabric.
 |
| oldnewgreenredo |
So here is the tiling which is actually scrapbook paper mod-podged in satin directly onto the walls. I used two coats of modge-podge. There are still a few bubbles here and there, but almost everything disappeared after drying. I used a foam brush and worked from the center out and then quit. Do NOT over work, the paper will not stand up to it. Actually wrapping paper works better, but finding tile prints is hard.
 |
| oldnewgreenredo |
You can see the bubbles, but they really did shrink out when it dried.

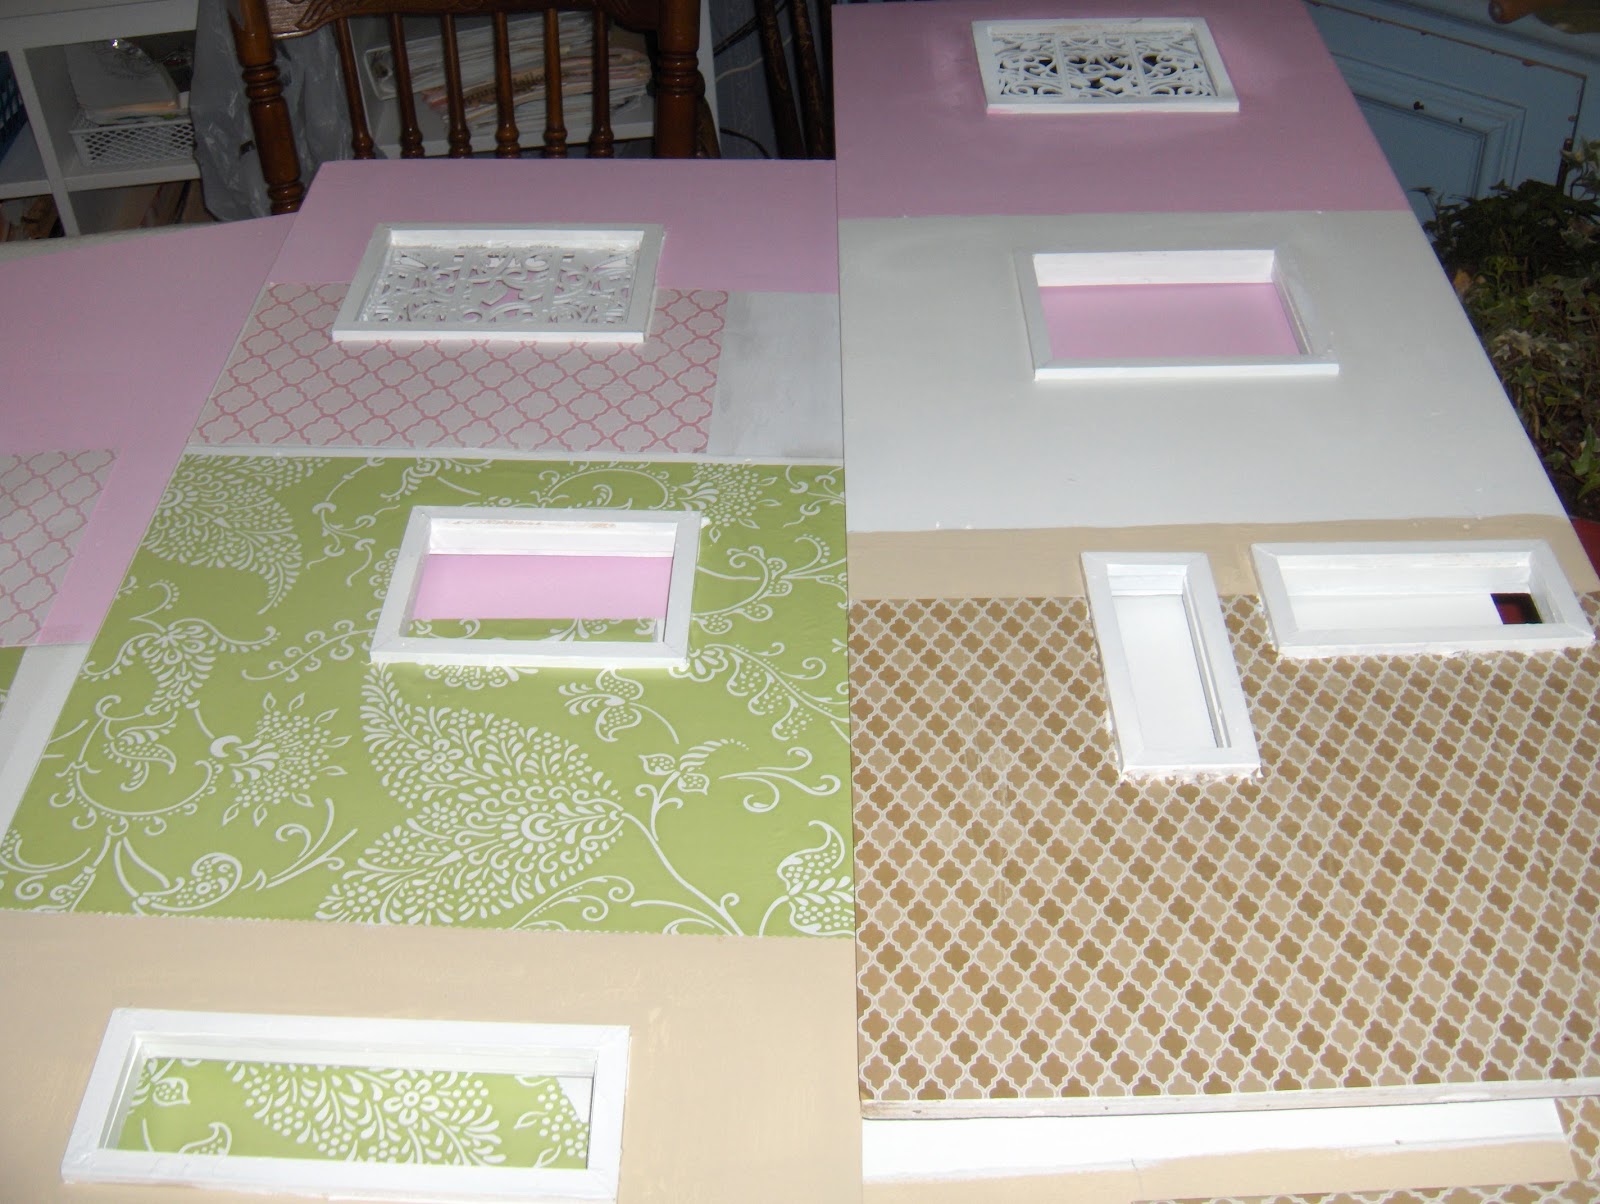
Here is the last of the pink tiling paper is laid out on the board with the pink paint.
 |
| oldnewgreenredo |
Here is the bath/bedroom colors again. I mixed the pink on the upper right from old paints I had. Magenta....lol and white and it was almost close to perfect.
 |
| oldnewgreenredo |
One of Ken's bathroom walls. More bubbles, but they do shrink out!
 |
| oldnewgreenredo |
All three of his bathroom walls and look how the windows pop. We chose beige for the paint. (This is the trim paint in our family room.) So free. I did have to buy some white satin paint as we did the interior of the shed this Fall, by mixing all our light colored old paints together (GREEN) instead of sending them to landfills.
 |
| oldnewgreenredo |
Here's that tile wall with all the bubbles, dried. It looks great with the hardwood tiled floor-6 tiles at 89 cents each with a rebate.
 |
| oldnewgreenredo |
I couldn't resist showing the wall cabinets on top of the green and white contact paper. (I did have to use a spray adhesive as the contact paper I've had for years and wasn't very sticky). So it was pressed down twice. I trimmed with the metal square and a sharp exacto tool.
 |
| oldnewgreenredo |
I think the colors will work well, the appliances will be stainless steel and all metals will be silver.
 |
| oldnewgreenredo |
Add the white walls in the living room. I may do an accent wall on the stairway wall,
to break up the white.
 |
| oldnewgreenredo |
Here are the walls with the windows, I need to do touch up but will do that after assembly. As there are many things to do yet, that could mess up the walls. I will use a sponge brrush and just dab paint on.
 |
| oldnewgreenredo |
We couldn't resist holding up the walls to get the 'room' effect. Working on the pieces flat has saved so much frustration. You just have to measure carefully, but we are putting up baseboards and door trim, and ceiling cove moldings (which will hide the electrical).
 |
| oldnewgreenredo |
We laughed when we saw this at first, on the east walls. Neopolitan icecream, lol.
 |
| oldnewgreenredo |
Here are the white walls and the fabrics for the living room and dining room. I think the stripes may wander into the kitchen too.
 |
| oldnewgreenredo |
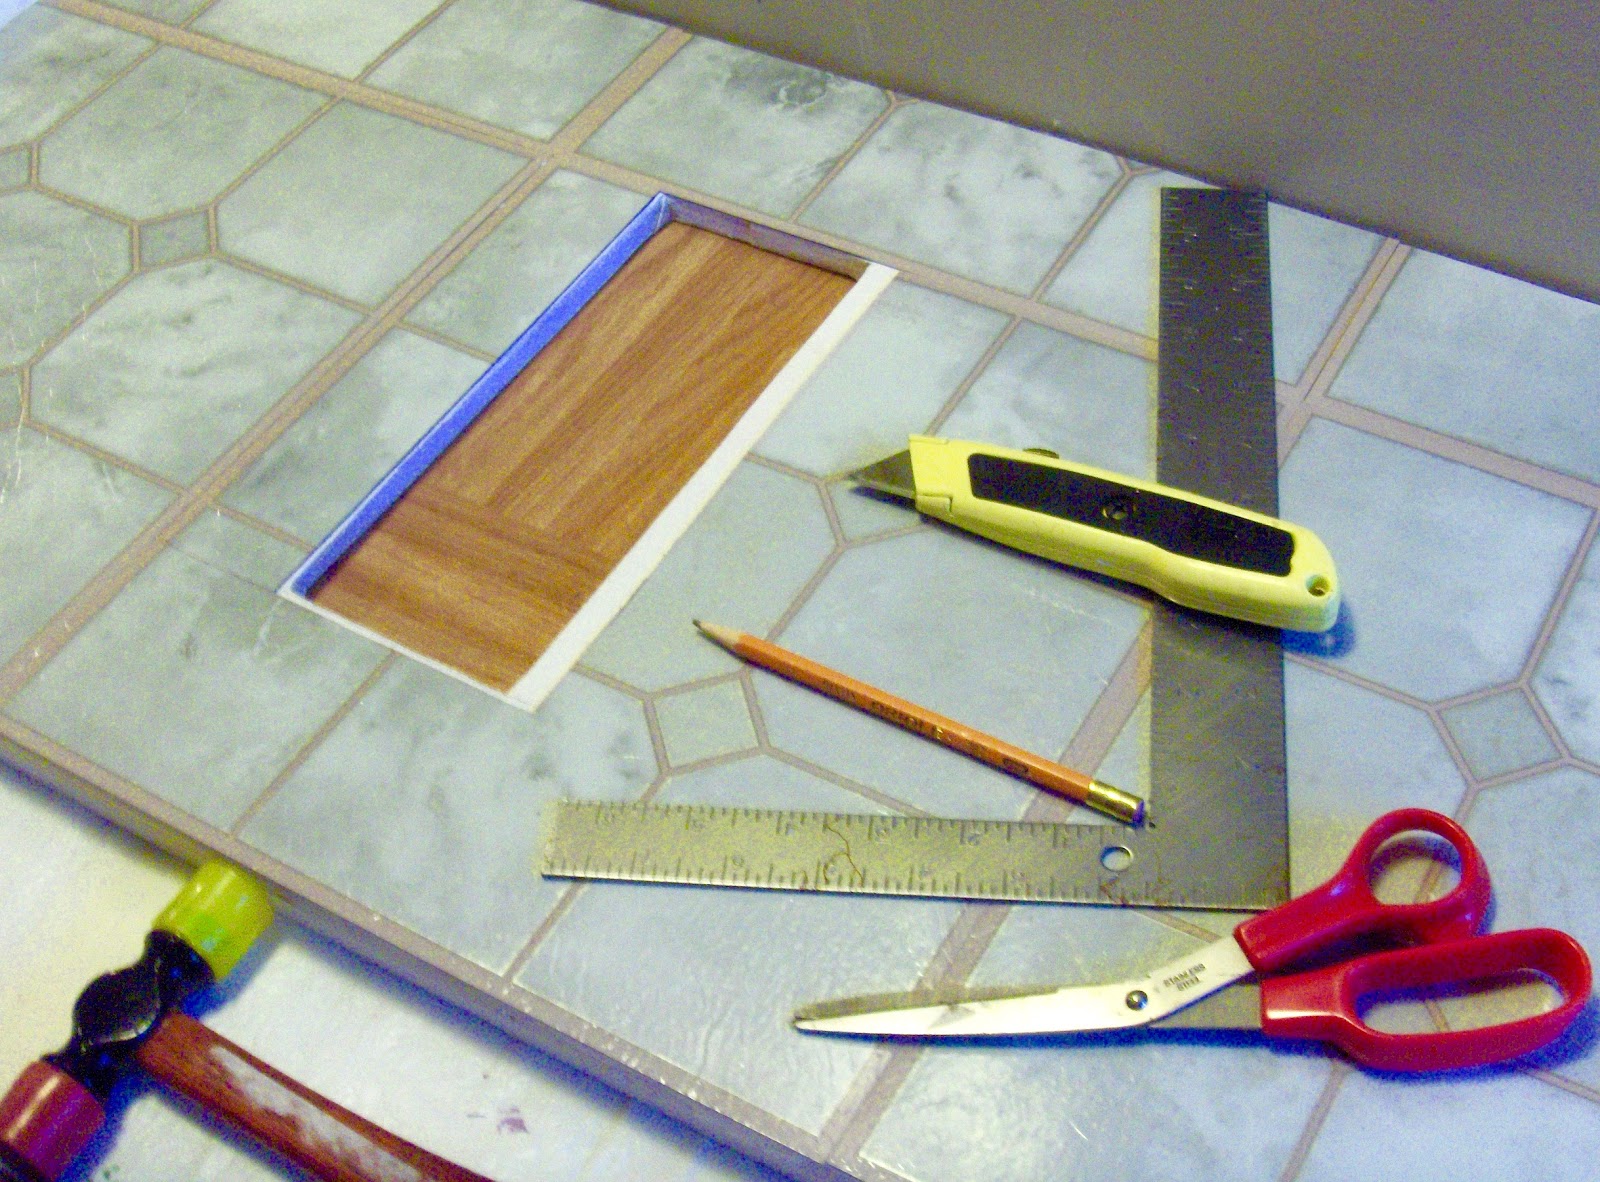
Cutting the floor tiles was way easier than expected. I placed the complete tiles at the front of the edges and worked to the back. I marked with a waterbase marker, and cut with an exacto knife by scoring and bending then another cut. Using a metal straight edge is a must. A rubber mallet is a great tool, I also used a rolling pin to press down the tiles, as we won't be walking on them.
 |
| oldnewgreenredo |
Really just a few simple tools. The white strip is the woodbase and a wall will go there 1/2" wide. Again these are leftover tiles...so basically free.
 |
| oldnewgreenredo |
READY to MOVE IN...NOT YET
Next is Week#4
Moldings, Electrical and Wood Trim.
Just like a real house, but WHEN are we going to get to the FUN stuff...????
and then again, the workers aren't union.
Plumbing: the toilets are brand new---so there shouldn't be any major problems, but everything else is second-hand or vintage though, or hand made, so there will be lots of DIY posts!
DIY Barbie house Week 1 Planning
DIY Barbie House Week2 Cutting and Painting
DIY Barbie House Week 3 Windows
DIY Barbie House Week 3 Finally Color
DIY Barbie House Week 4 Assembly
DIY Barbie House Week2 Cutting and Painting
DIY Barbie House Week 3 Windows
DIY Barbie House Week 3 Finally Color
DIY Barbie House Week 4 Assembly
DIY Barbie House Week 5 Stairs and Moldings
DIY Barbie House Week 5 Final Lighting
DIY Barbie House Moving in with Vintage Furnishings
DIY Barbie House Week 5 Final Lighting
DIY Barbie House Moving in with Vintage Furnishings
All the opinions and photographs in this blog are my own, I have not
been paid or reimbursed in anyway for my opinions, posts or products used.
Please do not
use my photos without linking back to this blog without my permission.
Thank you for your cooperation, Sandi Magle
Thanks for stopping by and all questions or comments.
I'll be sharing at these parties:
Amaze Me Monday
Show and Share Monday
Tuesdays at Our Home
Metamorphisis Monday
Amaze Me Monday
Show and Share Monday
Tuesdays at Our Home
Metamorphisis Monday
Sandi

What a work of love and art! You are making a lot of progress! Can't wait to see the next pics. Have a great week, Lynn
ReplyDeleteWe are having a ball...I can't wait either!. LOL.
DeleteThis looks like so much fun! Such a great project...and it will be wonderful!
ReplyDeleteI'm afraid this has been too much fun, now I want one! Thanks for stopping
DeleteWhat an ambitious project...I will look forward to seeing the completed piece!
ReplyDeleteJP
PS I tried to respond to your wonderful comment on my fall treasures, but you are a no-reply commenter and I have no way to correspond with you :(
ReplyDeletethat can be easily fixed, here...http://sweetinspirationsbyjpdesigns.blogspot.com/2015/10/getting-blogger-to-respond-to-your.html
Hi, JP, I have changed my preferences, but still have to directly go to my gmail, in order to reply---some issue with browser, total pain, so I will try and catch up there. I do get many comments/replies on my email, have no idea why it didnt' work on yours. But thanks for the heads up, and I'm still stumbling around this blogging thing, lol. Sandi
DeleteWhat fun!! And what a great job you are doing. Barbie will no doubt be pleased beyond belief. Sally
ReplyDeleteThanks Sally, she is, but Ken is thrilled with the possibility of no PINK in the mancave!, Sandi
DeleteThanks Sally, she is, but Ken is thrilled with the possibility of no PINK in the mancave!, Sandi
ReplyDeleteOmigosh! Love this too!
ReplyDeleteWow! Barbie and friends are going to be living in high style. How fun! Visting from Creative Country Mom's. Jane
ReplyDeleteWell Jane, the house may be NEW-- but 90% of everything else will be Old and Redo....or from scratch...I have been buying thrift store Barbie: bags, lots and misc all year, we will see if it all comes together. I dissected a Barbie Vending machine today for a closet. Like I said we will see.? Sandi
DeleteIt's really coming together, isn't it Sandi? What an incredible labor of love; I know Barbie will be very happy with the results :) Thanks for linking your handiwork up with Vintage Charm.
ReplyDeleteLove the colors, and can't wait to see the finished house! I remember the first time I used Mod Podge and worried about those bubbles. All gone the next morning. lol! Now, I no longer worry. Thanks for sharing with SYC.
ReplyDeletehugs,
Jann
Ha, ha, meant Modge Podge.
ReplyDeletehugs,
Jann