Showing posts with label Barbie house. Show all posts

Friday, March 24, 2017

DIY Barbie:New second floor

Here is the vintage Barbie Victorian Mansion purchased at GoodWill 
for $4.99 in amazing condition, with all working parts, that we have been playing with for a year.

The second floor as originally designed which barely had room for a single bed with its 9"depth. 
The hole in the floor for the elevator which cranks on the knob of the turret took up lots of room.
 When the tub on the left was down, it further cramped the space.

http://oldnewgreenredoblog.blogspot.com

Where are all the Barbie's supposed to sleep-let alone where do their clothes go?


Since the Grand isn't tall enough to reach up and over to use the crank on the elevator,
 I decided to board it over on the second floor. We also extended the wall forward 6 feet in barbie scale (1:6 scale) and 13 Barbie feet to the left side of the existing bedroom.
Who wouldn't want a 600+ sq. foot addition to their bedroom?

http://oldnewgreenredoblog.blogspot.com


Because the Mattel construction's very strong---when the house was opened, it was still sturdy.
 The green thing above is a vanity/tub that swung down and further used up the precious little floor space on the second floor.


http://oldnewgreenredoblog.blogspot.com
]

Here is the elevator on the second floor in the up position. Ramp just really reached far into the room.


http://oldnewgreenredoblog.blogspot.com

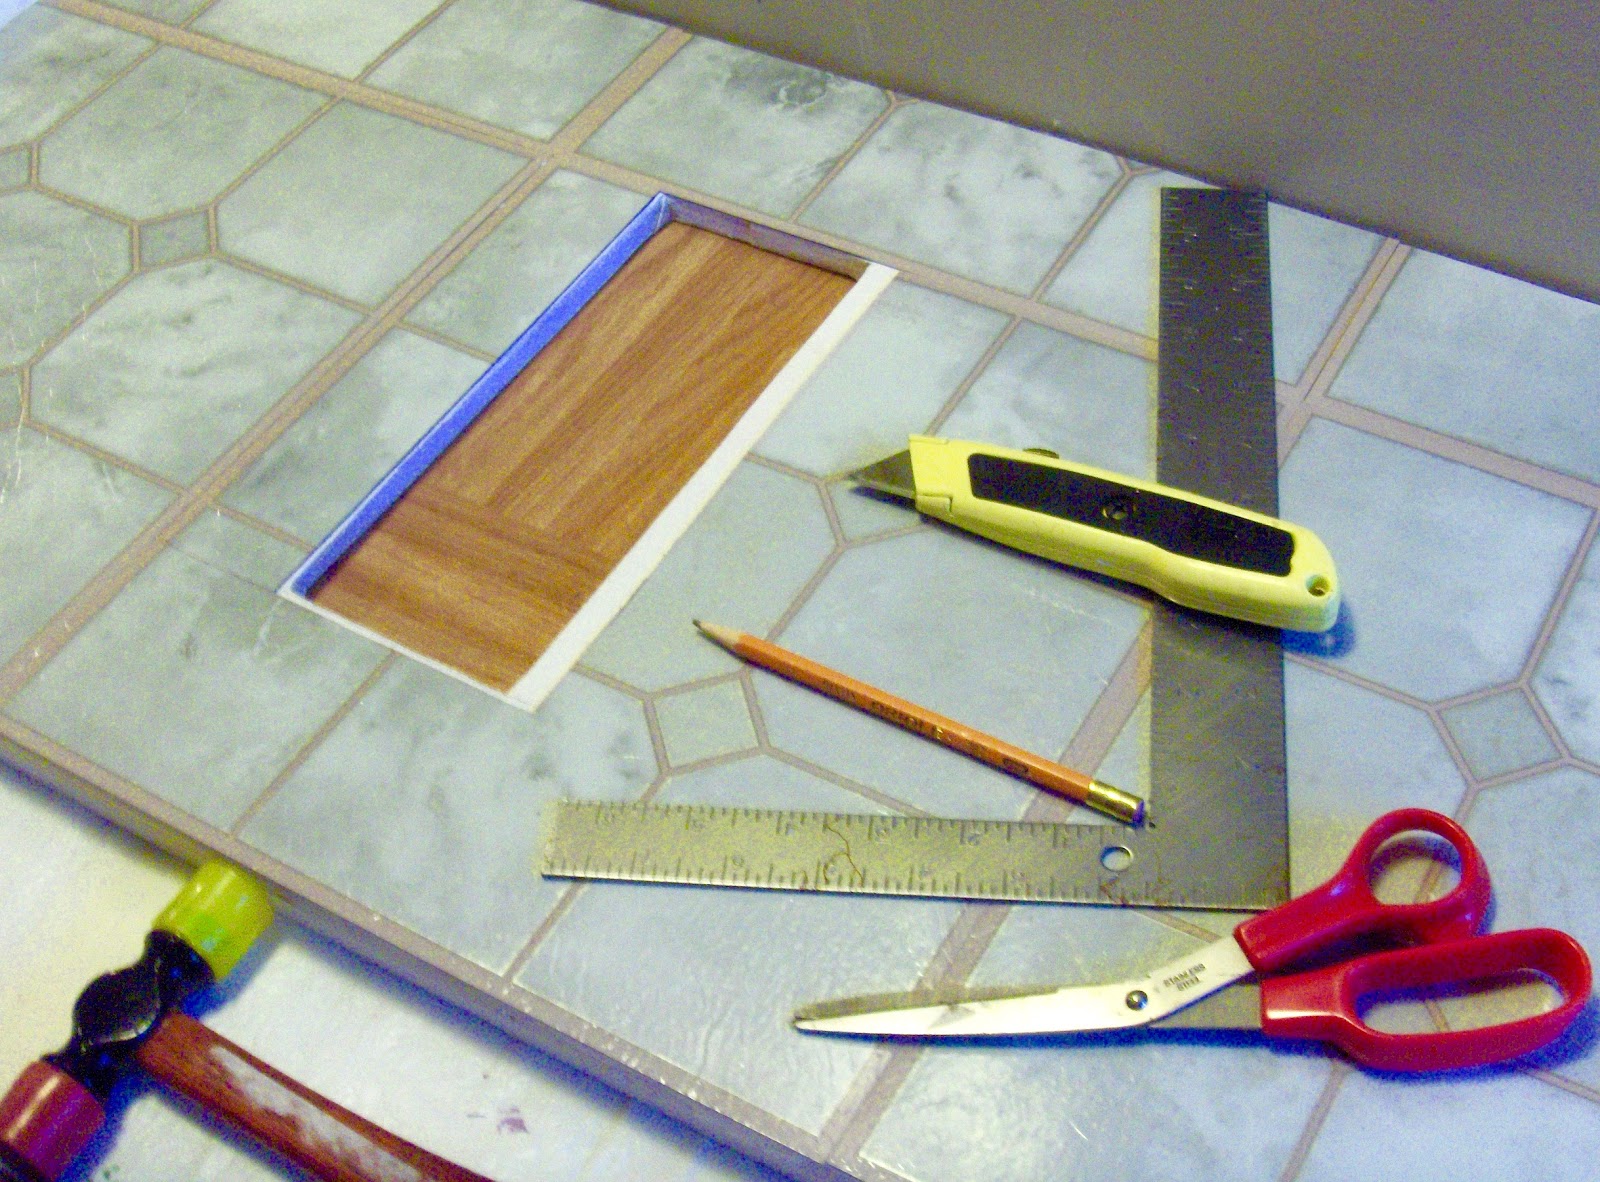
To begin the first job was to hack off the fittings for the built-in tub/vanity. 
I used a Dremel circular saw and eventually cleaned this all up, 
leaving the wall in great condition. 
If you are doing any kind of miniature work--a Dremel tool is a must have. 
I'm 69 now and have had 4 of these tools over the years, 
and they have always earned their keep.

http://oldnewgreenredoblog.blogspot.com

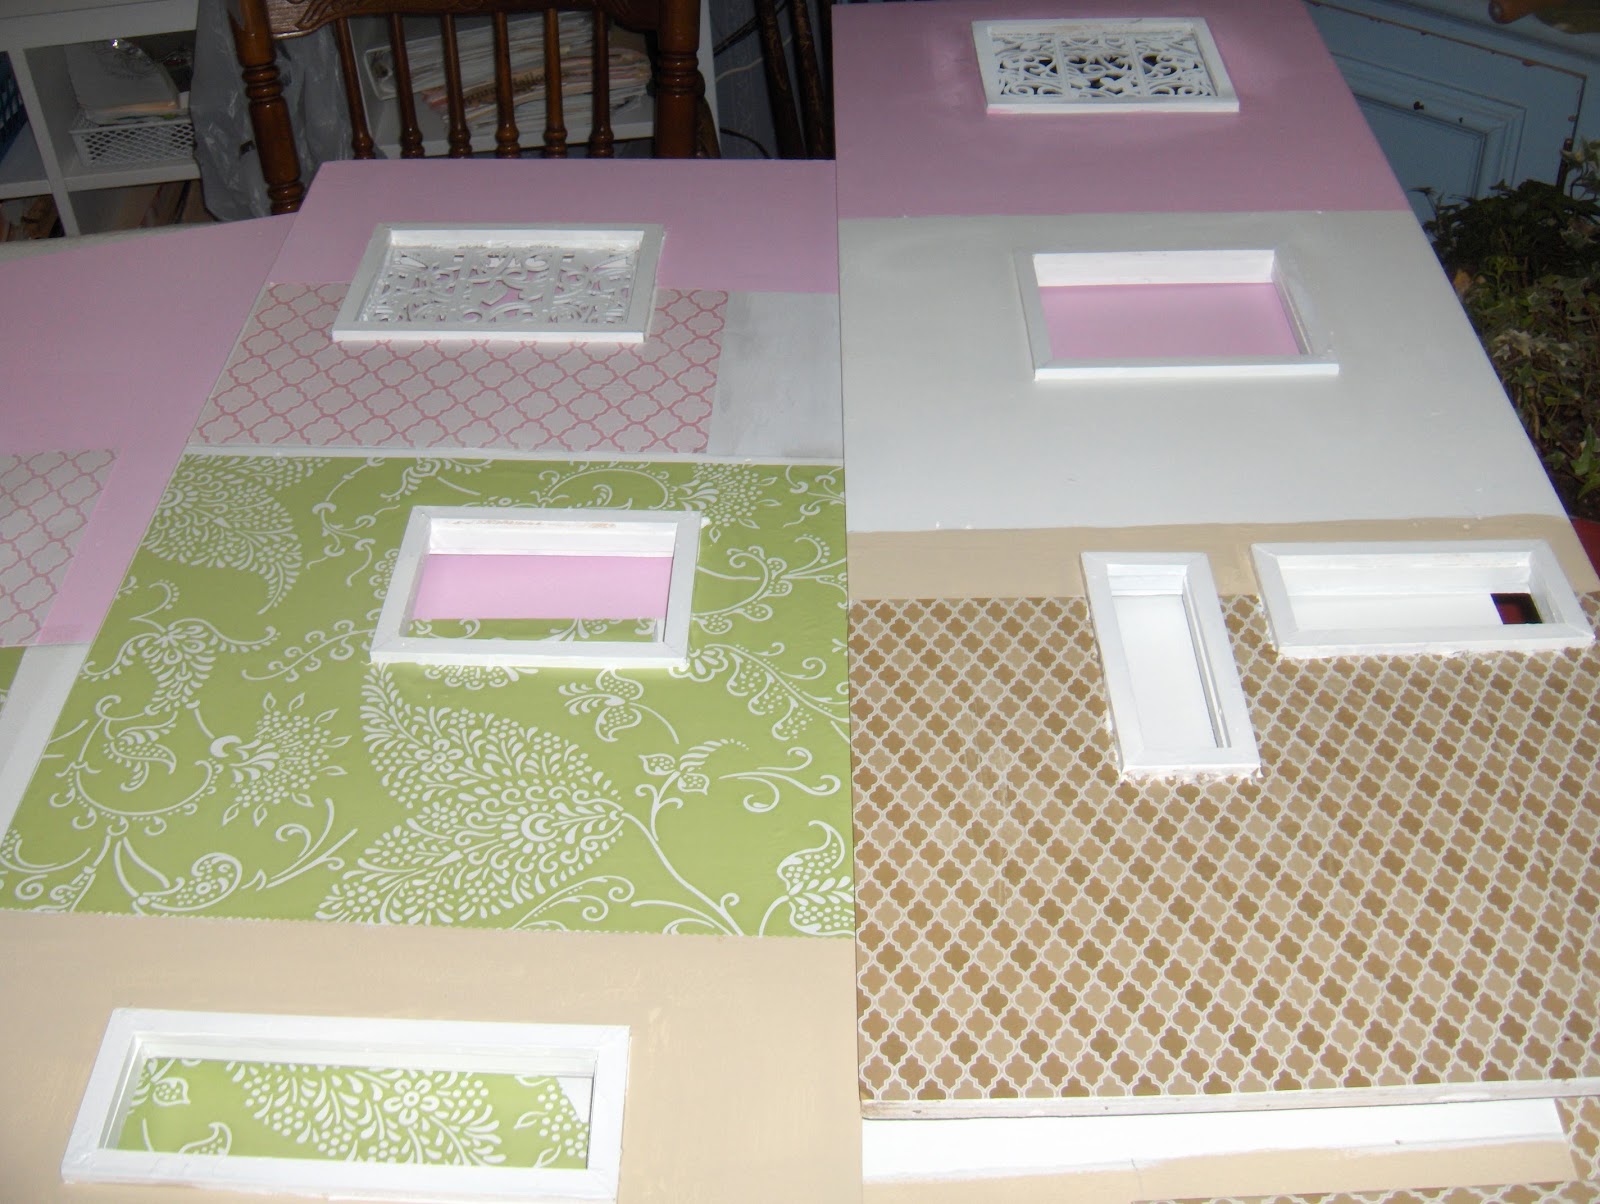
The largest paper I had to make a pattern for the new floor was a Hello Kitty coloring book. you can see the jig-jags as it is laid out on a light weight piece of pressboard. We chose this for its smooth surface and thin profile, light enough to be supported on the existing floor with a little help.

http://oldnewgreenredoblog.blogspot.com

More jogs to cut out which I did with the Dremel tools and a small saber saw.  The paper was fitted around all existing parts of the house including the built in pink cabinet. By fitting around the jogs, the floor adds additional stability to the now opened house.

It took several shavings and adjustments for the floor to neatly slide into place.


http://oldnewgreenredoblog.blogspot.com

Sadly the paint did not end up matching the existing green on the house, 
but is a more contemporary country green. Paint will happen later, when I can spray and use plastic paints outside.

http://oldnewgreenredoblog.blogspot.com

Here you can see the jogs (many)that had to be made,  but these also stabilized the house.
The floor is simply set in place without any gluing or screws.


http://oldnewgreenredoblog.blogspot.com

Here is the NEW second floor fitted over the dining room below. A support column made out of a 
dowel on the left supports the closet room, that once held the attached vanity/tub. we may add an edging to the floor to make it blend with the townhouse to the left. It is one step up into the bathroom from one house to the other---not bad for an urban renewal "This OLD DIY Barbie House."


http://oldnewgreenredoblog.blogspot.com

The support column below, appears a shade different then the original beige white column, will REDO that when we have some good weather to spray paint. Maybe I can faux some grooves. The column is attached with velcro dots, at top and bottom. 
Not permanently attaching anything the two houses can still be closed up into boxes.


http://oldnewgreenredoblog.blogspot.com

Now the extended floor forward allows for 2 beds, a 12"long bunk bed 
and a 12" double bunk bed placed over the elevator hole which is now covered. 
Plenty of room for 6 barbies now.

Now where to put clothes for Barbies, in the NEW walk-in closet.

http://oldnewgreenredoblog.blogspot.com

The old wall of the bathroom with the new floor is perfect for a walk-in closet.
Again the floor is slotted around the opened left wall of the house.
Some paint will be used in the future to unify this house with the Barbie Town House to the left.
The convenient walk-in closet is next to the bathroom. 


http://oldnewgreenredoblog.blogspot.com

I made tons of hangers from plastic coated wire, tutorial sometime in the future.

http://oldnewgreenredoblog.blogspot.com

I love the old vintage hangers but they are quite expensive and the new ones are very flimsy.
These are easy for 4 year old hands to work with and can be used for pants and skirts also.

http://oldnewgreenredoblog.blogspot.com

I had intended to build an entire wall closet, but found this OLD wood wardrobe very beat-up at Savers for $1.99, all it needed was a paint REDO--and it fit perfectly as the wall between the closet and the bedroom.
.
http://oldnewgreenredoblog.blogspot.com

Here it is placed perpendicular to the closet wall.

http://oldnewgreenredoblog.blogspot.com

Add some plastic drawers originally from the dollar store. And a walk-in dream closet.
Like most people, we have winter clothes and summer clothes, so I will have 
to switch out the coats and long sleeves for summer dresses.


http://oldnewgreenredoblog.blogspot.com

Here you see the new floor addition in the middle.
 It goes above the dining room, but really doesn't inhibit reaching into the rooms.

http://oldnewgreenredoblog.blogspot.com
Cost for the 600 square foot addition, $7.00 for floor, $3.87 for paint, dowel was scrap $.30 and velcro dots ($.75)

And the REDO bedroom complete with with Old, New, Green, Redo furnishings 
just waiting for another post.

Thanks always for visiting. 
I will try and respond to every comment and answer every question.

All the opinions and photographs in this blog are my own, I have not been paid or reimbursed in anyway for my opinions, posts or any products shown or anywhere I shop.
 Please do not use photos without linking back to this blog without my permission. 
Thank you for your cooperation, Sandi Magle

I will be sharing at these fine Parties!


Sandi


Monday, October 26, 2015

DIY Barbie Doll House: Week#3 Pt.2- Finally COLOR


AT Last
COLOR!

oldnewgreenredo

At last color----well, here's planning color first anyway.

Wanting to get away from Barbie magenta/pink and purple in all the furnishings and after consulting my daughter-in-law, we talked about a contemporary look with some fun things in a wider color family. Like a real house, and real people.

But, still using as many materials we already have. We both love green, and I had the green and white contact paper which is perfect for the kitchen. The gray tile which looks blue here, is really gray silver which is perfect as appliances and some furnishings will be stainless steel. The gray/silver tile will run through the living/dining room with white walls and the green and teal blue for furnishings and also on the third floor bedroom and bathroom.

The 'hardwood' flooring, brown bath tiles and beiges are on the bottom floor in Ken's man cave.

Barbie's bathroom/closet and bedroom on the third floor will be pink/white in the bathroom, with the pink tiling, and the other fabrics, purple, pink and stripes for the bedroom in the linens and furniture. With the silver gray floor that should work really well. And there will be green touches here also, there are two shades of green in the striped fabric.


oldnewgreenredo

So here is the tiling which is actually scrapbook paper mod-podged in satin directly onto the walls. I used two coats of modge-podge.  There are still a few bubbles here and there, but almost everything disappeared after drying. I used a foam brush and worked from the center out and then quit. Do NOT over work, the paper will not stand up to it. Actually wrapping paper works better, but finding tile prints is hard.

oldnewgreenredo

You can see the bubbles, but they really did shrink out when it dried.

 Here is the last of the pink tiling paper is laid out on the board with the pink paint.

oldnewgreenredo
Here is the bath/bedroom colors again. I mixed the pink on the upper right from old paints I had. Magenta....lol and white and it was almost close to perfect.
 

oldnewgreenredo

One of Ken's bathroom walls. More bubbles, but they do shrink out!


oldnewgreenredo

All three of his bathroom walls and look how the windows pop. We chose beige for the paint. (This is the trim paint in our family room.) So free. I did have to buy some white satin paint as we did the interior of the shed this Fall, by mixing all our light colored old paints together (GREEN) instead of sending them to landfills.


oldnewgreenredo

Here's that tile wall with all the bubbles, dried. It looks great with the hardwood tiled floor-6 tiles at 89 cents each with a rebate.


oldnewgreenredo

I couldn't resist showing the wall cabinets on top of the green and white contact paper. (I did have to use a spray adhesive as the contact paper I've had for years and wasn't very sticky). So it was pressed down twice. I trimmed with the metal square and a sharp exacto tool.

oldnewgreenredo

I think the colors will work well, the appliances will be stainless steel and all metals will be silver.


oldnewgreenredo


Add the white walls in the living room. I may do an accent wall on the stairway wall, 
to break up the white. 


oldnewgreenredo

Here are the walls with the windows, I need to do touch up but will do that after assembly. As there are many things to do yet, that could mess up the walls. I will use a sponge brrush and just dab paint on.

oldnewgreenredo

We couldn't resist holding up the walls to get the 'room' effect. Working on the pieces flat has saved so much frustration. You just have to measure carefully, but we are putting up baseboards and door trim,  and ceiling cove moldings (which will hide the electrical).

oldnewgreenredo

We laughed when we saw this at first,  on the east walls. Neopolitan icecream, lol.


oldnewgreenredo

Here are the white walls and the fabrics for the living room and dining room. I think the stripes may wander into the kitchen too.


oldnewgreenredo

Cutting the floor tiles was way easier than expected. I placed the complete tiles at the front of the edges and worked to the back. I marked with a waterbase marker, and cut with an exacto knife by scoring and bending then another cut. Using a metal straight edge is a must. A rubber mallet is a great tool, I also used a rolling pin to press down the tiles, as we won't be walking on them.


oldnewgreenredo

Really just a few simple tools. The white strip is the woodbase and a wall will go there 1/2" wide. Again these are leftover tiles...so basically free.

oldnewgreenredo

READY to MOVE IN...NOT YET
Next is Week#4
Moldings, Electrical and Wood Trim.
Just like a real house, but WHEN are we going to get to the FUN stuff...????
and then again, the workers aren't union. 
 Plumbing: the toilets are brand new---so there shouldn't be any major problems, but everything else is second-hand or vintage though, or hand made, so there will be lots of DIY posts!


All the opinions and photographs in this blog are my own, I have not been paid or reimbursed in anyway for my opinions, posts or products used. 
Please do not use my photos without linking back to this blog without my permission. 
Thank you for your cooperation, Sandi Magle


Thanks for stopping by and all questions or comments. 


Sandi


Friday, October 23, 2015

DIY Barbie Doll House: Week #3 Part-1 Windows!

I'm finally catching up on posting. This is actually week #3 for the Barbie House, so here we go with


Part 1-Windows.

I can't stress enough, making plans, be they to scale or just sketches with notes. We have chosen to work on this big project in sections-unassembled. By working on pieces you can move them in/out doors, work on the kitchen table, or hide when the granddaughter is around. But, you need something visual to keep track of what you are doing this way, ---so I refer to the plans all the time. Plans also helped in communicating with Hubby, we are from different planets afterall.


oldnewgreenredo

Here are the windows in the middle picture for the three floors of the west side piece. You can see the light sketching of the appliances in the kitchen, and the tub on the third floor with a window above it.

Since the holes have been cut in Part 1 and sanded/primed in Part 2--now it is time to frame them out. Hubby actually wanted to make sashes that went up and down---however that amount of detail for a three-year old isn't necessary. So we compromised and I agreed to make window frames, with mitered trims on the outside and inside.

We chose to make windows only on the left and right walls, as the back will face the bedroom walls anyway.


oldnewgreenredo
Here I am cutting the straight, inside frame pieces of 1/2" wide by 1/4" strips for the inside of the window. These pieces are the same thickness as the walls, but will help to square up the holes cut by the saber saw. One skinny window, I used balsa wood 1/16" thick. for the skinny sides.

I'm using a small hacksaw with a fine blade and a wonderful teeny miter box...which was awesome. Just a few strokes and I was cranking pieces out. After a few trials and failures, the measurements were pretty accurate. I measured each piece individually...like most houses our house wasn't  perfectly square and some of the window holes needed help. These pieces were lightly hotglued directly to the walls one piece at a time.

oldnewgreenredo
Hubby cut the first miters on the outside trim. We chose 1/4" x 5/8" wood for the trim. This would be very close to real in the 1"= 6" in Barbie world.

I hand-cut the other end of each piece for the window frames to make sure the measurements were accurate. Big power tools are hard to adjust for such small pieces of wood, not to mention chopping your fingers off.


Hardest part was keeping track of everything. I lined up the appropriate windows with the appropriate walls, we had 3 windows on one piece...so that was six trim frames for one side and 4 windows and 8 trim frames for the other. LOTS of pieces. I do not recommend cutting all the pieces at once...for confusion's sake.


oldnewgreenredo


 Stacked up like this, they almost look like real windows at the lumber yard. We chose not to use glass or plastic on the windows, but you could easily use plexi-glass by slotting the frame pieces.


oldnewgreenredo
Here were my main tools and a window frames lined up as they were completed. 
Measure, Measure, measure!

oldnewgreenredo

I hot glued the mitered corners with a dot of flexible hot glue. This allowed hubby to square them up to the windows as they were applied to the walls.

oldnewgreenredo
Hubby woodglued the frames for the outside windows.  He used a brad-gun to tack them in place. UPSIDE of using plywood, is you could hand nail each one. MDF is really a poor choice, everything has to be contact-cemented together, which is nasty stuff to use,  and you have major set-up times. Chipping is an issue and Weight is another factor; MDF is very heavy. Looking online at the dollhouses people made, you can tell the MDF ones, by the sagging floors. Just my opinion, I think plywood is the way to go, more expensive but worth it in the long run. Like many a investment, I will look at the total cost divided by the life of this dollhouse, say 10 years for a 3 year-old.


oldnewgreenredo
Here's a closeup of the Filigree window for the bedroom, from the outside. The plastic insert is actually from this Barbie Vending Machine I found at Goodwill for 1.99--still crammed with purses, boots, and new shoes. Apparently the mechanisms didn't work well...the reviews were hideous. The person that donated this, couldn't even get the shoes/purses out of the rack. I did once I removed the back. I didnt' know that; I just thought Wow---what a neat (REDO) closet, not to mention the six sets of purses/shoes that were still in the cabinet to fish out.

 The back was covered in two panels of white filigree plastic, I thought we could use for bath and bedroom windows.


oldnewgreenredo

***Upside of Mattel Barbie products*** Mattel uses flexible plastics and many of the pieces are easily dismantled: a few screws loosened, pry with a small flat screwdriver and the panels popped right out. Since I planned on using the cabinet in the bathroom and the back will be up against the wall.  MORE on this cabinet later.  I love the idea of a turning shoe display---too much fun. The filigree panels were cut apart on the miter saw with a fine blade. Easy---peassy!

OLD~~Remember When!
All this is a far cry from 1959 Barbies and our matchbox drawers, cerealbox cabinets and shoebox beds with pencils for posters and the cardboard lid for a canopy, but they were so much fun too. Nostalgia, anyone?


oldnewgreenredo

Assembly of the plastic panels into the frames, they were hot-glued directly in the holes of the plywood walls and then we trimmed around them using more hot glue to fill the gaps...this will all be painted... and hid.

Hubby applied even pressure to the frames, so they didn't slide around and the filigree window was secured.

oldnewgreenredo
Next, I used a small scrap of wood frame to fill in all the nail holes and corners. A metal scraper would have done more damage to the soft wood, this way I didn't make anymore dents in the wood. It looks really messy, but dries white and fast. LOVE this product for painted surfaces.

oldnewgreenredo


Here's the other plastic panel window filled. You can see the wonderful details on the plastic, with the distinctive Barbie heads and hearts showing. A light sanding with the fine side of a flexible sanding block and the windows were ready for paint.

oldnewgreenredo
 
I used one coat of spray Acrylic clear sealer, one coat of brushed on white craft paint, and then one spray of semi-gloss white paint---all non-toxic and kid friendly. The coats got into every edge, corner and crevice.  This gave the windows a nice finish. Don't you think?

oldnewgreenredo
The crazy window spacings will make more sense, after the furniture is placed. I did design house to go with the OLD, NEW and REDO pieces I have found.

oldnewgreenredo

I still have to tweezer off the hot glue, but this window is the best REDO of this post....I just love them, and I am sure Grandaughter, Barbie, and Ken will approve, too.

Total time on doing the windows minus painting about 3 hours for 7 windows, with two people on and off. Power tools involved, miter saw and compressor brad gun. Hand tools involved, hot glue gun, hack saw with fine blade, small miter box. Spray acrylic sealer, white craft paint and semi-gloss spray paint for finishing.

Did I mention sashed windows in 1:6 scale are over $30.00 a piece... 8 x $30==$240 dollars.

Next POST Week #3 Part 2___at last COLOR!


All the opinions and photographs in this blog are my own, I have not been paid or reimbursed in anyway for my opinions or posts. Please do not use my photos without linking back to this blog without my permission. 
Thank you for your cooperation, Sandi Magle


Thanks for stopping by, and I will be sharing at these parties:

Sandi