
Ad-Free Blog
Number 2 in a series of Mather Printmaking Kits for Illinois for Seniors.
 |
| oldnewgreenredo |
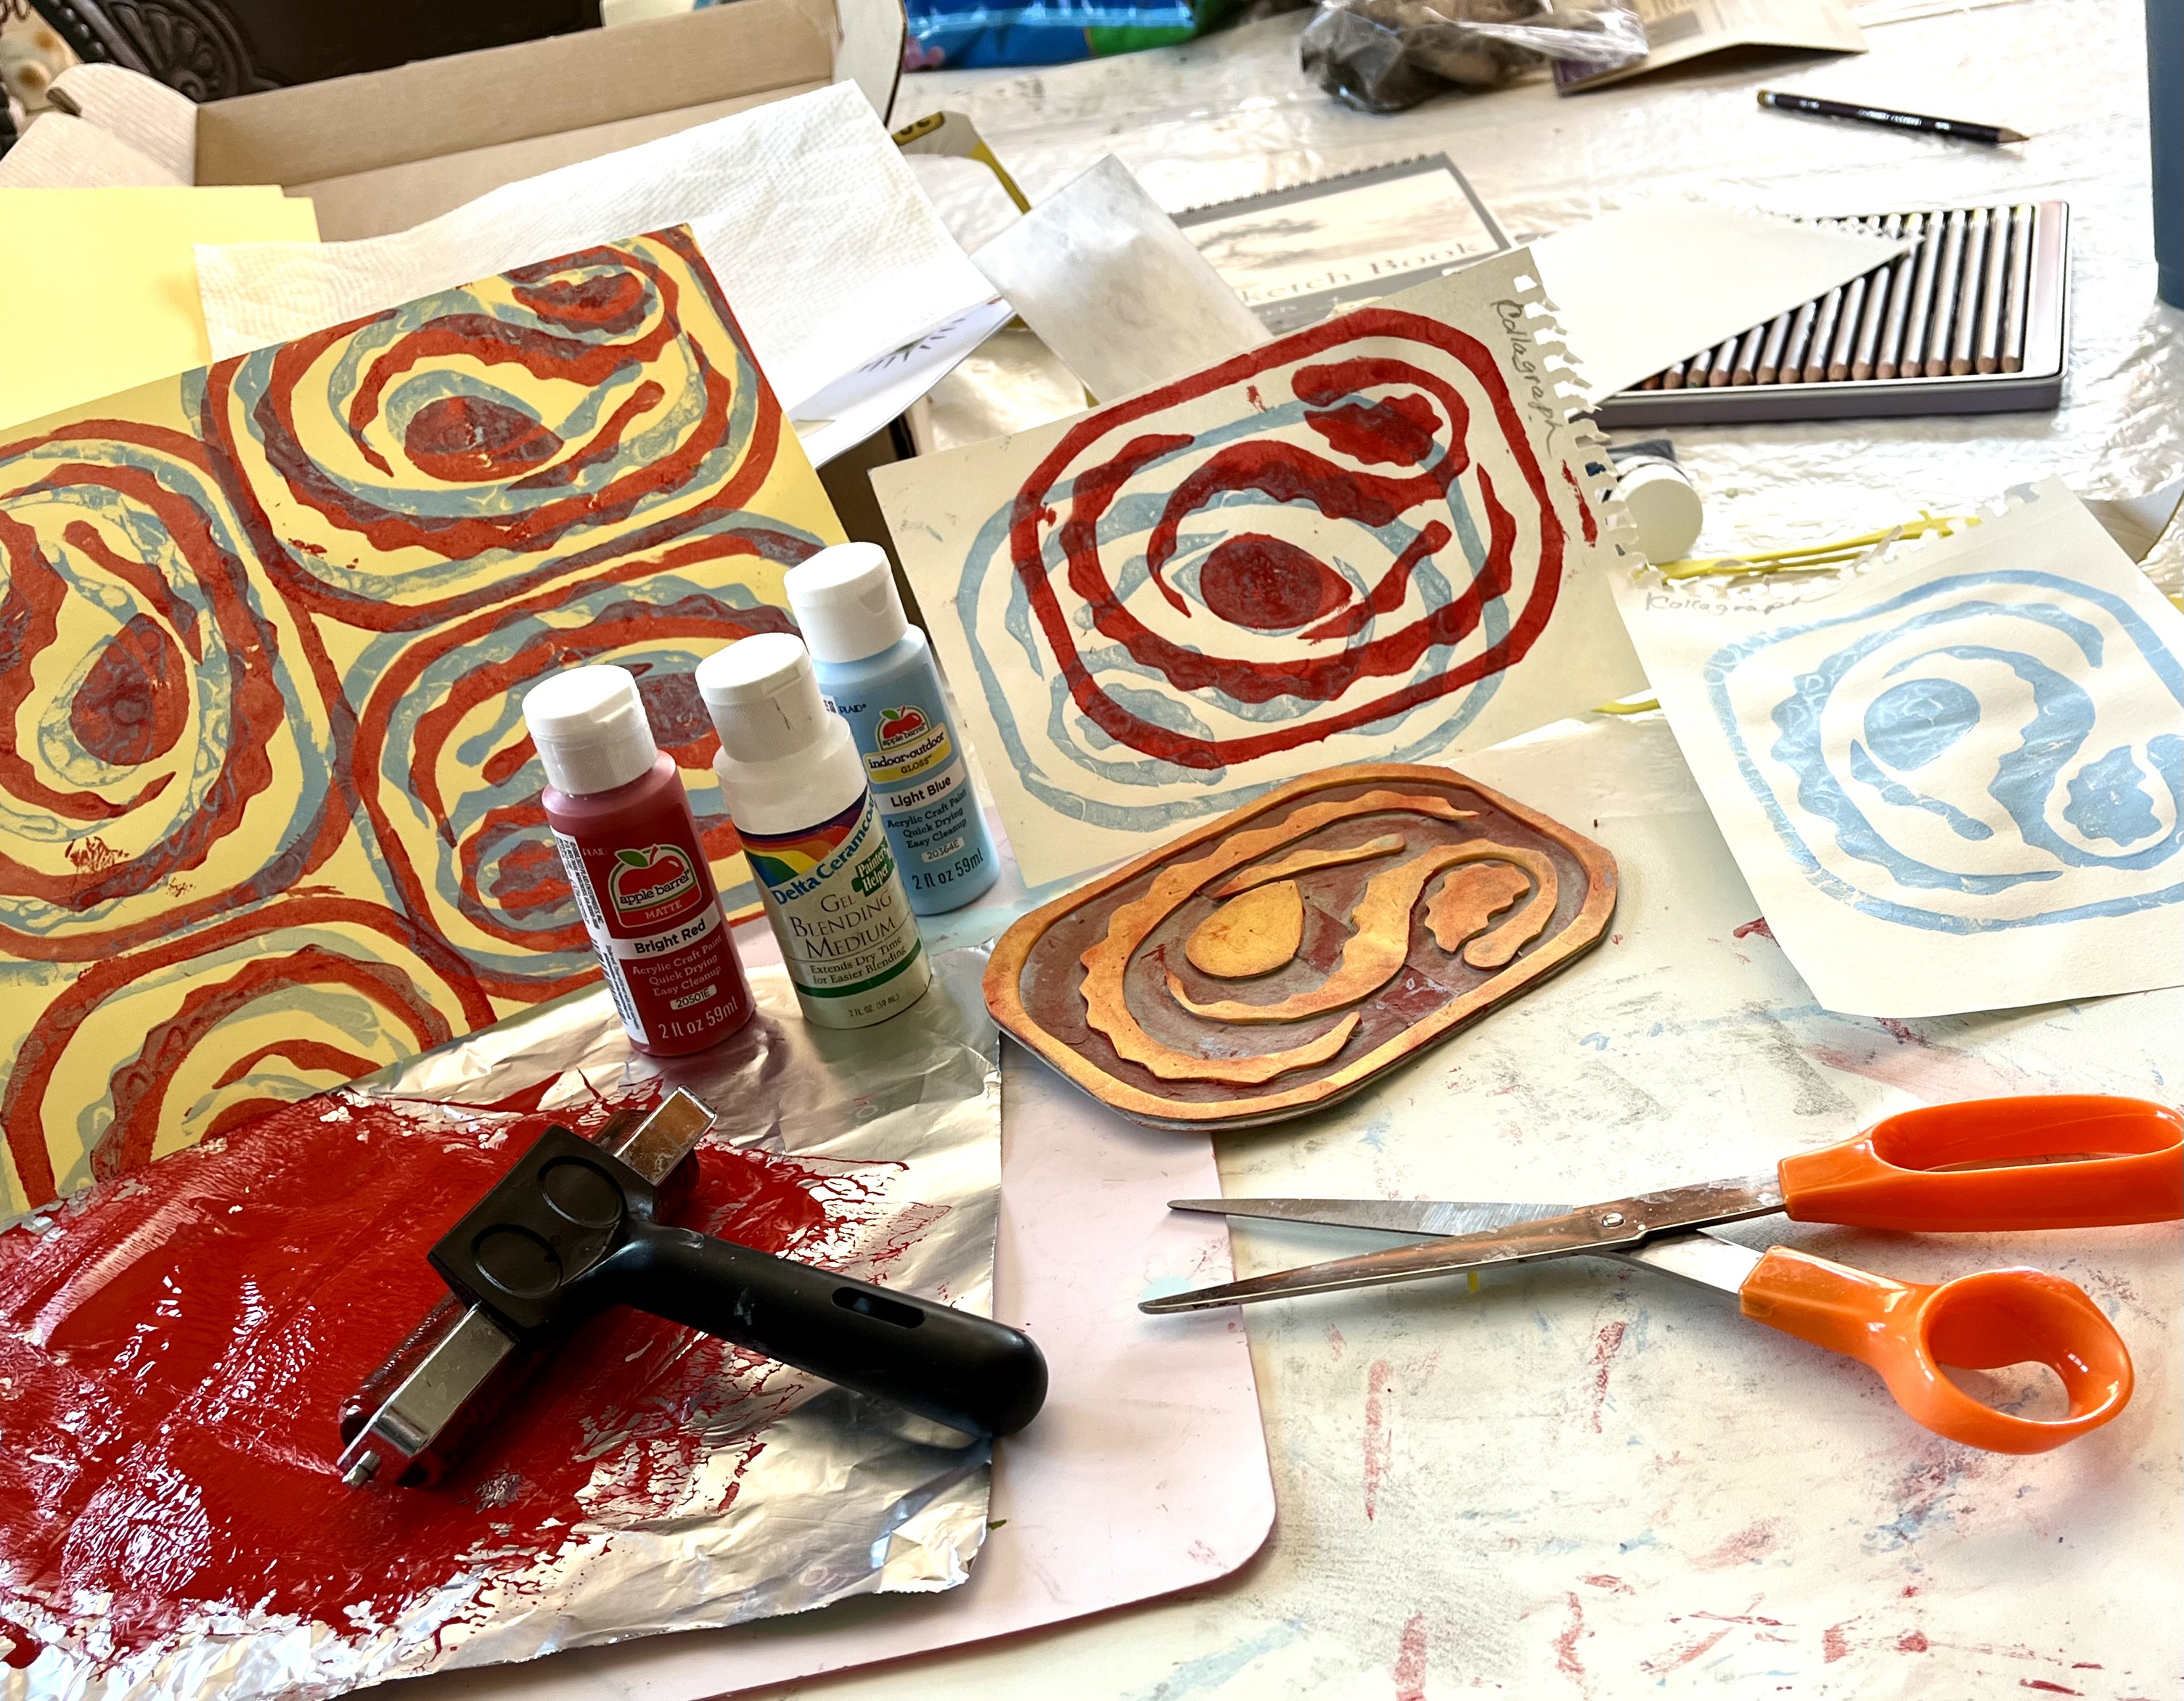
Collagraphs, this was pretty straight forward and simple. We were given a 4"x6" piece of sticky kids' craft foam. This technique is perfect for kids or short runs of prints. This is a learning project, not necessarily creating GREAT ART...LOL.
Materials:
Sketchbook paper
1 sticky foam sheet (adhesive on the back)
scissors
Marker or pencil to make your design on the back before cutting.
Acrylic paint
Tinfoil surface for paint
extender/blending medium
brayer (rolling surface to ink)
piece of cardboard or plastic to stick your foam design on
washable work surfaces
I was a bit late in getting organized and I skipped drawing the pattern on the backside of the sticky foam...and just began cutting. I had in my mind a sort of Paisley idea.
The idea was to make something fairly simple that you could print multiple images of, ie. for wallpaper or fabric, or just to make a larger print.
 |
| oldnewgreenredo |
And, I didn't take photos of my pieces gluing on the cardboard. Simply cutout your shapes and then protective layer strip off the back and glue the pieces on your cardboard or plastic surface to make your printing plate. This can be as simple or as complicated as you want. You can cut up your plate and make smaller independent images.
Many people did this to make flowers, hands, hearts, images for multiple colors.
 |
| oldnewgreenredo |
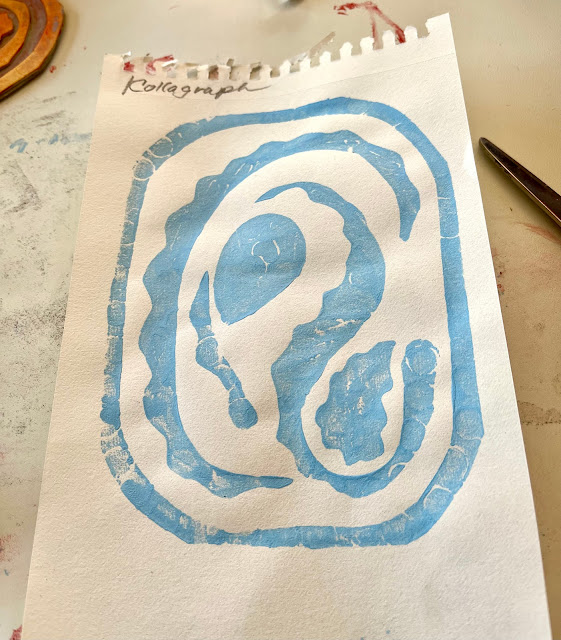
My first print was this blue on the small piece of sketchbook paper. Paper that is heavier with a smooth surface takes the acrylic paint prints well.
 |
| oldnewgreenredo |
Like last week the paint was quickly drying. I had tried to emboss textures on the surface of my foam...but it only showed up as a hint, and the crevices immediately filled with paint. No biggie.
Cleaning off the plate with wet paper towel, I printed another blue one.
 |
| oldnewgreenredo |
I then did 4 images on a yellow piece of yellow card stock sized 8 1/2" x 11". I did have trouble with the surface of the card stock getting stuck to the quick drying paint. Adding blending medium to my paint to slow the drying process helped and I had no more sticking. I think I will just automatically start adding gel to my inks and paints for better results.
 |
| oldnewgreenredo |
The red prints. My first red print I did was full strength red acrylic paint that was included with the kit. It was very dark and heavy looking on the white paper.
 |
| oldnewgreenredo |
Pure red paint on my second layer.
Knowing that the blending gel would make the red more transparent, I added almost a glob of maybe 30-40% as much gel as paint. Mixing well, I made four print new impressions off center of my blue images on the yellow card stock.
 |
| oldnewgreenredo |
I also reversed the up/down of each blue print to make it more interesting and then off set the red images a little to the left and down.
 |
| oldnewgreenredo |
I found my imagination really cranking.
 |
| oldnewgreenredo |
I could see alternating the vertical images with the horizontals images in long stripes on fabric. Maybe with different top colors...this could be fun!
 |
| oldnewgreenredo |
Here I have repeated my images...done on the computer...but you can see the possibilities for printing Fabrics or Paper items. These were just screenshot photos, but scanned images would be even better.
PRINTPRINTPRINTPRINTPRINT
The Collagraph Technique is simple and inexpensive...definitely something to try again.
 |
| oldnewgreenredo |
Mather has a facebook page where we get to share all our experiences, good and bad, but it is a great
Creative LEARNING EXPERIENCE!
oldnewgreenredo
 |
| oldnewgreenredo |
 |
| oldnewgreenredo |
Getting ready to press a print.
Short mini-video showing how a found objects-
pressing makes prints!
Hope you enjoyed this simple project...have fun...
AND CREATE!
If you enjoyed this post please follow this blog by blogger or
FOLLOW IT which you will find in the upper right hand corner of this page.
Thanks always for visiting.
I will try and respond to every comment and answer every question.
I will be sharing at these fine Parties!
The photos in this blog are my own or I have permission to using them from family. Any others will be attributed to the source if possible.
I have not been paid or reimbursed in anyway for my opinions, posts or any products shown.
Please do not use photos without linking back to this blog
without my permission.
Thank you for your cooperation,
Sandi
 |