Showing posts with label Redo. Show all posts

Friday, August 28, 2026

Our FALL, still is OLD, NEW, GREEN,REDO!

Ad-Free Blog

A little blast from the past post..., I still use the items today. These are some old photos, but I use these pieces periodically for Fall.

I've always tried to post with the name of this blog in mind, so things here are
Old, New, Green, Redo.
Why? Because I stick to this premise in my decorating and everyday living, and literally everything here is OLD, 
now LoL!
New means new here...and not necessarily 'NEW-new', if you know what I mean.


We have inherited some gorgeous OLD antique and vintage pieces and have vowed to share them with you...through this blog as well as use them periodically, instead of being hid away in boxes. 

We don't have a fireplace mantle, but in our living room, our built-in china cabinet is used for 
entertaining and display.


oldnewgreenredo

 I chose a balanced composition across the back of the buffet, with an OLD large silverplate tray (unpolished) as the anchor. I do polish my silver for Christmas and Spring use, but for Fall, the golden and aged tones of unpolished silver is lovely.

Here I used a vintage dark green lace runner sets a contrasting background for lighter items. I often switch out colors as the top of buffet is tiled.

The floral arrangement container was from Goodwill, its flowers were dismantled, freshened and added to from the stash of flowers from the post, 
Junkin-in-grannys-garage and a definite REDO.

The OLD porcelain berry bowl was from that stash also.
The OLD antique parrot vase is from Bornholm, Denmark, more on that later.


oldnewgreenredo

A NEW satin pumpkin from a craft show...(vintage REDO fabric) is on the right, next to a real pumpkin from our GREEN  grown garden. 
A small faux pumpkin on the left is my favorite, 
very real looking--already 10 years OLD. (now 21)

The candlesticks are vintage now--from Williamsburg, Virginia, glass makers. The two brass candlesnippers were my mom's antiques and very OLD.


oldnewgreenredo

Here is a soft closeup of the acorns and textures of the arrangement. 
I love the dusty grape leaves, how they look this time of the year in the garden.


oldnewgreenredo

 On the left, a NEW pumpkin platter was deep discountedat the end of the season last year, like 90% off. The dried gourds are natural GREEN elements.
The OLD lantern I have had forever and is considered vintage now,the brass candlesticks are very OLD, hallmarked and European from my family's stashes.

I have to do some research on these and a few others.
Leaves are tossed all about my house  and were from a bundle in a bag from 
a thrift store for fifty cents, a definite REDO.


oldnewgreenredo

The OLD parrot vase is from Bornholm, Denmark and by Ibsen Ceramics, circa 1920.
 Ibsen pottery is highly collectible...like super high $$$.
 These were given to my mother by my great-aunt and from her husband's family.


oldnewgreenredo

On the left side of the buffet are two more pieces of Ibsen's pottery and a  huge dried gourd (GREEN)
echoing the color of the matte glaze. The plate has richly carved grapes and leaves and lots of detail.
A candle from Sassy Primatives, my favorite local candlemaker, nestled in an Ibsen incised cherries on the rim of a bowl in the same orange glaze. 

Sassy's NEW potpourri and candles can't be beat. 
She is an OLD com-patriot from the art and craft show circuit from years ago, and continues to come up with new products and ideas every year


oldnewgreenredo

Details on the platter, the grapes are a rich black/purple with a matte glaze. The shading on this piece is amazing.

Ibsen Ceramic Works created art pottery from 1843-1955 by many generations of Ibsens and many well known Danish Designers and Artisans.


oldnewgreenredo

Here is the whole buffet with the china cabinet. 
When and if, I find my last tote of Fall and my oil-stained dried gourds, 
I will place them in the china cabinet to 'Fallify' the OLD Royal Copenhagen collection 
from my family. Some heirloom pieces date from the early 1800's. 
I know I need new candles...just haven't been able to find the tote with those in either.

oldnewgreenredo

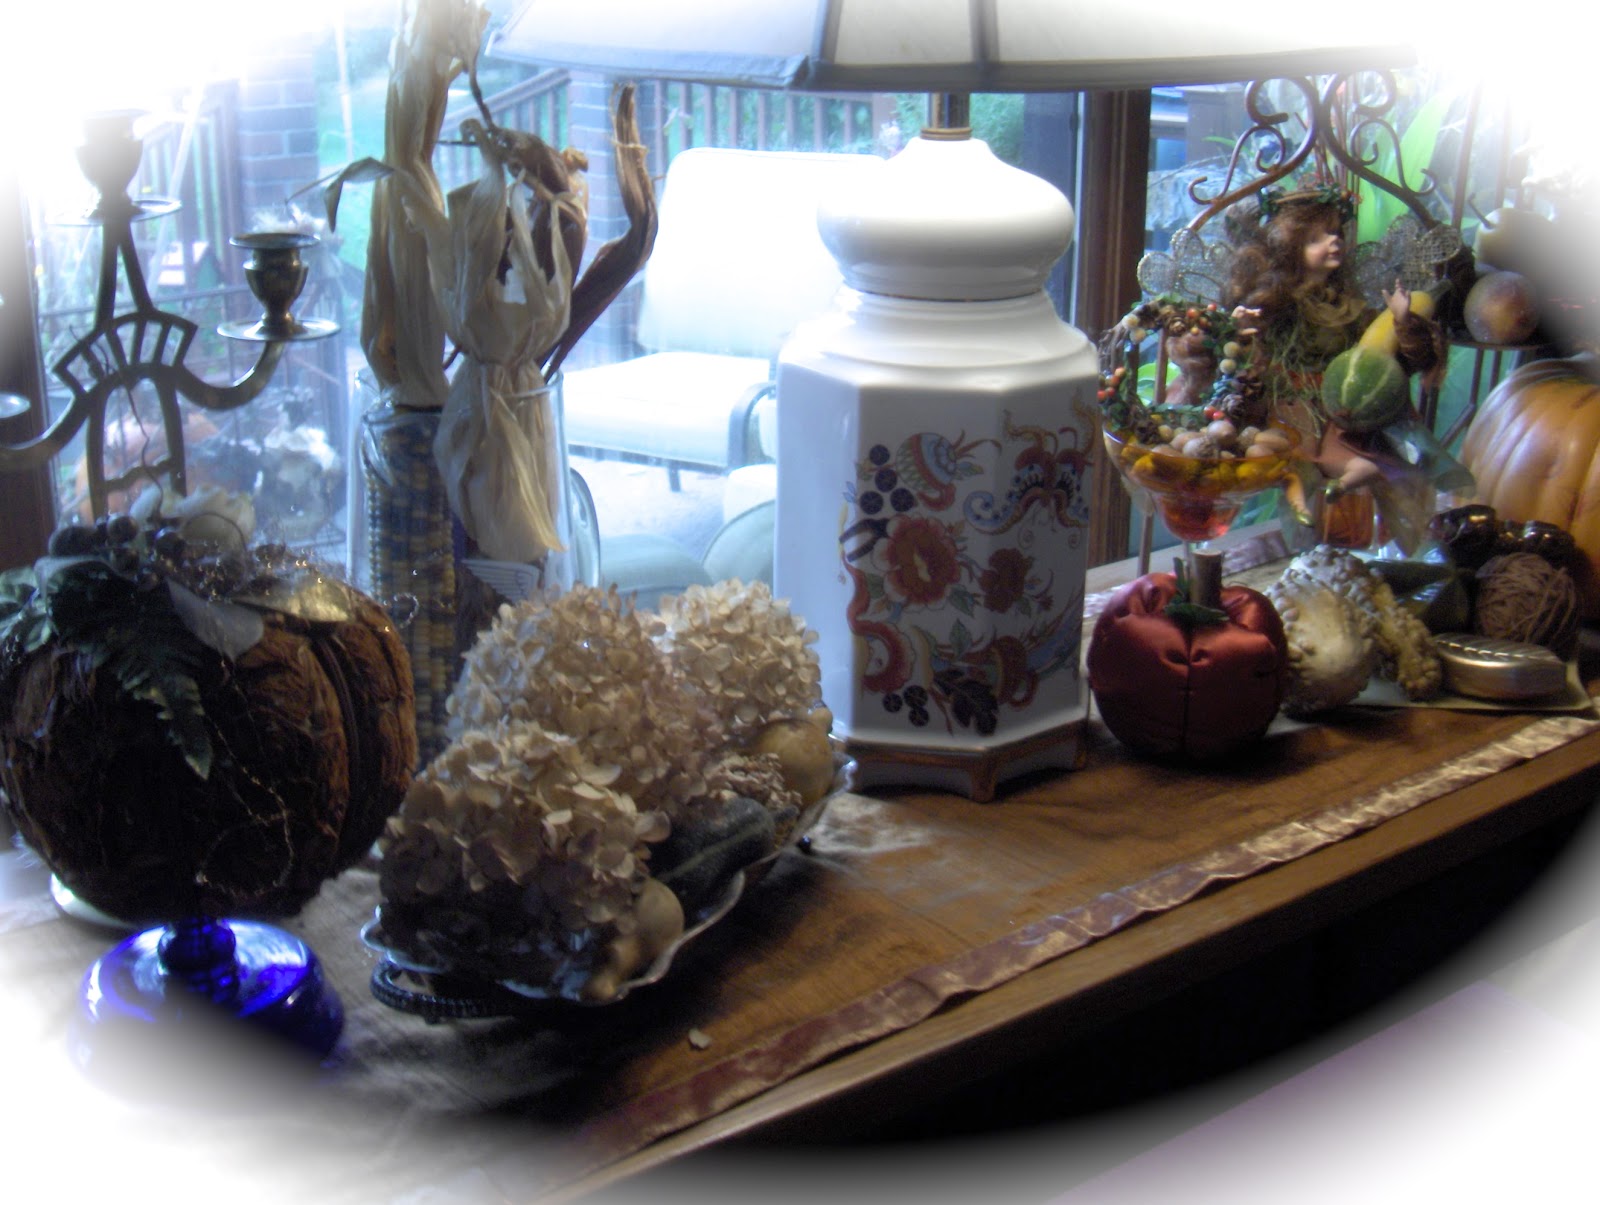
We always have a table or chest in the front window is also where we decorate for the seasons. 
This oak sofa table is perfect across the front of the room and the huge windows. 
 I used a mix of OLD antiques, NEW and vintage. 


oldnewgreenredo

GREEN Naturals: Indian corn in a vintage glass pitcher, gourds and dried hydrangeas in an OLD silver-plate handled tray, and a fiber pumpkin enhanced with some faux flowers and leaves, 
with a touch of angel hair for glitz on a cobalt blue glass compote finish the left side.


oldnewgreenredo


 I love the old glass with the corn, great textural differences here. The antique candlabra is one of an heirloom pair my mom and aunt split from my great grandparents, I think from the 1890's.


oldnewgreenredo

 A New Silk pumpkin and a gourds rest on an OLD bakelite butler's tray.
The large faux pumpkin will get a REDO this week, 
as it was 'decorated' last year by Grandbaby.
I'm sure she will enjoy painting it pumpkin colored.
Maybe a little copper, we will see.
The lamp I have had long enough to have been rewired once. 
When I like something it sticks around forever.

oldnewgreenredo
 
 A three-tiered metal pumpkin stand from a thrift store 
holds pumpkins, gourds and a vintage sweet Fall Fairy (thrift store). She just needed to reside here and work some FALL magic. I found her swinging in a chandelier...hiding at the thrft store. 
Acorns fill an OLD vintage orange margarita glass and along with her Fall wreath. 

oldnewgreenredo

My last Fall vignette to share is the top of the bookcase. 
The pine mirror my dad made for us when we moved into this house in 1984. The crock was his and I filled with dried (GREEN) Sedum 
and some NEW burlap sunflowers from the Dollar store. The statue was a gift from my husband, a flower embroidered mini-runner is perfect on the top of this bookshelf.
The English toffee OLD tin from a garage sale...I just loved the colors to finish off the small area. 
I lost the source of the NEW Fall printout on the mirror-please send it to me, so I can post for the 
creative blogger.

oldnewgreenredo
The tin echoes the colors in the OLD antique, teensy-weensy cross titches on linen runner from Denmark. I'm not sure which ancestor made this...but it is one of my favorites and came to me, via my grandmother.

I hope you enjoyed my Old, New, Green, Redo Fall decorating.

All the opinions and photographs in

 this blog are my own unless

 identified, I have not been paid or

 reimbursed in anyway for my

 opinions, posts or any products

 shown.  


Sunday, November 23, 2025

Apple Pies, Apple Sauce and Family Working Together.

Ad-Free Blog

After a long haul outside last Sunday dealing with leaves on our 1/3 of acre, the family day was a total work day. 

Then, we had community apples and made pies for the freezer. Hubby and I both come from families that did projects and cooking together. You are never too old or too young to help in the kitchen. 

                       Many Hands 
        make Small Work!

Our island is perfect for Family baking, cooking, or prepping!

oldnewgreenredo

The apple peeler got a work out and so did the Grand, now 13. She was a star at peeling on our OLD crank peeler.
(OUR peeler peels, cores and spiral slices the apples nice and thin.)

Don't tell our Grand I posted this. LOL!

oldnewgreenredo

Short on time, we cheated this year and used purchased pie crusts for nine inch pies and couple of deep dish, too.

oldnewgreenredo

Here the Grand pokes holes for her signature, double hearts, in the crust for air holes, 
We usually do a wheat pattern which was  
Grandma Fern's signature. 
 Each finished pie is sealed in a bag and quickly frozen. 

oldnewgreenredo

Here I am mixing Streusel for tops of a few pies. Hubby's and my favorite.

oldnewgreenredo

Top Crusts are great, but Streusel is a wonderful alternative. I use real Butter, Flour, Cinnamon, Sugar and Oatmeal in place of some of the flour. 

This makes a hearty Streusel, and it crisps up extra nice. 
Or, you can use nuts with the flour mixture for cakes, pumpkin pies, etc.

Frozen APPLE PIES

Recipe I've adapted  from an old Betty Crocker Pie and Pastry book 1970ish. 

9" Apple Pies.
Unbaked Pastry for top and bottom of pie, your choice.

5-6 cups of thinly sliced/peeled apples 
(we use Gala or McIntosh)
We cut these into  lemon water 1/3 cup to half large bowl of water, scoop the apples into drainer after a few minutes in the water.
 (this keeps the apples from discoloring)

Sift and mix: 
1/2 cup of sugar, 
1/4 cup of flour,
1/2 tsp nutmeg
1 TBSP of Cinnamon
and a Dash of salt. 

Toss the apples in the mixed flour mixture until they are totally coated. Any additional mixture/juice in the bowl pour over  top your apples when in the pie shell.
Heap the apples high in the center and off the edge so you can seal the top crust.
Dot the top of the pie with 3 pats or more of butter/margarine.

(This will melt and soak through the pie...and helps thicken the delicious juices).

 After applying crust pierce generously across the surface for steam to escape, do your own designs.

 Add your top crust or Streusel.

Quickly bag and Freeze. 


Streusel for 9" Pies,  coffee Cakes, or Muffins.

1/2 Cup of flour (I've use unbleached, whole wheat or oat flour)
1/2 cup of uncooked oats, like  for oatmeal
1/2-2/3 cup of Butter or Margarine
1/2 cup of packed Brown Sugar
2 tsp. cinnamon or  1tsp Ginger and 1 tsp Cinnamon
dash of Salt

Combine by cutting the mixture with a pastry blender until lumpy
I end up with fingers in there smooshing the ingredients together until it is a perfect crumble. Gently heap on the apples and press the streusel mixture in.

Good for one heaped 9"- 10" pie.

Baking Frozen Apple pies. 

Place frozen pies on a cookie sheet. 
Start in hot oven at 400 degrees for 30 min.
Turn down oven to 350 and bake until done at least an 1 hour-1 1/2 hours, check when juice begins to bubble from all parts of the pie, then it's done.
You can cover the edges of the crust with aluminum foil half way through to avoid over browning.

WE MADE 11 PIES! My son had to take most home for his freezer, ours is full.

NUMMY, we serve warm slices of Apple Pie with Ice cream or non-Dairy topping. 


oldnewgreenredo

We'll have fresh baked apple pies for Thanksgiving! 

PS- We also made 7 pint jars of Apple Sauce and 3 pints of Apple Juice canned from the waste of peelings and the  smaller apple cores. 

An OLD REDO
Another great way to save $$$  is
simply cook the apple peelings and cores in a large kettle with a bit of water to keep from burning--simmer until the apples begin breaking down. Stir often. When cool run the mush through an old crank juicer with fine mesh. I ran my apple mush through about 5 different times until the waste was quite dry.  All the seeds and core bits are pushed out for the compost pile. I strain the watery sauce to separate the excess juice and heat both the juice and sauce to a slow boil,
ladle into jars,  add the lemon juice, and also put those  jars in the canner to process.

Canning: add 2 tsp of lemon juice to each hot filled pint jar, add hot metal canning lids and process closed jars under boiling water for 20 minutes.  
You can use a canner or a large pot with a spacer/trivet inside the kettle, so the jars don't come in contact with the kettle on the bottom or sides.

Since I had 10 jars, I did use my big canning kettle.
Unsweetened Applesauce is healthy and a great use of waste, and the juice will be great to add to many things!
Don't forget to compost the rest for healthy soil.

Enjoy!


What sort of Family Cooking/Baking 
do you Do Together!?

Thank you for any and all comments. I will try and answer each and every one.


Join me at these fine blog parties:


Thanks so much for visiting,
OldNewGreenRedo  
which is an ad-free blog.  
I do not endorse or receive any $$ for any products I may use. I enjoy showing how I use products
but I do not receive any $$ from anywhere I shop.

The link to my BarberryLane Etsy shop is on the right hand side if you choose to visit for antiques, craft supplies, vintage, dolls, mini's, and more.


Monday, November 10, 2025

A Fun Kid's Craft for Thanksgiving!

                                                                   Ad-Free Blog

A Fun Kid's Craft for Thanksgiving!

Thanksgiving is a couple of weeks away...OH MY!
Our Grand was here one Sunday and we try to do a craft.


 I found a large bag of OLD Vintage plastic ball ornaments at a thrift store, 3 dozen or so for $4.00. Well, over half were lime green (for my D-in-law), with a few gold and 8 orange. 


Knowing I was never going to have an orange Christmas tree, I dug in my craft stashes, and decided to REDO them into Turkeys for the table with the Grandgirl.


oldnewgreenredo


I had everything on hand, I shop end of season sales 
(70-90% off) for kid's craft supplies, 
and keep a huge tub in the kitchen corner buffet. 
I had a bag of brown feathers, chenille stems, google eyes and lots of foam sheets, 
foam glue and brown paper drip coffee filters. Rather than throw them out when that coffee pot passed on---I saved them for crafts-a GREEN thing to do.


oldnewgreenredo


I precut the black, (I didn't have brown) foam sheets into proportional squash shaped heads. The Grand wasn't ready for scissors yet, she had just turned 4. 


Here are the supplies ready for crafting. I corral supplies into plastic tubs, to keep the table organized and easy to go fishing in. The Grand picked out the eyes, she made sure she matched them---sometimes eyes don't match though, which can be fun.

I cut each chenille stem in half with a wire cutter and twisted the two pieces
 together leaving the ends open and sticking out for turkey feet.


oldnewgreenredo


Here the Grand traces her hand on two-layers of foam sheet. 
You need two hand shapes for each turkey. 

oldnewgreenredo


She does a pretty good job, we used washable markers.


oldnewgreenredo

We use wax paper or parchment paper for work surfaces.
 Nothing sticks to it, and makes for easy clean-up.

While Gramma cut the hands out, Grampa and the Grand glued feathers on the opened coffee filters. 
This worked great, the foam glue is thick and tacky, and the feathers stuck super. 
We each did two or three. The Grand was very patient in placing her feathers without help.

oldnewgreenredo
oldnewgreenredo

They look very fluffy. The shape of the filter is perfect for a tail. We let these dry for over an hour.


oldnewgreenredo


I made one google-eyed turkey face with the precut beaks and wattles. The Grand knew the red thing was the wattle from story hour at the Library. 
She patiently did all the beaks, eyes, and Wattles...

"That's a funny word Gramma," she giggled.

I squeezed the glue, because it was thick and sticky. She doesn't like getting sticky, lol.


oldnewgreenredo


I love that they are all different, I didn't use patterns and we free handed the shapes

oldnewgreenredo

I tried to use the foam glue, but as a crafter I'M IMPATIENT, so I got out the hot glue gun. 
First I put the feather layer paper on, and then the two foam hands behind, thumbs pointing out.  The Grand helped by pushing on the pieces. She pushed on all the faces after okaying their placement.


Yes, those are cookies she is working on too, we multi-task around here. I always have a plan B when working with kids. You just never know when they will want to do something else.

Gramma hot-glued the turkey feet on by herself. 
I used an extra hot glue-stick as a finger to pushdown on the 'feet' and save my own fingers.
No burns that way.

0ldnewgreenredo

Results, some NEW roly-poly turkeys for the Dining Table or a Tree,  that can sit up straight on top of a REUSE canning jar rim. 
The foam glue will dry completely clear, eventually.  (my Impatience-again).
These in any scale would be great for a Fall tree.


A Happy Face and Gobble-Gobble Turkeys!


       oldnewgreenredo

Gobble-Gobble! Everyone have a Happy Thanksgiving!

Supplies for a Roly-Poly Turkey

Safe disposable surface for gluing, I used parchment paper or wax paper.

ball ornament(s)-orange, gold or brown would work, these were soft-ball size, but you could use any, you will just have to scale down the papers and foam pieces.

Yellow, green, orange, red was glitter and what I had, also  black/brown plastic foam sheets. Quantity depends on how many you are doing

Google eyes (I buy assorted packs on sale.)

Paper coffee filters from a drip coffee pot, or cut a fan circle shape from a paper bag in scale with your ball. You could also use Cardstock scrapbook paper-something with a little body to glue feathers on.

2 chenille stems for each turkey

Foam Glue

rubber bands to hold pieces in place if you use foam glue, or hot glue used by an adult.

Feathers, we used a bag of assorted brown feathers or leaves will work also.

Washable marker, 
scissors
canning jar lid ring for a base.

Tips: 
Have the small pieces cut out ahead of time. 
Make a sample to show what stages of a finished project might look like for kids to get excited.

Put leftover supplies in zip-plastic bags, for easy finding, in your craft tote.


Thanks always for visiting. 
I will try and respond to every comment and answer every question.

All the opinions and photographs in this blog are my own, I have not been paid or reimbursed in anyway for my opinions or posts. Please do not use photos without linking back to this blog without my permission. Thank you for your cooperation, Sandi Magle

I will be sharing at these fine Parties


Sandi