Thursday, November 3, 2022

Midwest Gardening: Back Yard Clean UP and Projects

AD-FREE BLOG

Late Fall projects and Backyard Cleanup!!!

oldnewgreenredo

This is our side stairway off the back kitchen door. It was one of the first things we did back in the 80's to improve the house. The original stairs were concrete underneath, crooked, and without railings...hardly to code. We covered it with wood, but it was poor quality and warped, split, and got ugly---the reason I never showed photos of it. 

Originally the stairs curved, but Hubby redid the bottom base in concrete and ripped out all the old wooden steps and replaced them with higher quality (safe for ground/water contact) wood now in a straight line.
 We also have had issues here with nesting animals and wasps...so lots of wood later, insulation, caulk and this is the result so far. 

The railings are still missing, but the wood is sealed and tight now. He is also going to remove the vent as we no longer have a dryer in the basement...again trying to critter proof.

oldnewgreenredo

Before: The adjoining flower bed was shortened to expand the stair base and straighten them and new boards added on the side. We switched out the dirt here, replanted the Iris, Sedum and small Del Oro Lilies. In Spring I will probably add a new vine to this bed. This area is on the East side and is very hot with blasting sun until 2pm each day.

oldnewgreenredo

AFTER: Just a little tweaking and some nice light on the space! I've always wanted to do something with the concrete? But, then flowers fill this area up anyway.

oldnewgreenredo

Onto more clean-up. Our lot is a bit over a quarter of an acre, and we use every inch of it. When you are both in the mid-70's---120 feet back and forth is a lot of work. THIS is my 'workhorse'. This is our second garden wagon---the other one disintegrated. Just a little yard cart that the sides come off of...nice tires and just the right length handle to pull.  I couldn't do all my pots/decor without it. Back and forth to the compost pile a million times during Spring and Fall. 

oldnewgreenredo

Before: The East side of the house was still a disaster...the beds to the right have been basically cleaned out. I pulled out the last of the old stump below the Dragonflies. We needed to add fresh dirt to there. I will plant some 'transplanted' Iris in that spot...should be pretty in Spring. 
oldnewgreenredo

AFTER: I did get all the leaves blown into the backyard late yesterday and Hubby cleaned up all the construction mess. This concrete is beginning to need a facelift---maybe next year!

oldnewgreenredo

Today I planted 5 Iris roots in new dirt. It will be odd not to have a pot or a chair for annuals here next year. I will plant some taller plants or a vine in back.

Crazy marigolds are still going strong---even after at least 3 frosts? 

oldnewgreenredo

Glaring sunshine, but our Fairy landed here along the fence. The bushes had swallowed her by the porch and she may need another more permanent home again. Perhaps in the front yard? The Zinnias here and there have escaped the frosts.

oldnewgreenredo

Four-feet from those Zinnias are the Giant Hosta and you can see the frost results. We will let the leaves stay until Spring---for the bees to have some protection.

There are so many trees surrounding our property and we have two large Silver Maples, which we had severely trimmed last Spring. So leaves should be about half of normal.

oldnewgreenredo

This is today, while yesterday we had chopped them all up with the lawn mower and then the lawn vacuum sucked them up and bagged them. Seven huge bags went into the compost pile, and this is just from the backyard. 

oldnewgreenredo

With all the garden waste the compost pile is already more than half-full. It was down to under a foot deep with soil this summer, we used so much for projects. I've already dumped 80% of our pots into here. It's work, but really 'free' soil and free fertilizer...one of the reasons all our pots produce such great flowers and veggies.
A totally GREEN thing to do. 

We never burn any yard waste.

These stairs were blown off twice yesterday...LOL.

oldnewgreenredo

I managed to get the garden almost totally stripped. I rolled up the fabric and collected the stakes for next year. Much of the ground up leaves from the yard end up in here, and then Hubby will till them in later this Fall. We have a forecast for good weather for at least another week or so.

oldnewgreenredo

Once Hubby is done with all his other projects, we need to tackle the inside of the Greenhouse, make it more critter proof and change to a thick foam insulation. Apparently regular fiberglass insulation is just a HOME for mice. 

oldnewgreenredo

Amazing, last of the Roses...9' in the air, and tufts of bedding oozing out of the birdhouse. We have a myriad of birdhouses everywhere on the property...I love all their chatter, and sparrows will land very close to us if we actually sit still. 

oldnewgreenredo

Meanwhile, this flamingo does look out of place amongst so many leaves from our trees.

oldnewgreenredo

This old bird bath was our first backyard purchase in 1984. The birds love it!

oldnewgreenredo

The last crops that are frost resistant, our two types of Swiss Chard and Broccoli.

oldnewgreenredo

Both these were stunted in the unrelenting heat this summer, but have gone nuts this Fall with growth and production. We will have at least one more fab pick of broccoli despite the bugs having their way with it. 

We organic garden---so the bugs just take their share.  I douse my produce in lightly salted water when cleaning and that makes sure we aren't getting any extra protein.

oldnewgreenredo

Hiding along the fence are the tomato cages. Normally, I sort by color---LOL, this year I realized I hadn't---so we have a pastel photo-op for Fall.

oldnewgreenredo

I harvested many blossoms for seeds, but these I left for the birds. The Zinnias here are pretty much done.

oldnewgreenredo

Our giant Marigolds are still blooming strong and the bees were still busy!!! These were all planted from saved seeds.

oldnewgreenredo

We are getting there...how are you doing?

Happy Fall Clean UP You All-

And this is just the BACKYARD! 

IYou enjoyed this post please FOLLOW IT in the upper right hand corner, to get just one email of each AD-Free post.

I will post at the following Link Parties, I hope you visit them.


All the opinions and photographs in this blog are my own, unless otherwise designated. I have not been paid or reimbursed in anyway for my opinions, posts or any products shown or anywhere I shop.


Thanks ALWAYS for visiting!

I will try and respond to every comment and answer every question.
Thank you for your cooperation,

 Sandi Magle

OldNewGreenRedo


Wednesday, November 2, 2022

Midwest Gardening: Drying Herbs---Sage Smells so Good!

Ad-Free Blog

Part of Gardening of course is eating all the wonderful fresh vegetables and fruits you can produce in your garden or pots. Then there are the herbs which make everything taste better!

Two years ago, our over 10 year-old Sage plant croaked. It was huge one year and then dead the next, probably from our Midwest freeze/thaw cycles. So, I planted a new one---last year, and I had enough sage to do Thanksgiving and that was about it. 


oldnewgreenredo
Here is the second year plant (center) in Spring of this year, and another variegated sage that I planted this year. The plant to the lower right is Marjoram which is still growing and is also hardy here in NE Illinois.
oldnewgreenredo

Well this year---the Sage was huge and luscious with tons of leaves and tall hardy stems. I cut it all before our first frost and hung generous bunches up where the air circulation is good in our house: *the stairway to the basement---we run a fan down there all the time, and the dining center in the kitchen---the overhead fan is always on low.* It took three weeks for the sage to be totally dry. 

Here's a Fabulous Article by an expert on all the benefits of Sage---right HERE ! I just know I love using Sage in cooking, and who knew it was so good for you!


oldnewgreenredo

Drying herbs is so easy---and you can dry and harvest just about any herb like this! Simply wash and clean, tie up in loose bunches (I reuse rubber bands from vegetable purchases) and hang them up.
This is the sage after drying for almost three weeks. Definitely dry enough to harvest.

oldnewgreenredo

First I undid the rubber bands holding the sage, and placed a bunch on a large piece of parchment paper. Any leaves that are browned I pick off and throw away.

oldnewgreenredo

It was easy to just roll up the paper on the diagonal and crunch all the leaves inside the paper---very little mess this way.

oldnewgreenredo

Of course not all the leaves crunched off. But they were 'cracked' and easy to scrape off with my fingers. I leave the bits clinging to the stems. 

oldnewgreenredo

Again, the generous size of the paper controls the mess. Fold the paper and just pour all that luscious goodness into an air-proof container. Today I used a freezer bag.

oldnewgreenredo

Then, I took all the remaining stems and folded them ---into little clusters or sage rolls and tied these with cotton string. These will be for 'purifying' a room by burning, and I will send these sage rolls to a friend who enjoys this. I prefer roasting and cooking, I can easily throw a few leaves on a tray in the toaster for the scent.

oldnewgreenredo

It is a nice gift from the garden....and smells so good---the stems hold so much scent and oil.

oldnewgreenredo

This is what I got from one plant---that's a gallon bag, and six sage rolls. More than enough for a Year of Nummy goodness and health.

My kitchen smells so delicious now! I will transfer the dried Sage to a large gallon canning jar as soon as it come out of the dishwasher and is totally dry. 
Sage will keep in an airtight jar for well over a year...and is just as flavorful as the day you dried it! 

WHAT HAVE HERBS HAVE YOU PRESERVED THIS YEAR? 


IYou enjoyed this post please FOLLOW IT in the upper right hand corner, to get just one email of each AD-Free post.

All the opinions and photographs in this blog are my own, unless otherwise designated. I have not been paid or reimbursed in anyway for my opinions, posts or any products shown or anywhere I shop.


Thanks ALWAYS for visiting!

I will try and respond to every comment and answer every question.
Thank you for your cooperation,

 Sandi Magle

OldNewGreenRedo


Tuesday, November 1, 2022

Old Fashioned Favorite- Pumpkin Spice Bread from Scratch

Ad-FRee Blog 

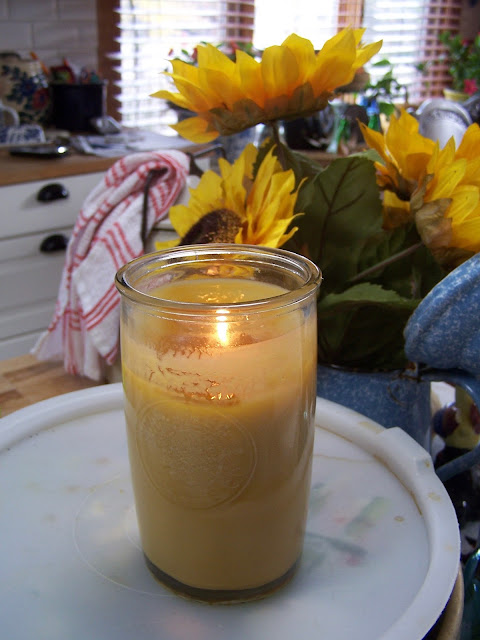
It's Sunday, and the kitchen ceiling fan sends the scent from the Pumpkin Candle in the kitchen to the living room...and literally making us hungry. 

oldnewgreenredo

Just when everyone is sick of pumpkin-spice and even the color, orange, I decided to make my Pumpkin Bread kicking up the spice and flavor. 

I don't even know where the original source came from and I've been fooling with this recipe for over 50 years. This was one of the things we made to give as gifts when we were first married and in college.  

oldnewgreenredo

Baking or making was what we had to do for for the holidays. Hubby made Birch Christmas Log candle holders for everyone and we baked pound cakes, pumpkin bread, and some favorite cookies as gifts for all our family and friends. 

oldnewgreenredo

Since then we garden, and I grow fresh pumpkin/squash and roast/puree the delicious inexpensive Pumpkin for baking, pancakes, Muffins and this year's Fritters.! 

oldnewgreenredo

Honestly, I like adding the molasses instead of the artificially (browned sugar) or use Turbinado sugar, which is naturally brown.


oldnewgreenredo

PUMPKIN SPICE BREAD.  makes 2 loaves 

Bake at 350 degrees for 1 to 1hr15min.

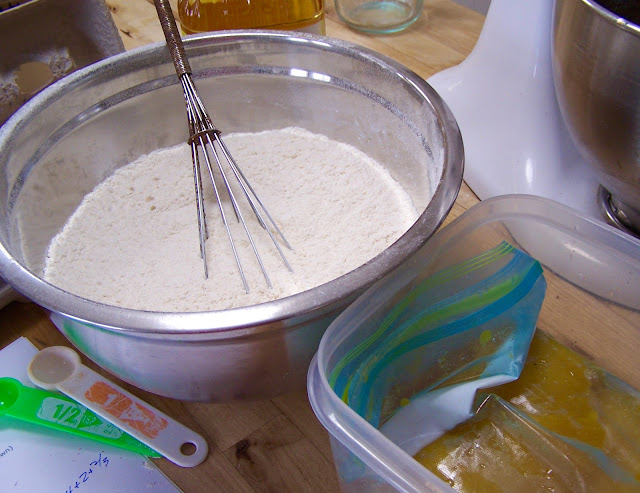
Mix Dry ingredients in large bowl

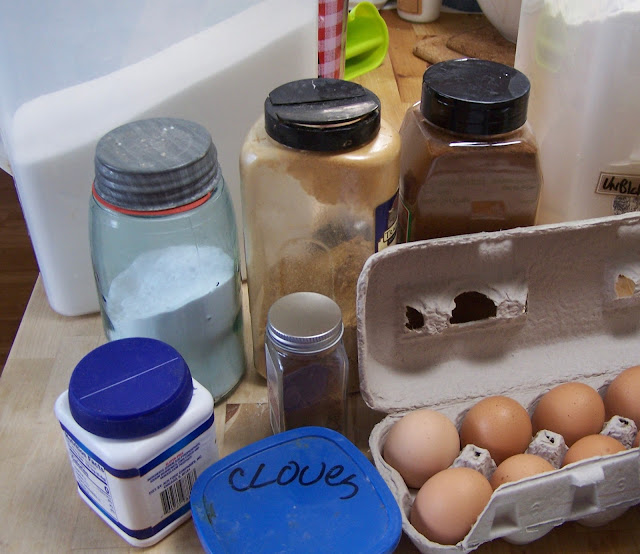
Sift 3 1/3 cups of whole wheat/ or unbleached flour, (oat flour can be subst) with the following:

1/2 tsp of baking powder

2 tsp baking soda

1 tsp each of ginger, nutmeg and cloves (I kick this up to 1 1/2tsp of each)

4 tsp. of cinnamon or more if you are brave!

In mixer mix ingredients with

1 1/2 to 2 1/2 cups of sugar or brown sugar. (taste your pumpkin, if it is sweet use the lesser amount)

1 heaping TBSP real Molasses (if using white sugar)

2 cups or 16oz. of fresh pumpkin (or canned)

1 cup of oil, (I've used canola, corn, vegetable, sunflower or combos and all work)

1 cup of water

Blend: then add 4 eggs one at a time until well blended.

Slowly add dry ingredients...Do not beat, but mix until blended completely.

(Floured Nuts may be folded in at this time if you wish, or raisins, or both) 

Fill two greased and floured cake pans. (I doubled the recipe in photos)

oldnewgreenredo
I'm still getting used to my new ovens...there are two ovens. I used the conventional Bake oven part for the bread, as I'm still not use to the convection oven for baking.
Bake 350 degrees for 1 hour to an 1 1/4 hours or until a testing stick comes out clean remove and let rest....remove when cool enough to handle the pans. (I used both glass and dark pans and they all baked at the same rate. 1 hr 15 minutes.)

oldnewgreenredo


Keeps for at least a week in the fridge, and freezes very well.

Enjoy---and it's nice to have a gift for a friend or family member!


oldnewgreenredo

Totally Nummy, and make to your own taste. 

IYou enjoyed this post please FOLLOW IT in the upper right hand corner, to get just one email of each AD-Free post.

I will post at the following Link Parties, I hope you visit them.


All the opinions and photographs in this blog are my own, unless otherwise designated. I have not been paid or reimbursed in anyway for my opinions, posts or any products shown or anywhere I shop.


Thanks ALWAYS for visiting!

I will try and respond to every comment and answer every question.
Thank you for your cooperation,

 Sandi Magle

OldNewGreenRedo