Saturday, November 21, 2015

DIY Porch Cushions for the Holidays, UH OH!


So much for Fall and Thanksgiving, apparently---ALL YOU~~~
* Christmas* people have WON! *O* !

Last night, with the snowy forecast in the news, I began covering my porch furniture in all those vintage plaid table cloths I bought here. This is the first year we are leaving the furniture on the porch. So I purchased OLD acrylic plaid table cloths in various tartans to REDO the settee, two chairs and the swing to protect the cushions a bit from the elements.

I got the swing and settee done about 8:00 pm on Friday. I simply cut the cloths in half and utilized the finished edges. Then used huge pins to secure the fabric underneath. Matching the plaids was entertaining the first hour,  and for the 4 cushions on the settee and the double cushions on the swing, I used a package of 40. I will need to get the dogsled going tomorrow to get some more.

I came inside because I was cold after doing the swing cushions, they were larger than my available space in the livingroom. So no picture, and hour later we looked outside, 9pm CST. NEW fallen SNOW! I forgot to take a pic of the swing, because the snow was so gorgeous. We were like little kids running from window to window to look at the snow. Big, HUGE, fluffy flakes, just like on a Christmas card.


Nothing sets off snow like orange lights, snort.


So here is the swing, all covered in the OLD tartan, LOL. See it's there...just under the sliding 6" we had at 8am. So we bundled up and shoveled, correction pushed the snow---too wet to snowblow or lift, for old people.


Thanksgiving decorations...Pfffft. Here is our blow-up turkey...he's still blown up just buried and bent over.


And our pretty maple tree...and our orange lights, nothing looks wierder than candycorn lights on snow.


I filled the birdfeeders during the storm lull ---at 10am. We haven't fed them since mid-summer because of all the available natural feed, I'm sure they will be pigging out today!


My pond kids...Ice fishing apparently in the frozen pond. That's a GREEN blooming Hibiscus plant and a blooming royal blue Iris you can barely see behind. WIERD YEAR!  5pm update they are totally buried now. nothing sticking out but the poles.


This is 1:00 pm and the storm is still going strong.... and in the background...

Those are CHRISTMAS TREES for sure, now to go dig out the pumpkin lights along the walk...Happy Thanksgiving!

5 pm Saturday update....16" and counting. Hopefully it will stop soon. We are in the NW suburbs of Chicagoland.


 Thanks always for stopping by,  I'll be happy to answer any questions or comments.

I'll be linking with these great parties:


All the opinions and photographs in this blog are my own or I am in possesion of the originals, 
I have not been paid or reimbursed in anyway for my opinions, posts or products used. 
Please do not use my photos without linking back to this blog without my permission. 
Thank you for your cooperation, Sandi Magle


Sandi


Thursday, November 19, 2015

Happy? Thanksgiving Preparations?

IN ALL HONESTY, I feel the need to record this....I may or may not have a follow up post (chewing fingernails here).

Thanksgiving is a week away and the house is a disaster, all the Fall decor (pumpkins) outside had to be brought in last night because of various stages of deterioration and horrid weather on the way to Chicagoland. Temperatures have plummeted and snow is on the way for Saturday.

oldnewgreenredo

I plotched the huge ones here and there and there and there. Not only did the pumpkins come in, but the parsley, gourds, squash and other herbs. My Geraniums are in the kitchen sink for now...until I can find someplace to put them.


oldnewgreenredo
 Here's a cast of miscellaneous pumpkins squash from our garden, I dropped on the IKEA bookcase. The orange pot is my Rosemary and it is huge.

oldnewgreenredo
The last thing I did last night was roast the BIG  pumpkin from the walkway planter...the GREEN brussel sprouts are the only stem that made it through the wierd summer we had this year...they will be a meal anyway.


oldnewgreenredo
As long as the oven was going forever---I toasted my sourdough and oatmeal sunflower nut bread for stuffing. I multi-task, hence the chaos in my kitchen all the time.

oldnewgreenredo
I also chopped the tops off the Dracena plants, I abhor killing anything GREEN. I will try and root them, but there just wasn't room anywhere in the house for another HUGE plant. They are enhanced with  More pumpkins squash, etc.
oldnewgreenredo
 Here's the great OLD cookie jar I snagged at Goodwill for $4.00. I have no idea what it is, (unmarked but Ohio Valley clay) but I have been searching for something to use for a cookie jar for the Grand. Notice the clever use of wood putty for a pedestal REDO-lol, under another squash, and the large green pumpkin. Another clever enhancement is the wood plane--(from NEW DIY barbie house?) tool, lurking there.


oldnewgreenredo

Fall Tablescape #3...Can you believe this...more gourds squash...offset by power tools, glue and paint.
Such creativity...LOL--Hubby is almost done with his mess on the Barbie House...just 3 feet off camera in my kitchen!
oldnewgreenredo

Left over Halloween pumpkin from Grandbaby---she did great on the face---she's only three. Empty calendar underneath, because I never write anything down in my organized life, snort.


oldnewgreenredo

Here's the Parsley, lurking under the front window in the living room, an attractive wad of paper  towel catching the overflow from the rainsoaked planter.

oldnewgreenredo
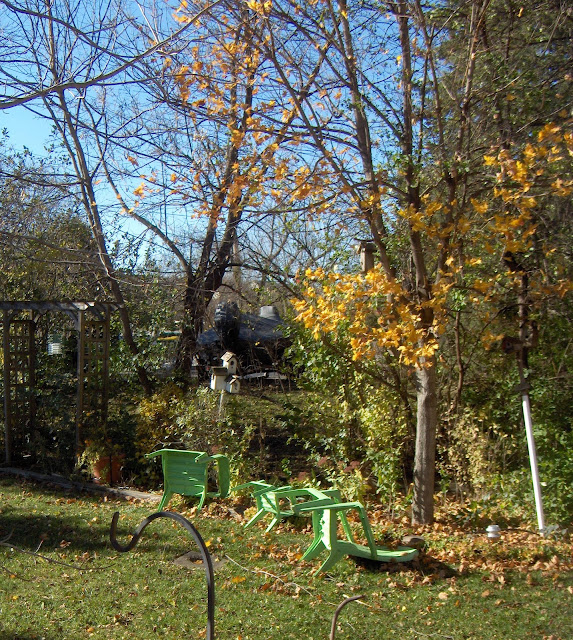
So many people commented on my post of our gorgeous color last week. WELL, I took those pictures because we were forecasted 4 days of wind/rain which turned out to be 7 days of wind and lots of rain. It's still blowing out there...I gave up uprighting the chairs three days ago. Trees are empty and that gorgeous Maple lasted all of two days.

oldnewgreenredo
Marigolds are finally decimated. I will leave the flowers for the birds to chew on over the winter. If marigold seeds are good for Purdue chickens, they will feed our feathered friends. Totally a GREEN thing to do.

oldnewgreenredo

The porch vignette is now devoid of color and dreary---I will have to perk it up, somehow.

oldnewgreenredo
The artificial arrangement still looks great by the door, but even weighted down,  it has blown over at least twice a day.  (Note to self, to use bricks next time in the bottom, instead of rocks.) In front with the leaves is another OLD lantern that has a REDO flame in it.

oldnewgreenredo
This little corner I had freshened up last week,  the OLD lanterns have flicker lights in them and I redid the chalkboard after Halloween.

oldnewgreenredo

Inside, here is one corner of the living room that looks finished, gorgeous dried oak leaves in an OLD vintage Royal Copenhagen Vase with a nymph on it. Small collection of porcelain animals reminiscent of pets long gone, all very OLD.


oldnewgreenredo
The chalkboard says it best, "Gather Family Friends and Give Thanks." It doesn't say anything about polished silver, tablescapes, and neat houses. I still have a week?


Happy Thanksgiving Preparations readers, how ready are you?

Thanks as always for stopping by, I'm loving your comments, questions, and suggestions.

All the opinions and photographs in this blog are my own or I am in possesion of the originals, 
I have not been paid or reimbursed in anyway for my opinions, posts or products used. 
Please do not use my photos without linking back to this blog without my permission. 
Thank you for your cooperation, Sandi Magle

Sandi

Tuesday, November 17, 2015

Vintage and Holiday Finds


Quick post here. Just because I'm not doing Christmas yet, doesn't mean I'm not thinking of it. Last week, I did some sleuthing in a few shops and at Goodwill. Now, I am a Goodwill addict and have upped my visits to twice a week at least.

oldnewgreenredo

I found these OLD two goodies.

Does anyone rember Jeanette MacDonald--she was the singing diva from the 1920's-1940's. I swear this image is of her on the towel rack, or it could be Marion Davies--the famous actress/paramour of William Randolph Hearst-Pic of Miss Davies.

The towel rack  looks handmade, but has some pretty snazzy hooks on the back. Anyway it is charming and I will either give as gift or sell. The silver tray is a nice size and weight and I will use for a candle tray, or holiday display.

oldnewgreenredo

These are my NEW Fall 70% off finds from JoAnn's a week or so ago. I love the corn and sunflowersb on the papergoods but, we have snow forecasted for the weekend so I dont' know if I will use them this year or not, might be using pumpkins and pinecones, if they don't freeze outside.

oldnewgreenredo

Yes, Christmas, I know I said I wouldn't post any Christmas, but....

The NEW candles are the timer ones..that come on every night at the same time and then turn off, they are battery operated and safe...I love them. I know mine are buried in my Christmas totes, and I want some on now.

The acrylic tablecloths were bought for their material and fade-resistance and will be a REDO for a big project. Three tablecloths (huge ones) for total of $9.98 at two different thrift stores. The triple-weave napkins were a vintage shop find...all cotton and never been used, 4/$6.00, perfect for the kitchen for the holidays.

Something else NEW were three ornaments from Walmart, 2 foxes and a squirrel, probably be used for packages or displays.

oldnewgreenredo

This handsome OLD (1980-90s) handmade wood truck's maker name, I actually recognized burned in the bottom. They were some fine toymakers and made doll furniture for 18"dolls for years and showed on the art/craft fair circuit here in Chicagoland when I was doing shows with pottery. My father also made wooden toys, but my boy's trucks were passed on long ago, so now I have one again. Will REDO this for holiday displays.


oldnewgreenredo

New purchase...simple wonderful wood star @6" across...and an OLD silver bell, displayed on one of those vintage tablecloths.

See, I am thinking about Christmas ~~but, still have to worry about Thanksgiving first.

Thanks always for stopping and I will be happy to answer questions or comments.


ll the opinions and photographs in this blog are my own or I am in possesion of the originals, 
I have not been paid or reimbursed in anyway for my opinions, posts or products used. 
Please do not use my photos without linking back to this blog without my permission. 
Thank you for your cooperation, Sandi Magle 
Sharing at these fine parties this week,


Sandi


DIY BarbieDollhouse:Wk#5 Final Lighting

This is the second half of last week's post. Last week just got away from me. So....you will see some inconsistencies in continuity here.

Point is, this post is about lighting our NEW DIY Barbie dollhouse. After searching online, I saw Christmas lights dangling from inside cardboard houses (shudder)---battery candle lights dimly lighting cubbyholes of rooms, and rooms conventially lit with dollhouse lighting totally in the wrong scale of 1:12 instead of double that, or 1:6 for Barbie. What should we use?

Christmas lights and sockets, with little wires sticking out,  was out of the question for a three-year old.

Convential dollhouse lighting would run over $100.00 with this size dollhouse and would involve metallic tape, wall sockets, tiny wiring and still having to secure/hide it. Light fixtures were all over the place in price and would be scaled too small. So we started another search.

oldnewgreenredo

Looking online, I found rope lighting and LED under cabinet lighting. Our china cabinet lights (round) LED's would be too bright. They were designed to light up an entire cabinets. So I looked for something softer and scaled smaller.

IKEA had some LED strip lights (set 4) that could be hooked together or installed individually. They gave softer light then other things we saw. Price was good---19.99 for a set of 4--we bought two sets and used 6 light panels-one for each room, so actual cost was 29.99.

oldnewgreenredo

Hubby began by drilling holes in the back large enough to run the wires through. Because we wanted everything enclosed, we made plans to encase the wires in the 'magic' plastic molding and then cover with ceiling trim afterward. The LED's strips came with ample cord, more than enough cord for the 4'x4' size of this dollhouse.

From the back Hubby ran the cords along the divider walls, along the center beam, across the front to the fixture strips.

oldnewgreenredo

Here you can see the slack wires hanging in each room and the actual lights showing at the front of the rooms. By lighting from the front, the lights cast light all over the rooms. We planned on scalloped molding trim to cover the lights, making the light shine into the house.


oldnewgreenredo

On the upper right room, you can see the pieces of 'magic' plastic channel molding I used in the last post,  Wk#5 Landings and Stairs getting ready to secure the wires. Hubby glued the plastic channel directly to the walls and beam with Gorilla Super Gel Glue.
oldnewgreenredo
 Here is a fuzzy closeup of the plastic channel molding. Very inexpensive, cuts with an exacto knife or a scissors. Also flexible so easy to work with.

oldnewgreenredo

Here is a light strip attatched to the ceiling. These lights are attatched to screwed in clips. Nothing is exposed. and the channel covers the wires in the front and along the dividing room walls.


oldnewgreenredo

Sorry for the tilt--getting these pics was tricky. Here you can see the pink wall with the molding installed over the plastic channel all the way to the back.

oldnewgreenredo

In the back the light wires were pushed into these little junction boxes which will be covered by a fake box/chimney, which we will show when completed with the rest of the exterior completion.


 This picture is taken of the kitchen area with some furniture just set in place...that rug has to go. No flash, RL lights, so the light looks perfect. Kitchen plans are still not final, but the table will become a drop leaf---and painted either green or white? What do you think? The pink is going on the appliances, they will be white with stainless steel..look--and we have to build the stove and counters.

oldnewgreenredo
This room was also lit with only the dollhouse lights. The master bedroom furniture temporarily laid out so we can see what we need to do. All the ceiling moldings are installed and the lighting is complete. The matress is on the floor, bed still needs to be delivered, but of course Ken is napping, again!

oldnewgreenredo

The bathroom roughly laid out. One piece of floor molding still needed to be installed, but all the touch-up was done. The strips of white are more bits of trimmed plastic channel from the landings, simply glued on the walls. Looks like a tile edge.


oldnewgreenredo
Here's the garage area with its gray painted floor and the garbage can---which was a pencil container in school promo from Walmart, for 1.99...and the perfect size, lid opens and has little wheels, tooo adorable...and GREEN.

oldnewgreenredo

 Completed stairway from the man cave to the second floor.  Temporary furniture arrangement in the background.
oldnewgreenredo

Close up of the moldings/trim all painted and Ken's closet/cabinet installed under the wierd windows. My daughter-in-law commented it was a custom fit, lol. The shower on the back left still needs to be painted and installed...you always have to wait for plumbers!

oldnewgreenredo
Hubby did take this picture with a flash...but you have seen how great the LED lights work. We have opted not to have any lit fixtures or lamps. There may be a couple of battery lights...but the rooms are nice and bright with the LED strips.  However, this post is not a recommendation of- or for- any products or use of products as safe for children. Please follow all manufacturer's suggestions and installation recommendations.

Now to get to working on all these furnishings--and make them not so retro, crazy colors. Everything begged, borrowed and thrifted needs to morph into some assemblence of a tastefully decorated home. More to follow on Barbie's thrifty and thrifted furnishings. I did buy the to toilets and Refrigerator new, and the green table and dining chairs. My daughter-in-law is constructing the hanging chandeliers and lamps...which will be for show and she will work on many of the miniature food, magazines, books, etc, things for th house.


Thanks for stopping by, and I will be happy to answer any questions or comments.


All the opinions and photographs in this blog are my own or I am in possesion of the originals, 
I have not been paid or reimbursed in anyway for my opinions, posts or products used. 
Please do not use my photos without linking back to this blog without my permission. 
Thank you for your cooperation, Sandi Magle 
Sharing at these fine parties this week, 
 Sandi