
Church Pew Redo
 |
| oldnewgreenredo |
Let's get started on the redo. DIY Ladies, this will be totally doable on your own, except for moving the pew, as oak anything weighs a ton.
The pew was sound, but I reinforced the legs by pre-drilling holes and inserting deck screws and wood glue from the inside out to keep the wood from splitting at the seams. I drilled a series of holes for drainage in the rear of the seat.
 |
| oldnewgreenredo |
It's wise to use a mask and gloves when working on old finishes, many before the seventies contained lead and other harmful substances. Chipping paint, while a romantic 'shabby chic'
look, is a true hazard to a curious toddler.
After a vigorous scrubbing with Murphy's wood soap and hot water, I scraped and then I orbital sanded with 60 grit to remove all the loose paint layers and even out the finish. The shop vac and a damp cloth removed all traces of dust and debris. The surface is finally ready. Tip: remember to wear a mask when emptying your vac and change the filter before using it again.
I applied two sparse coats of Minwax Helmsman Spar Urethane-clear semi-gloss (indoor/outdoor) varnish. We intend to use this on the back deck for extra seating--so much nicer than tripping over folding chair legs.
 |
| oldnewgreenredo |
Ready for sealing.
 |
| oldnewgreenredo |
The Helmsman varnish is very runny, and needs to applied quickly in thin coats. I used sponge brushes (not recommended on the label) to avoid carrying too much varnish on the tilted surfaces. Sponge brushes help to soak up excesses instead of pushing it around. I had no significant deterioration of the sponges, other than normal wear from an irregular surface. I used two sponge brushes for the two coats. They don't last long, but I save the handles to use as dowels for other projects.
Some drips occurred, but this can be brushed out in the next coat. I only waited two hours between coats, as it was a very warm and low humidity. After curing the two coats for a week, the finish is very tight and very shiny.
 |
| oldnewgreenredo |
Waterproofing the legs
Tip: Weather proof the legs by submerging the wood into large oil drain pans of Cabot's Wood Toned Deck and Siding Stain, 19200 Natural. This soaked in nicely and used almost a full quart of stain/sealer. This project will be on a raised deck, but this step is absolutely necessary for furniture in contact with dirt or grass.
This is just one of a history of marriage challenges between a pocket-protector husband and an artist wife, LOL.
 |
| oldnewgreenredo |
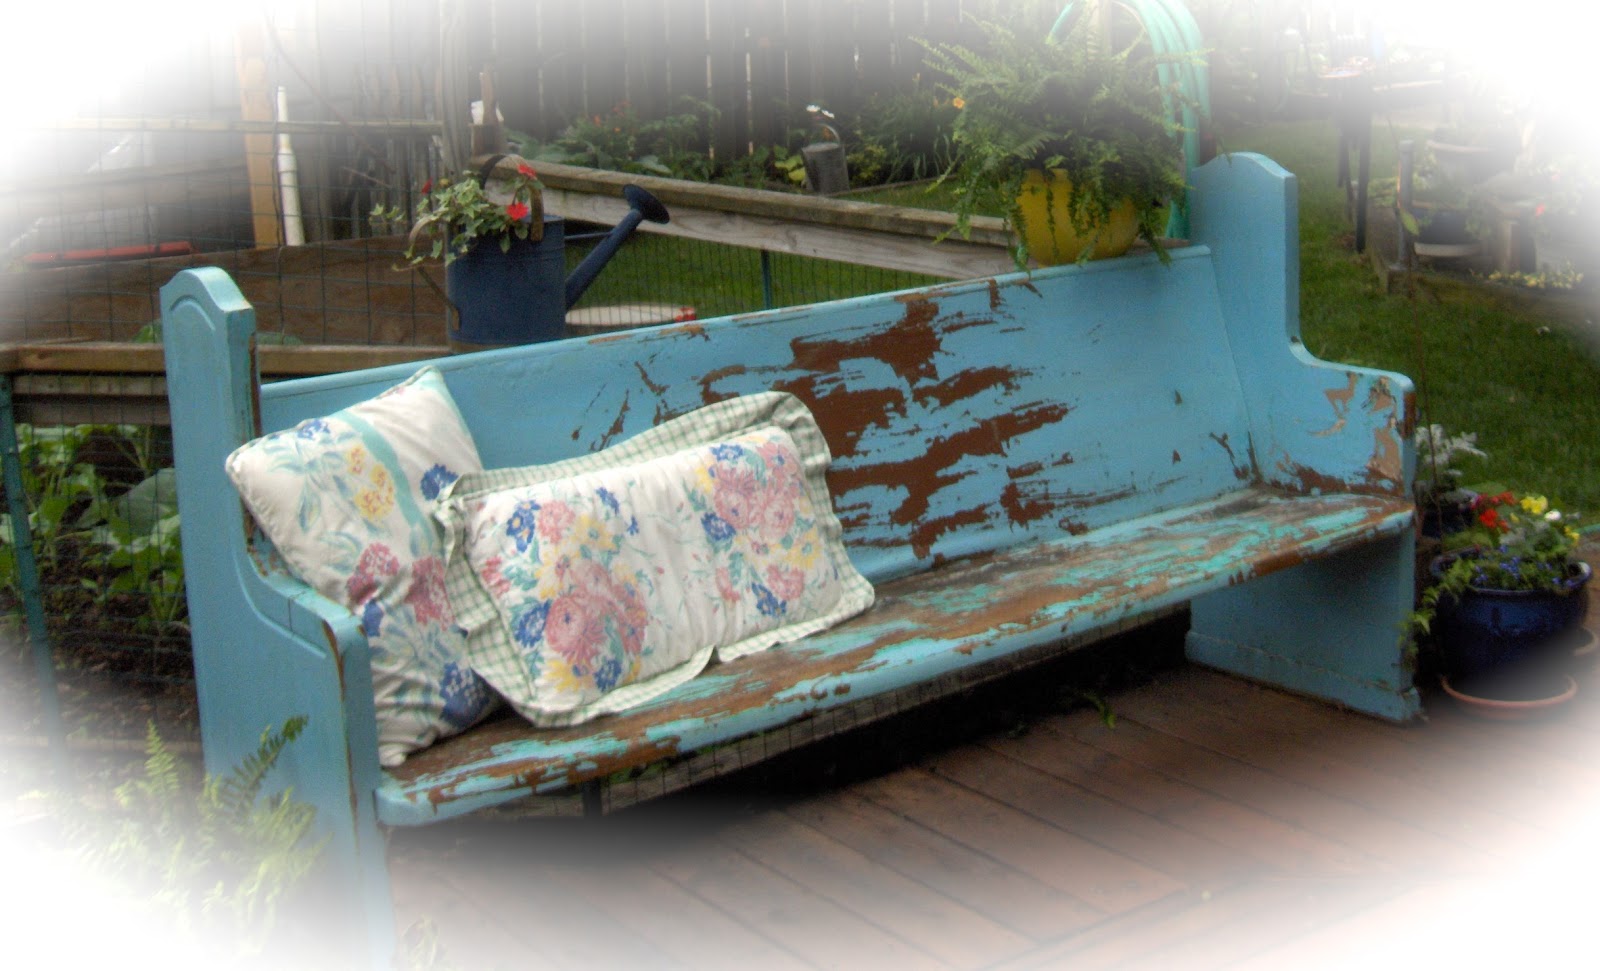
PS: After a month the finish has mellowed and the shine has gone way down.
I can't wait to use it every day, come join me for a cup of your favorite!
Thanks for stopping by!
Sandi
My shop is at https://www.etsy.com/shop/BarberryLane
Thanks for stopping by, I love all your comments and questions and will try and answer them all.
All the opinions and photographs in this blog are my own, I have not
been paid or reimbursed in anyway for my opinions or posts. Please do not
use photos without linking back to this blog without my permission.
Thank you for your cooperation, Sandi Magle
I'll be sharing at these fine blog parties:
Sandi


