
AD0-FREE BLOG
This watercolor basics class seems to be flying by. Mondays come so quickly---last week I didn't get to work on anything, so I forced myself to play after class yesterday.
 |
| oldnewgreenredo |
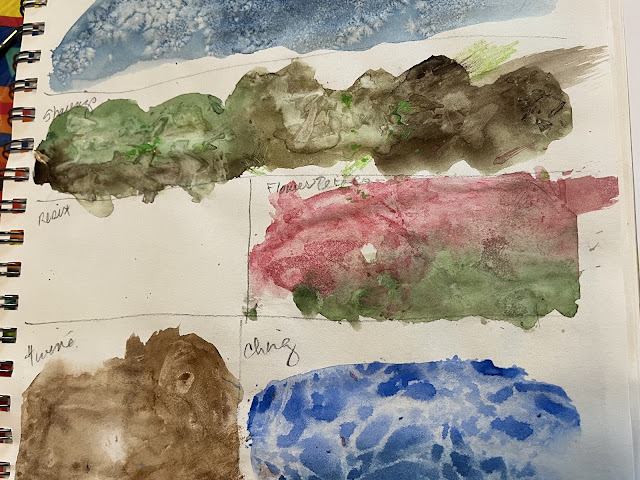
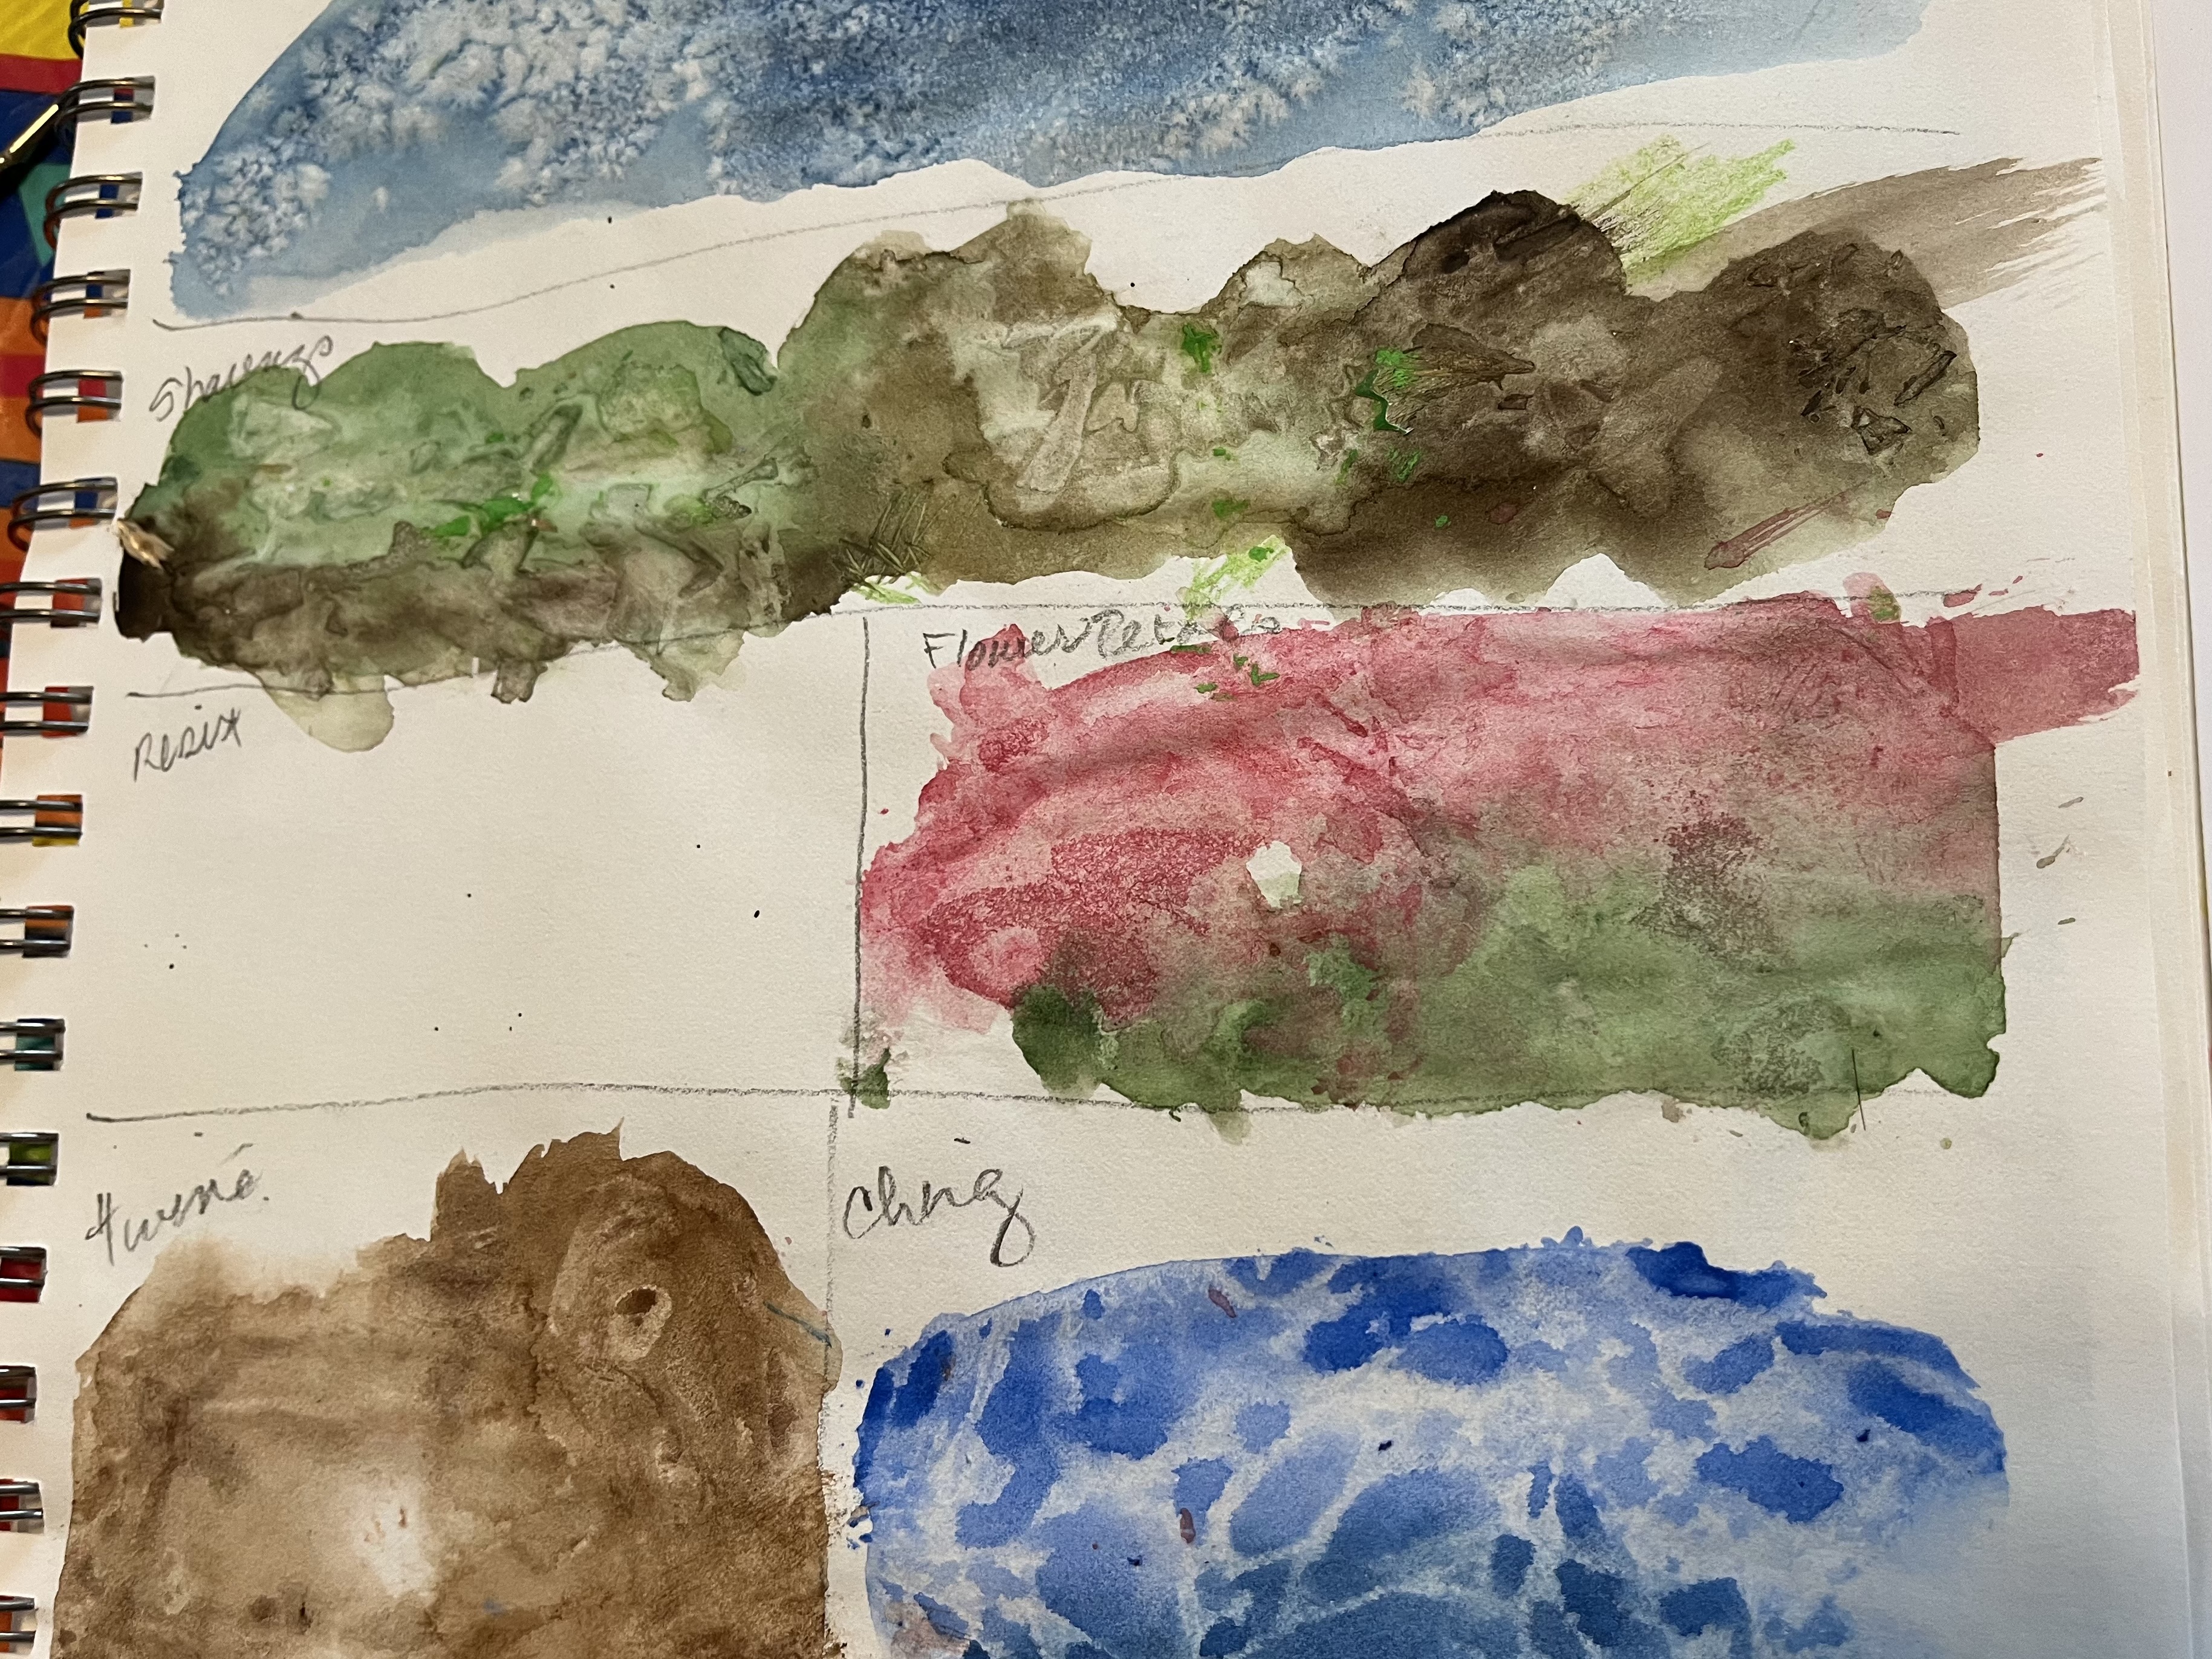
Our handouts this week, were trees/bark/grass with paying particular attention to light sources. Ruth shared her palette box...all cleaned up---I never have a clean palette(S), LOL!
We did work on some interesting techniques. I sectioned off my sketchbook to make little samples of these.
 |
| oldnewgreenredo |
It's so gray today after stormy weather, these were hard to photograph.
 |
| oldnewgreenredo |
Blue TOP: I did a wet on wet Prussian blue stripe under a wet on dry stripe above---they melded and then I sprinkled canning salt. Note to self to buy some Kosher salt, and maybe some Himalayan crystals ??? Very Cool effect, you just leave it on to dry and then brush it off...Might be great for backgrounds for sure.
Green Brown: I did a double color load on a mop brush across the page. (I misunderstood when it said pencil shavings...SO... I sprinkled a bunch of wood shavings across this, but what the instructor meant was to shave watercolor pencil lead into the wet paint..(that's the lime green bits). I'll have to experiment with this more, but I really like the textures from the wood shavings. It was also suggested to sandpaper or emery board the pencil lead onto the paper for speckles. (Interesting idea)
 |
| oldnewgreenredo |
TOP: Pink/Green following the pencil shavings, I used some dry and semi-dry flower petals into this wet pink/green stripe. I think you might have to use very dry petals and somehow press them down to dry. This may be worth experimenting with.
Bottom: Cobalt Blue and Prussian blue wet-on-wet and then squish a sheet of cling clear wrap onto the surface, pull up and neat stuff happens. Other suggestions, bubble wrap, synthetic place mat material, fabrics, lace, trims....anything that will absorb some the color and make a pattern.
 |
| oldnewgreenredo |
This one wasn't suggested on the sheets, Wet on Wet brown on the left and Wet on Dry on the right. Then I quickly draped cotton twine on the paper...again, it may need some pressure...a bit of mono-print making basically--one shot and you get what you get.
 |
| oldnewgreenredo |
I used white color pencils (L-Derwent and R-Prismacolor) to see if I could keep-white after painting. Results not white, but nicely subtle... We talked about wax resist pencils and crayons---but then you can't paint over the white. Water base resist is really gummy, and I had just enough not hardened in the bottle to play with later.
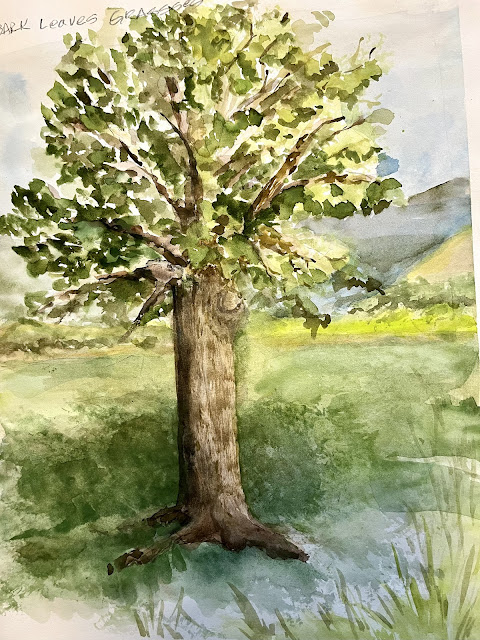
Our next lesson was about bark/trees/grasses. We talked about light/sources as well as atmospheric shading...
how far away is duller and less detailed while in the foreground you have more detail and brighter/intense colors. Ignore that strip of lime...it got away from me, grins.
 |
| oldnewgreenredo |
I've been using a good quality sketchbook for lessons and practice bits, so the paper isn't quite as reactive as watercolor paper which becomes expensive for scribbling and playing. I'm more adventurous this way.
This tree study is done from the given photograph the class used. I concentrated on the light source and the bark. I gave the sky background a very light wash...of blue/gray. I'm concentrating on layers in painting, working a bit, then walking away and letting it dry. The tree isn't perfect in shape or proportion, but again this wasn't a finished picture, but a working lesson. All the shadows are made with complementary colors...greens use added reds or blues use the oranges to get my shade colors. I add Payne gray mixed to get even darker shadows with the complements. It's really interesting to play with the shading and to work in layers.
 |
| oldnewgreenredo |
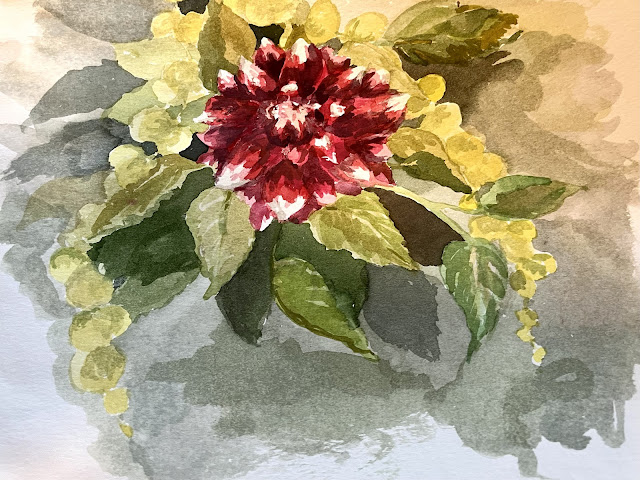
Our Dahlias are finally blooming on the porch after making mounds of greenery with all our rain.
Definitely worth trying to paint, the leaves have so much texture to them.
 |
| oldnewgreenredo |
I have five Mandevilla plants, three which are blooming bonkers...who couldn't resist wanting to paint these.
 |
| oldnewgreenredo |
1
I'm planning a painting mixing all these elements and our crazy Baby Tears that are just so lush and textural. What a challenge?
I also wanted to use the last drops of resist to cover the Dahlia points. (I have to get a new bottle...UGH $$$$) I grabbed an old watercolor pad and took a damaged sheet to play on and to do some color studies and see if the resist would work for the white tips on the Dahlias.
 |
| oldnewgreenredo |
Again, I worked in layers, not trying to duplicate the flowers/greens but make an interesting composition and work all sorts of tones onto the paper. Yesterday was great bright sunlight, but today is very gray day with artificial light and I couldn't get the colors to photo accurately on the painting. The yellows/greens are a bit brighter in real life.
 |
| oldnewgreenredo |
I'm really liking working in layers...it gets quite moody, Paynes Gray with the greens and complementary reds and a touch of other yellows here and there.
 |
| oldnewgreenredo |
The resist peeled off nicely and I was able to layer in the colors of the Dahlia petals. Gosh, I think I used Vermillion, Thalo Red, and Cadmium red light as well as Chromium green (very opaque) and Prussian blue for leaves to be opposite the deep reds.
I'm glad I made this study---I may do one more and add more gold tones, and try to figure out how to add the metal plant stand, or just a simple shelf for the top pot to sit on?
 |
| oldnewgreenredo |
My light sketch on real paper has me using elements of all three flower photographs. I may do a few more studies...before I challenge the whole thing.
WISH ME LUCK!!
If you enjoyed this post please follow this blog by Blogger or FOLLOW IT which you will find in the upper right hand corner of this page.
Thanks always for visiting.
I will try and respond to every comment and answer every question.
I will be sharing at these fine Parties!
I have not been paid or reimbursed in anyway for my opinions, posts or any products shown.
Please do not use photos without linking back to this blog
without my permission.
Thank you for your cooperation,
Sandi
 |