Showing posts with label Mather Institute Senior Art program. Show all posts

Friday, February 23, 2024

Mather Printmaking-Week 2: CREATE Sticky foam prints called Collagraphs

Ad-Free Blog

Number 2 in a series of Mather Printmaking Kits for Illinois for Seniors.

oldnewgreenredo

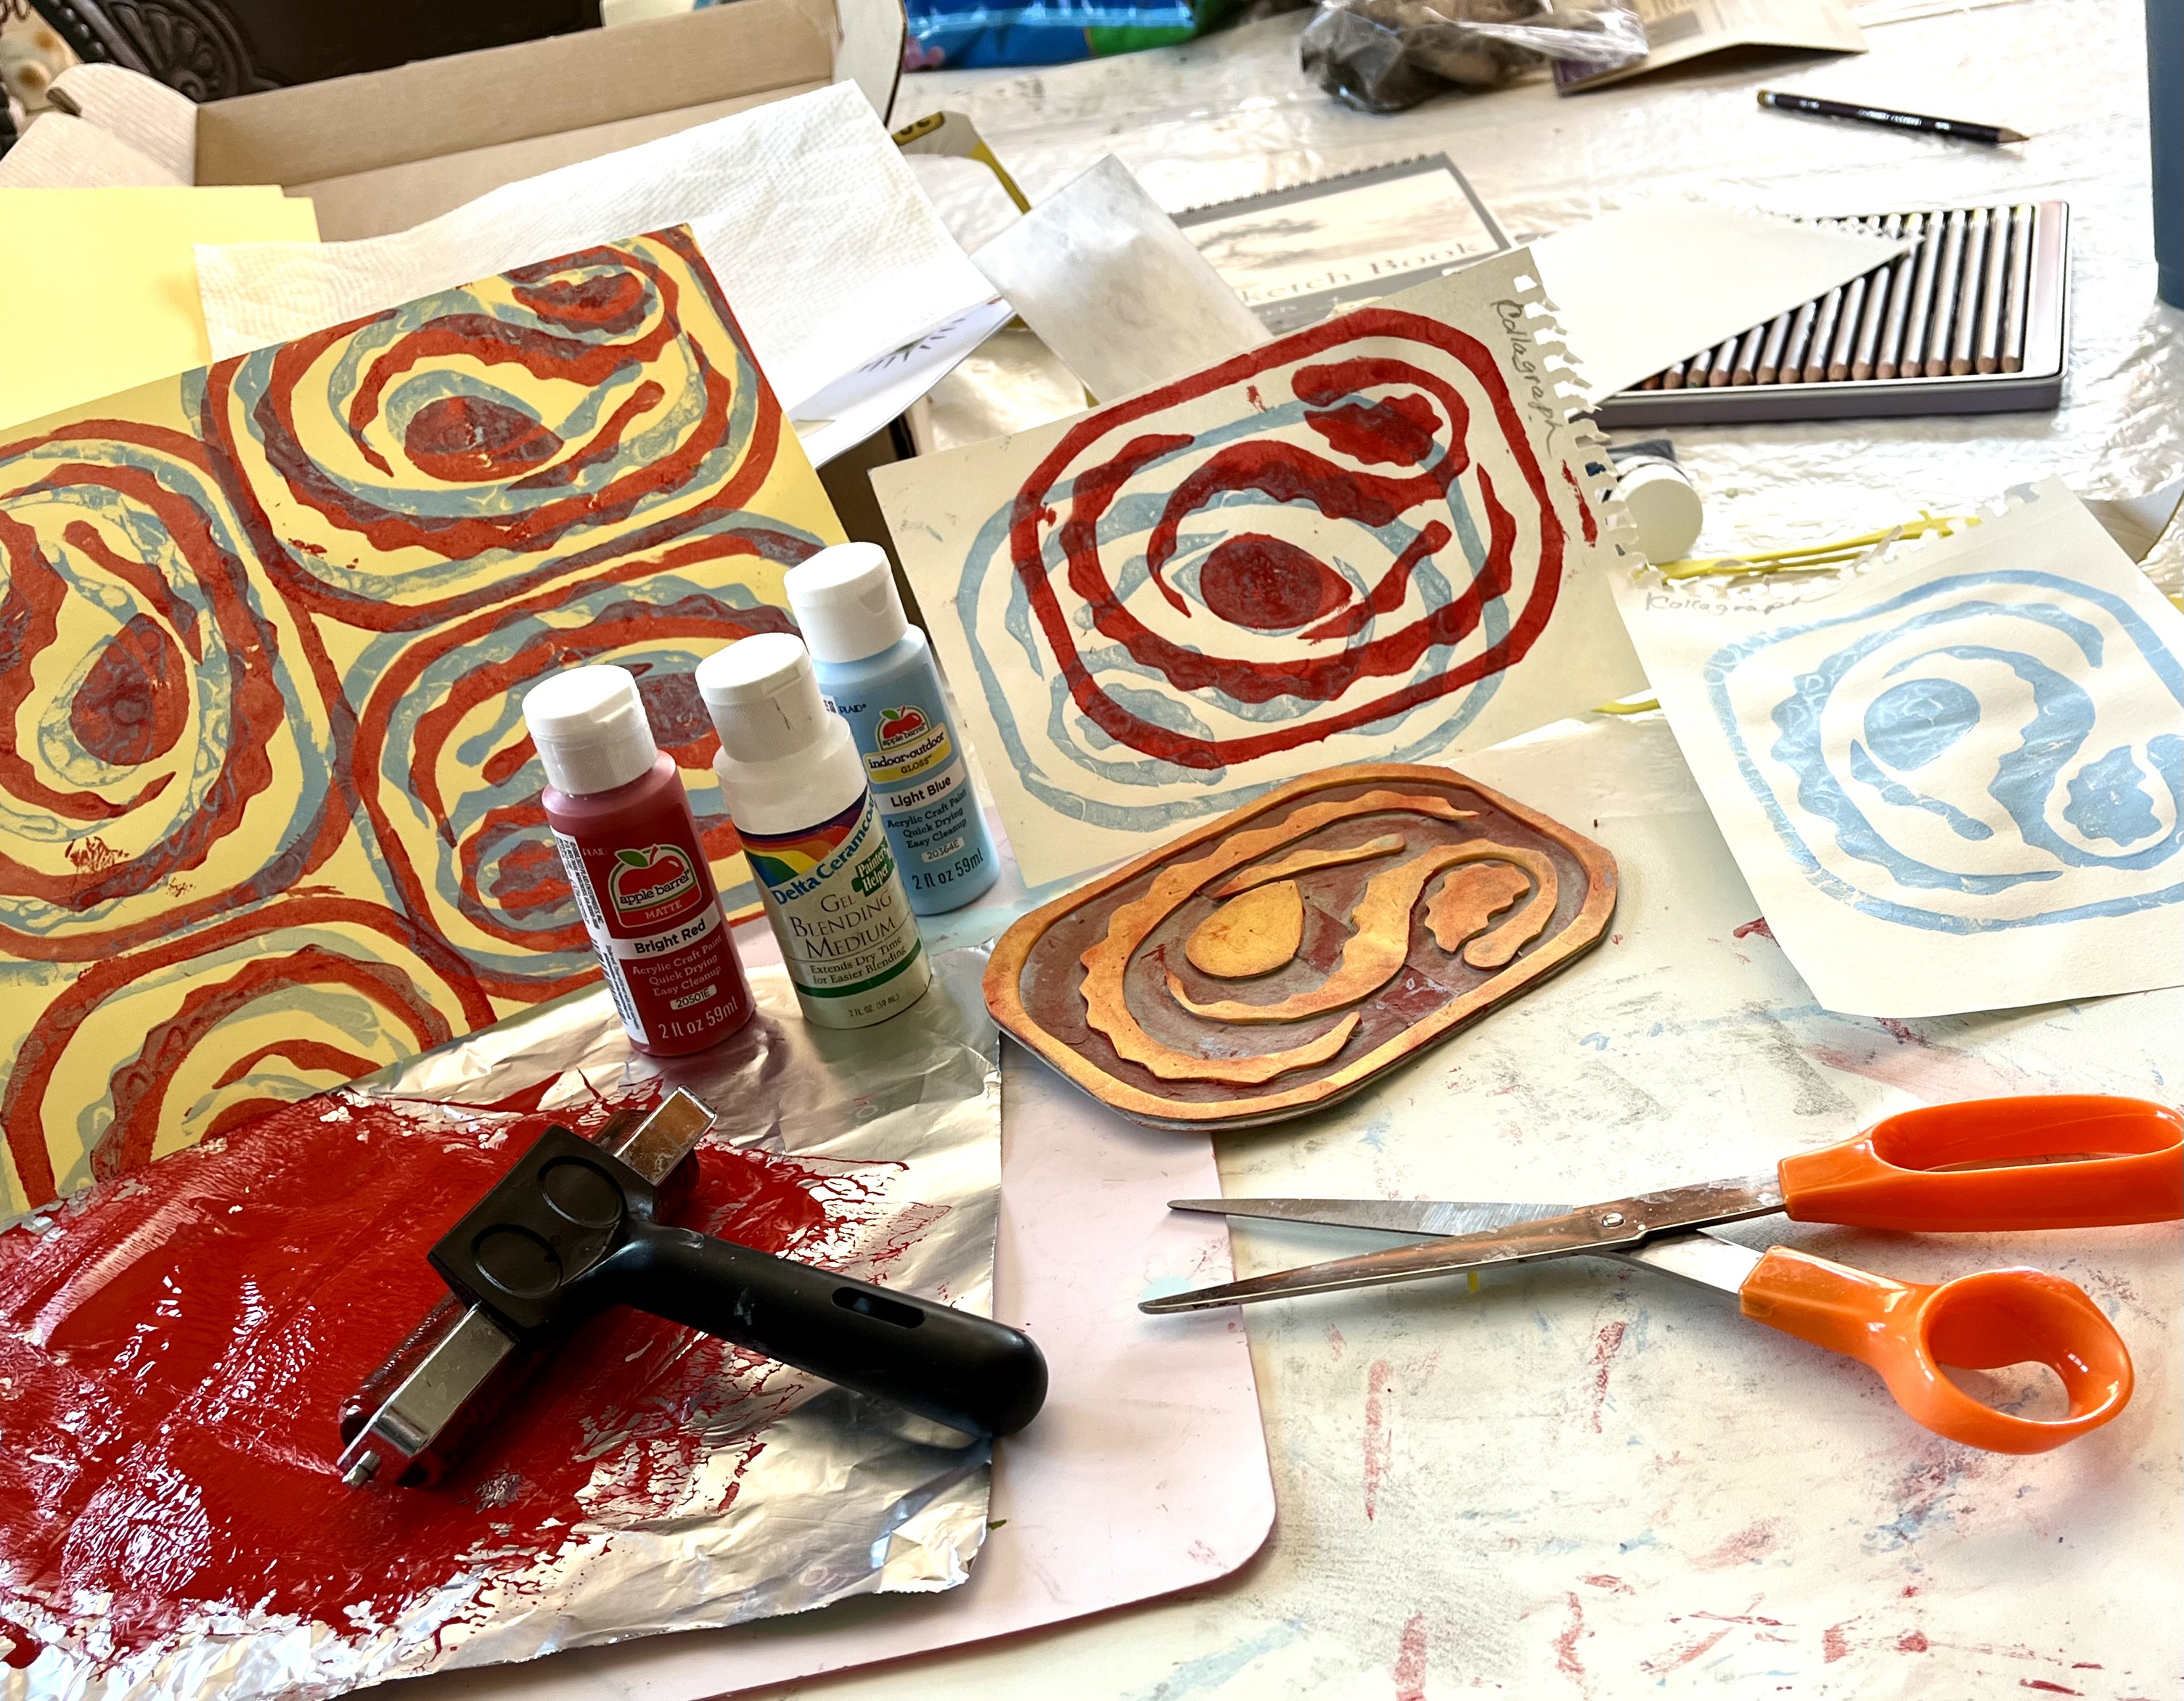
Collagraphs, this was pretty straight forward and simple. We were given a 4"x6" piece of sticky kids' craft foam. This technique is perfect for kids or short runs of prints. This is a learning project, not necessarily creating GREAT ART...LOL. 

Materials: 
Sketchbook paper
1 sticky foam sheet (adhesive on the back)
scissors
Marker or pencil to make your design on the back before cutting.
Acrylic paint
Tinfoil surface for paint
extender/blending medium
brayer (rolling surface to ink)
piece of cardboard or plastic to stick your foam design on
washable work surfaces

I was a bit late in getting organized and I skipped drawing the pattern on the backside of the sticky foam...and just began cutting. I had in my mind a sort of Paisley idea.
The idea was to make something fairly simple that you could print multiple images of, ie. for wallpaper or fabric, or just to make a larger print.

oldnewgreenredo

And, I didn't take photos of my pieces gluing on the cardboard. Simply cutout your shapes and then protective layer strip off the back and glue the pieces  on your cardboard or plastic surface to make your printing plate. This can be as simple or as complicated as you want. You can cut up your plate and make smaller independent images. 

Many people did this to make flowers, hands, hearts, images for multiple colors.
oldnewgreenredo
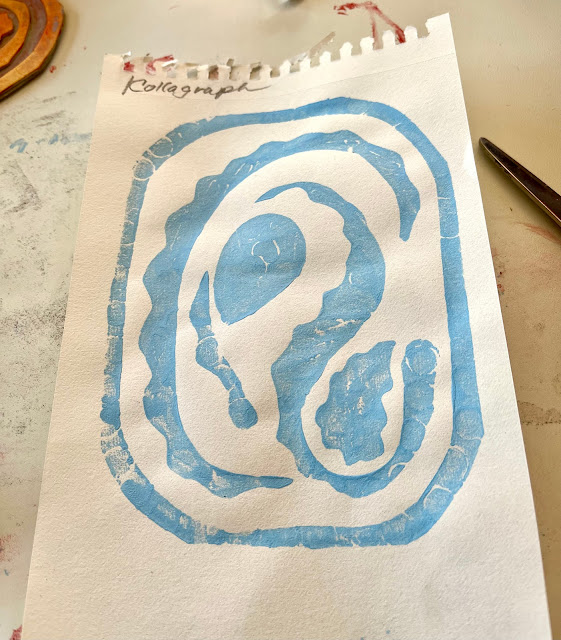
My first print was this blue on the small piece of sketchbook paper. Paper that is heavier with a smooth surface takes the acrylic paint prints well.
oldnewgreenredo

Like last week the paint was quickly drying. I had tried to emboss textures on the surface of my foam...but it only showed up as a hint, and the crevices immediately filled with paint. No biggie.

Cleaning off the plate with wet paper towel, I printed another blue one.

oldnewgreenredo

I then did 4 images on a yellow piece of  yellow card stock sized 8 1/2" x 11". I did have trouble with the surface of the card stock getting stuck to the quick drying paint. Adding blending medium to my paint to slow the drying process helped and I had no more sticking. I think I will just automatically start adding gel to my inks and paints for better results.

oldnewgreenredo

The red prints. My first red print I did was full strength red acrylic paint that was included with the kit. It was very dark and heavy looking on the white paper.

oldnewgreenredo
Pure red paint on my second layer.

 Knowing that the blending gel would make the red more transparent, I added almost a glob of maybe 30-40% as much gel as paint. Mixing well, I made four print new impressions off center of my blue images on the yellow card stock. 

oldnewgreenredo

I also reversed the up/down of each blue print to make it more interesting and then off set the red images a little to the left and down.


oldnewgreenredo

I found my imagination really cranking.

oldnewgreenredo

I could see alternating the vertical images with the  horizontals images in long stripes on fabric. Maybe with different top colors...this could be fun! 

oldnewgreenredo

Here I have repeated my images...done on the computer...but you can see the possibilities for printing Fabrics or Paper items. These were just screenshot photos, but scanned images would be even better.

PRINTPRINTPRINTPRINTPRINT

The Collagraph Technique is simple and inexpensive...definitely something to try again.

oldnewgreenredo

Mather has a facebook page where we get to share all our experiences, good and bad, but it is a great 

Creative LEARNING EXPERIENCE! 

Something I tried on my own this week was a found tool---to make my prints more consistent. Pressing on the back of the paper with your fingers to get your prints is pretty uneven and tools tend to tear up the dampened paper.  Desiring better prints, I pulled this little metal pitcher out of my kitchen drawer. It has a rounded bottom and clean flat surface to rub on the back of my damp paper. Any object with smooth edges and a flat surface would help to rub prints.

oldnewgreenredo
oldnewgreenredo

oldnewgreenredo

Getting ready to press a print.


Short mini-video showing how a found objects-
 pressing makes prints! 

Hope you enjoyed this simple project...have fun...

AND CREATE!

If you enjoyed this post please follow this blog by blogger or 
FOLLOW IT which you will find in the upper right hand corner of this page. 

Thanks always for visiting. 
I will try and respond to every comment and answer every question.

I will be sharing at these fine Parties!

The photos in  this blog are my own or I have permission to using them from family. Any others will be attributed to the  source if possible.
I have not been paid or reimbursed in anyway for my opinions, posts or any products shown. 

Please do not use photos without linking back to this blog 
without my permission. 
Thank you for your cooperation, 

Sandi


Wednesday, February 14, 2024

Mather Printmaking Kit for Illinois Seniors in 2024

Ad-Free Blog
Last summer I shared with you the Mather Institute art program that was available for residents in Illinois. 

oldnewgreenredo

This year they introduced a second kit for Printmaking which I signed up for last Fall. These kits are for releasing creativity, learning, and sharing in a senior environment. I know I'm happiest when I'm doing something creative at anytime...and this is the program's goal, creativity and well-being for seniors.

Here's the kit for 7 weeks minus my colored pencils which I dug out  and some stuff from my junk drawer: screws, string, q-tips, toothpicks to add to the collection.


Contents of the box:
Instruction sheet for 8 projects
Sketchbook of paper 
plastic sheet for inking
a brayer
Speedball water-based acrylic ink in black
craft paint, red, blue, and yellow
plastic gloves
paintbrush
packets of gel (like jello) for mixing for a later project

I also added to my table: 
A spray bottle of water, tissue, paper towels, a plastic placemat to work on, tin foil for braying ink plate, colored pencils, string, screws, nails, toothpicks and lots of q-tips, for today's project of Mono-prints. 

oldnewgreenredo

I got ahead of myself and brought out my soft/crayon type pencils, knowing these would not break down  under the water based ink.

oldnewgreenredo

Here's a closer look at some of the supplies. The paper isn't totally smooth, but with a very light texture.

oldnewgreenredo

Coloring some of the paper was an ambitious idea....a scribbled scene vaguely tropical.

oldnewgreenredo

The right one was just blocking out colors ...for what I thought could be Pansies.

oldnewgreenredo

The clear plastic square in the middle is the 'printing plate' which can be either glass or plastic for this simple project. This has a nice smooth surface that grabbed the paint. You put a dab (fingertip size) of tube ink on this plate and then use the brayer to spread the paint evenly across the surface. The ink easily covered the surface.

Then you carve, etch, brush, dab the ink away or totally off the plate in your chose design with the brush, q-tips, nail, toothpicks, whatever. The effects can be varied and that is the fun of doing mono-prints. Each is very unique.

You get one shot for a print---once you have completed your design in the ink, you place your paper onto the ink plate and completely rub the back to transfer the ink surface to the paper.
Sounds simple?

oldnewgreenredo

As you can see there is a wide variety of success here.

oldnewgreenredo

My first piece I had trouble working all the lines in---the q-tips removed the wet ink quite well in the beginning but the thinner lines from the brush didn't really show up. My paint became quite sticky and resistant sooner than the 5-7 minutes we were supposed to have to work.
I work fast, so I was really scrambling. 

oldnewgreenredo

I thought I had accented all around my flowers, perhaps the rubbing on the back covered some? 

My second attempt was the flower drawing in colors.
LOL...IF you work on paper a pattern that is irregular, in design, you have to remember to reverse the same design when drawing into your ink...which I didn't do. 
So... my leaves are in the flowers and my flowers in the leaves, and lots of color was under the black and not showing at all...this is a learning process(I mumbled)
oldnewgreenredo

This is coloring on the paper design...

oldnewgreenredo

The plate is all the black part and you can sort of see where the shapes are reversed...another lesson...but sort of interesting in a discom-boozeled way.

oldnewgreenredo
oldnewgreenredo

Okay----this time I thought I had it figured out...but the ink dried so quickly, I spritzed a little bit of water mist...and when it printed the black spread here and there. The bottom pier and boat are totally off the paper...so we will see what this looks like matted.
Our hour of visiting, instruction, and playtime was up...so I thought it was time to clean-up.

I started thinking back to my old days (1967-8) when I had Printmaking in college (never my medium) and thought about adding some sort of retarder to the acrylic ink.

oldnewgreenredo

I went downstairs and dug out an old bottle of craft paint (water based) gel-medium (which is a retarder) and extends dry time and a blender (on the label,)
and added an equal part gel to an equal part of ink to the plastic for one more try.

Mixing the ink and gel really went well together, I did seem to get better/more even coverage on the plate and a thicker application of the combined ink/retarder gel. I still planned to work fast..not knowing how long I had.

oldnewgreenredo

This gave me a little more time to play---enhance, and do some detailing on the bleeding heart stem. This with color behind it--in the right place, would be quite nice.
 I like the textures and shading I got here and there...my working time was still only about 5-7 minutes. 
I may try this or a similar design again with more subtlety, and even more retarder.

This was printed on the plain piece of paper and rubbed on the back, and I also used a smooth bottomed (no edges) metal creamer-back and forth and all around smoothly. This gave a more even pressure to get my print.

Another: Second time around..print or ghost print
oldnewgreenredo

There was lots of ink still on the plate, so I did this second or ghost print with one spritz of water added. I think this will make a fun background for another project. 
Below, I cleaned up the plate with a water spray and swipe of paper toweling, halfway through I printed the plate again with the remaining ink left on the plate. 

oldnewgreenredo

Again, perhaps a starting point for something else.

oldnewgreenredo

Another one of my cleaning off prints with a spritz or two of water, a dirty paper towel schmere (inky towel  balled up and swished on the wetter surface) 
and then I printed.
I'm totally loving the etching like look of this...
definitely a starting point for something else.
All this with just a few materials, and limited instruction, lots of experimentation and...

Six more weeks of Printmaking 
is going to be so much fun.

Here's a video I made discussing my different prints...successes, failures, and surprises.
Special Thanks to the Mather Institute for such  valuable resources and experiences for Illinois Seniors.

If you enjoyed this post please follow this blog by blogger or 
FOLLOW IT which you will find in the upper right hand corner of this page. 

Thanks always for visiting. 
I will try and respond to every comment and answer every question.

I will be sharing at these fine Parties!


The photos in  this blog are my own or I have permission to using them from family. Any others will be attributed to source if possible.
I have not been paid or reimbursed in anyway for my opinions, posts or any products shown. Please do not use photos without linking back to this blog 
without my permission. 
Thank you for your cooperation, 

Sandi