Showing posts with label modge podge. Show all posts

Friday, May 23, 2025

Mather DIT Wearable Art Kit: Clay Beads and Pendants

Ad-free Blog 

This are the materials for the Clay Pendants and Beads from the free Mather art kit for Wearable Arts.

oldnewgreenredo

I've used Model Magic before for kid's crafts, but this small package was enough to do lots of jewelry pieces. 

Since the classes are for seniors...the clay is non-toxic and very easy on the hands and to work with. We were encouraged to pick up things in the kitchen for impressing into the clay. 
oldnewgreenredo

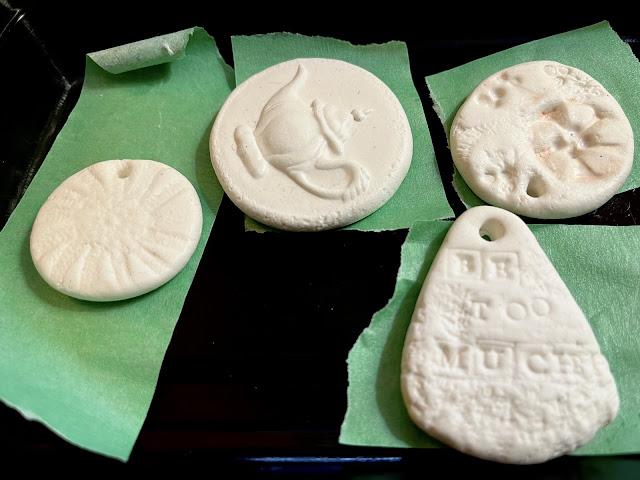
I had letter stamps, a cookie press(teapot) and some old clay stamps from my Pottery days and lots of this and that for textures. The Model Magic has a fluff texture and tends to bounce back after impressing and loosing some of the texture. I left the heavy clay cookie press sit on the clay for quite a time...and that gave the cleanest image

Pendants were made simply by flattening a ball of clay and pressing images into the clay. The pendant was trimmed and I used rubber letter stamps and some lace to texture it.

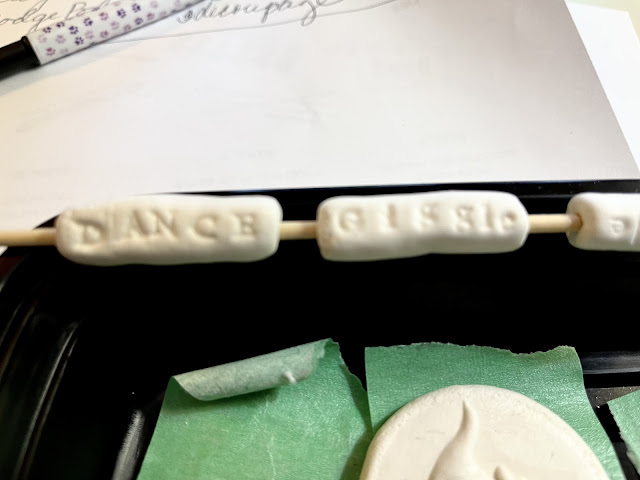
We used ka-bob sticks to make holes and string our beads on to dry. 
oldnewgreenredo

The beads that once were perfectly round were squishy when impressing and got a lumpy shape. The more I pressed the messier they became...so I just went with it.

An hour class really cuts into your FUSSING time, which is probably a good thing, LOL.

I knew enough to spin/twist my beads on the stick to keep them loose. As clays dry, they shrink, and so will your holes.


The second week!
oldnewgreenredo

After drying for an entire week, it was time to paint and decorate. I sealed my pieces with modge podge before I painted. Here you can see how I stained the words on my beads, DANCE, Giggle, Create, LIVE.

oldnewgreenredo

You can see the textured edges, you can lightly sand those off or go with it. The holes need to be opened more as the puff of the clay closed these up a bit.

oldnewgreenredo

Painting was fun and annoying....lol. filling crevices that are so soft means you have to accentuate the actual desired shape. I definitely fussed with this for the full hour class. I used the class acrylics, and then went in with a Micro-point marker to enhance and define the designs a bit.

oldnewgreenredo

I used some glass beads from a cut up bracelet to add spacers...we used the enclosed embroidery floss encluded in the kit. I will probably switch the floss out for something more substantial, hemp or rayon cord.

oldnewgreenredo

BE TOO MUCH! As an old lady---I've learned THAT, to enjoy life.

I won't wear this piece but will use it in an imspirational multimedia construction for my Grand Girl. 
The pendant on the right...was too indistinct ...and eh...

I like the sunflower piece...and may use that with some of my other beads in a piece for myself

oldnewgreenredo

That was simple and the marking pen added the details.

oldnewgreenredo

This will end up on the wall in my 1:6 scale diorama Bakery Coffee shop. the blue was quite transparent in the colors....and this was three coats and then I gave up.

All the pieces were sealed with Modge-Podge gloss....that was included in the class box. I would consider a spray sealer if you really want to use them as in Chicagoland humidity Modge-Podge can be a bit sticky. 

oldnewgreenredo

Will I do this again. Maybe not...but I will drag out some Sculpey or Polymer clays and play a bit...the harder finished product will give cleaner imprints...and who knows where that will go.

Thanks to Mather and Ruth Guerry  for a fun two classes.

Mather Communtiy Information for Free Classes is HERE.
So many different types of online FREE classes for those over 55.

Remember


DANCE* Create* Giggle *LIVE

Thanks always for visiting, 


Join me at these fine blog parties:


All the opinions and photographs in this blog are my own, I have not been paid or reimbursed in anyway for my opinions, posts or any products shown.  


Monday, October 26, 2015

DIY Barbie Doll House: Week#3 Pt.2- Finally COLOR


AT Last
COLOR!

oldnewgreenredo

At last color----well, here's planning color first anyway.

Wanting to get away from Barbie magenta/pink and purple in all the furnishings and after consulting my daughter-in-law, we talked about a contemporary look with some fun things in a wider color family. Like a real house, and real people.

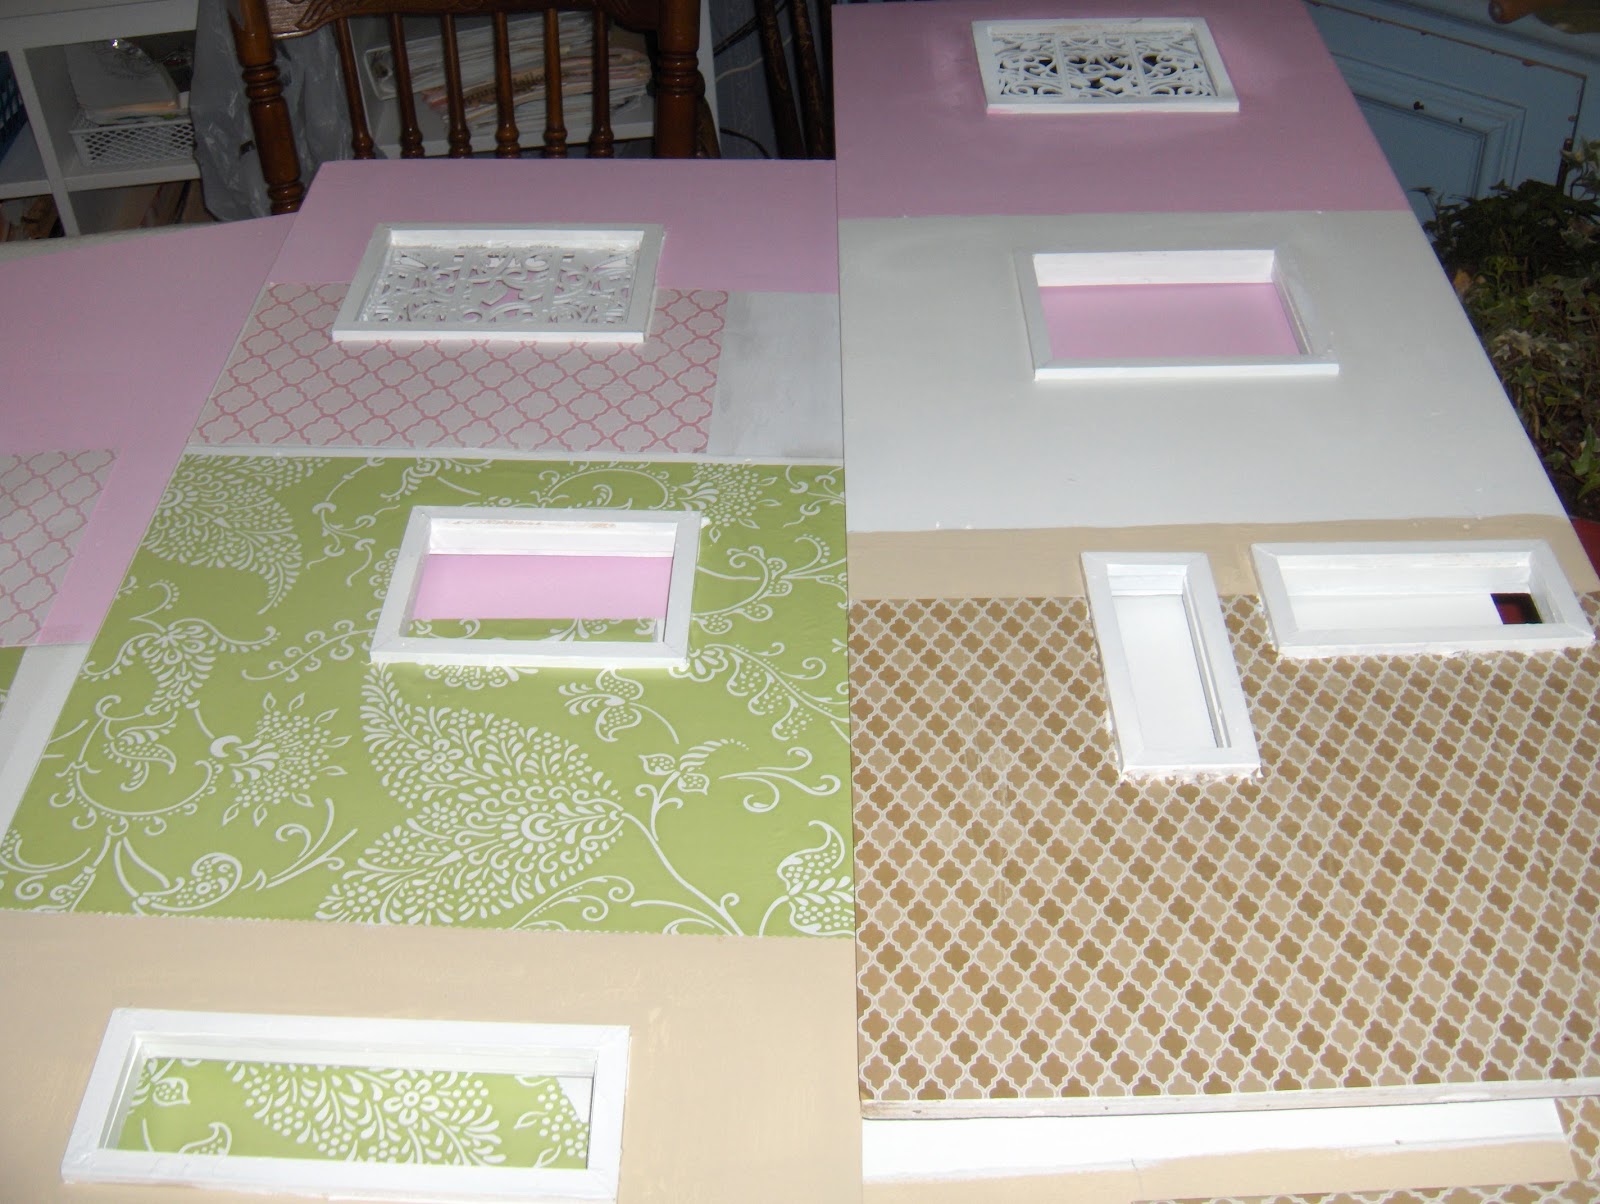
But, still using as many materials we already have. We both love green, and I had the green and white contact paper which is perfect for the kitchen. The gray tile which looks blue here, is really gray silver which is perfect as appliances and some furnishings will be stainless steel. The gray/silver tile will run through the living/dining room with white walls and the green and teal blue for furnishings and also on the third floor bedroom and bathroom.

The 'hardwood' flooring, brown bath tiles and beiges are on the bottom floor in Ken's man cave.

Barbie's bathroom/closet and bedroom on the third floor will be pink/white in the bathroom, with the pink tiling, and the other fabrics, purple, pink and stripes for the bedroom in the linens and furniture. With the silver gray floor that should work really well. And there will be green touches here also, there are two shades of green in the striped fabric.


oldnewgreenredo

So here is the tiling which is actually scrapbook paper mod-podged in satin directly onto the walls. I used two coats of modge-podge.  There are still a few bubbles here and there, but almost everything disappeared after drying. I used a foam brush and worked from the center out and then quit. Do NOT over work, the paper will not stand up to it. Actually wrapping paper works better, but finding tile prints is hard.

oldnewgreenredo

You can see the bubbles, but they really did shrink out when it dried.

 Here is the last of the pink tiling paper is laid out on the board with the pink paint.

oldnewgreenredo
Here is the bath/bedroom colors again. I mixed the pink on the upper right from old paints I had. Magenta....lol and white and it was almost close to perfect.
 

oldnewgreenredo

One of Ken's bathroom walls. More bubbles, but they do shrink out!


oldnewgreenredo

All three of his bathroom walls and look how the windows pop. We chose beige for the paint. (This is the trim paint in our family room.) So free. I did have to buy some white satin paint as we did the interior of the shed this Fall, by mixing all our light colored old paints together (GREEN) instead of sending them to landfills.


oldnewgreenredo

Here's that tile wall with all the bubbles, dried. It looks great with the hardwood tiled floor-6 tiles at 89 cents each with a rebate.


oldnewgreenredo

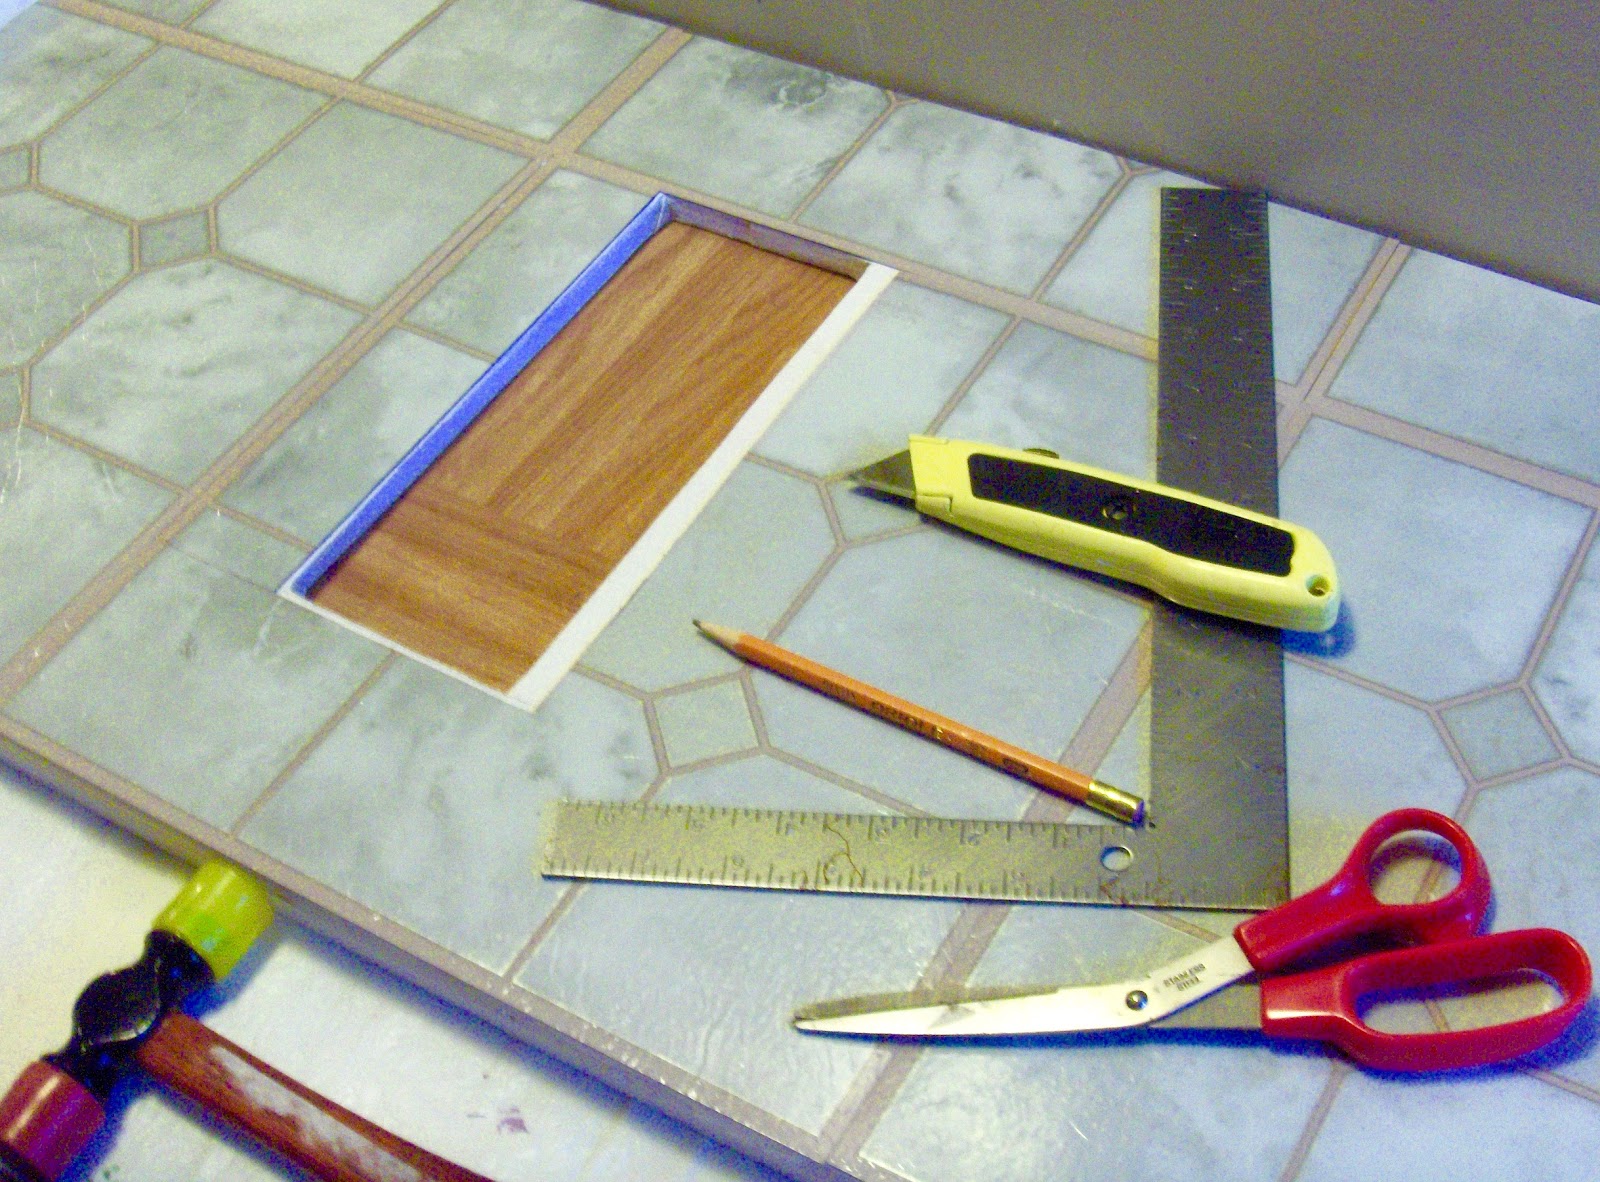
I couldn't resist showing the wall cabinets on top of the green and white contact paper. (I did have to use a spray adhesive as the contact paper I've had for years and wasn't very sticky). So it was pressed down twice. I trimmed with the metal square and a sharp exacto tool.

oldnewgreenredo

I think the colors will work well, the appliances will be stainless steel and all metals will be silver.


oldnewgreenredo


Add the white walls in the living room. I may do an accent wall on the stairway wall, 
to break up the white. 


oldnewgreenredo

Here are the walls with the windows, I need to do touch up but will do that after assembly. As there are many things to do yet, that could mess up the walls. I will use a sponge brrush and just dab paint on.

oldnewgreenredo

We couldn't resist holding up the walls to get the 'room' effect. Working on the pieces flat has saved so much frustration. You just have to measure carefully, but we are putting up baseboards and door trim,  and ceiling cove moldings (which will hide the electrical).

oldnewgreenredo

We laughed when we saw this at first,  on the east walls. Neopolitan icecream, lol.


oldnewgreenredo

Here are the white walls and the fabrics for the living room and dining room. I think the stripes may wander into the kitchen too.


oldnewgreenredo

Cutting the floor tiles was way easier than expected. I placed the complete tiles at the front of the edges and worked to the back. I marked with a waterbase marker, and cut with an exacto knife by scoring and bending then another cut. Using a metal straight edge is a must. A rubber mallet is a great tool, I also used a rolling pin to press down the tiles, as we won't be walking on them.


oldnewgreenredo

Really just a few simple tools. The white strip is the woodbase and a wall will go there 1/2" wide. Again these are leftover tiles...so basically free.

oldnewgreenredo

READY to MOVE IN...NOT YET
Next is Week#4
Moldings, Electrical and Wood Trim.
Just like a real house, but WHEN are we going to get to the FUN stuff...????
and then again, the workers aren't union. 
 Plumbing: the toilets are brand new---so there shouldn't be any major problems, but everything else is second-hand or vintage though, or hand made, so there will be lots of DIY posts!


All the opinions and photographs in this blog are my own, I have not been paid or reimbursed in anyway for my opinions, posts or products used. 
Please do not use my photos without linking back to this blog without my permission. 
Thank you for your cooperation, Sandi Magle


Thanks for stopping by and all questions or comments. 


Sandi