Showing posts with label crafts. Show all posts

Monday, September 29, 2025

Deja Vous Fall

                                                                                                 AdFreeBlog

This post was featured at 


Hi, All!

Vintage Fall and Naturals 

on the Front Porch

Good Morning, it's finally FALL!

Oldnewgreenredo

Slowly, I have been starting to do Fall as temperatures have finally tempered here in Chicagoland. Yesterday was spent in the garden, pulling up done plants, 
and trying to find our pumpkins and squashes. 
We had some great growth, but not lots of produce. 

oldnewgreenredo

 I found this NEW great greenhouse garden frame for $4.00 at a craft store discount aisle,  I showed it in an early post here: Somethings Old….
 I thought this would be great for a REDO vignette for Fall, with the rich rust coloring on the metal.

oldnewgreenredo

I wanted to use different things on our porch this time, 
I thought this would be a great addition for cool Fall nights, an OLD kerosene lantern.
Here is a closeup of my Grandfather's watchman's lantern cleaned up from an early post:

oldnewgreenredo

I confess the garden-shed frame was tucked away behind the settee on the porch all summer. The porch has  new railings and stairs---with NEW 'out of stock' materials since May---holding up the whole show for almost six months--that's a YELP story for another day.

oldnewgreenredo

Still not 100% done, the porch is ready to style a bit and use now.
 We bought the larger pumpkin at the local grocery store, as ours were too small. 
The gourds are from years past; dried and left natural grown in our own, GREEN, garden. 
 Every time I walk by, I fiddle with the gourds, and occasionally I find a walnut stored in there by one of our local squirrels.
Do they really think the corner of the stairs and my Fall vignette is a hiding place?

 I did spray the gourds with some Johnson's Wax-Pledge when they were fully dry to enhance the color and seal in the dustiness of the gourds.

oldnewgreenredo

Here's our Zinnia's--oops we found out they were Sunflowers in July. I picked one of the dried blossoms and used it for the 'GREEN' element in the front.
Another sprig of smaller sunflowers was put in the back. 
Adding a few pinecones and that is pretty much it. 
I'm sure this will change when my Fall bins are delivered by hubby, from upstairs in the garage.

oldnewgreenredo

The craft wood Scarecrow was from a painting project I taught at Michael's back in the 1990's. I taught free-hand painting without patterns---back then, which was out of the norm. 
Somewhere I have a photo  of 14 of these all painted differently by the students.
This scarecrow is a favorite of the Grand Girl as the arms move up and down. He has long since lost his "Pumpkins for Sale" wired sign. My gosh, he is OLD and vintage now.

oldnewgreenredo

A straw hay bale waits over in the corner with the houseplants, for a pumpkin or two or three--
they are really small!
The pensive angel tile was a NEW rescue from 'HomeGoods' two seasons back.

oldnewgreenredo

The one plant that was very happy outside this summer was my Rosemary--I'm wondering where on earth I am going to keep it in the house this winter. It smells so good.

oldnewgreenredo

Here's a  view of the entire seating area--with a lightweight throw REDO
 for those cool nights-perfect color for the porch from GoodWill-$2. 

I added smaller mums in the summer planter box.
 Grampa's OLD lantern and a stoneware candle pot from my potter days, probably from the 1980s, finish off the table top. A REDO antique crate serves as a table between the chairs. 


oldnewgreenredo


So Finally---beginning Happy FALL

from my OLD front porch to yours.

If you enjoyed this post, please join via Blogger or the FOLLOW IT in the upper right corner of the blog page.

Sharing at these great blog parties :


All the opinions and photographs in this blog are my own, I have not been paid or reimbursed in anyway for my opinions or posts. Please do not use my photos without linking back to this blog without my permission. Thank you for your cooperation, Sandi Magle
And Always, Thanks for stopping by, 

Sandi


All the opinions and photographs in this blog are my own, I have not been paid or reimbursed in anyway for my opinions or posts. Please do not use photos without linking back to this blog without my permission. Thank you for your cooperation, Sandi Magle

Tuesday, March 28, 2017

Garden Mosaics Class


So a year ago---yes, a year---I took a CRAFT mosaics class with my friend E. 
I did a lengthy post on it, then, lost it---somehow. Disgusted, I went on to
do something else. Cleaning my folders, I found these photos all ready to go. 


http://oldnewgreenredoblog.blogspot.com


http://oldnewgreenredoblog.blogspot.com

Here is our instructor, Lisa Tolbert (left) from Mosaic Whimsies  setting up for the huge class.
I know this is a long post, so bear with me. 

http://oldnewgreenredoblog.blogspot.com

A greenhouse was the perfect place to do this kind of messy class. 
This was in March 2016.  We had 60 degrees when we went in, and then a rainstorm, then hail (not fun in a greenhouse) and finally snow in the three hours we were there---just an average spring day in Chicagoland.

http://oldnewgreenredoblog.blogspot.com

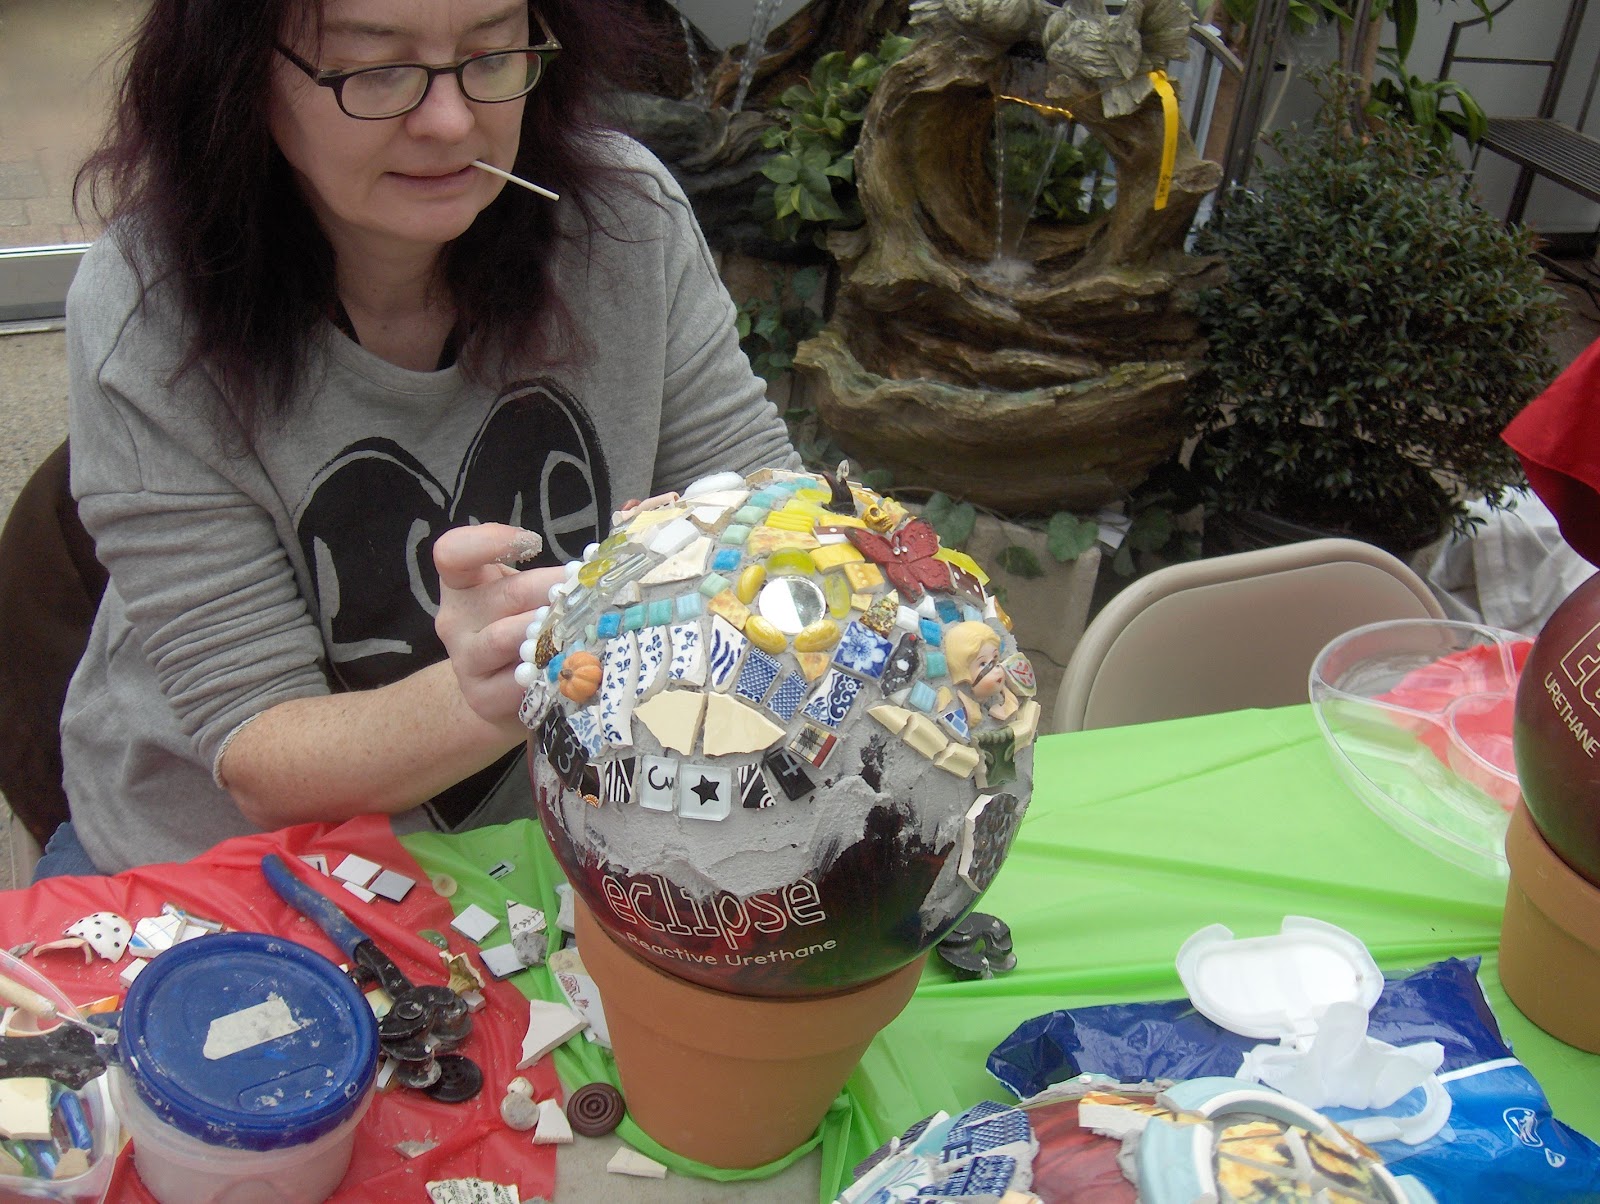
Well, here is the OLD bowling balls, all ready for us to choose from. Yes bowling balls to become 
mosaic gazing balls for your garden. A great REDO and GREEN project, everything used would normally end up in a landfill.  All your chipped dishware and trinkets, reused.

http://oldnewgreenredoblog.blogspot.com

Lisa had a few of her gorgeous pieces on display to inspire us. These were glass on glass windows. 
She teaches many classes and travels all over Chicagoland and N. Indiana.


http://oldnewgreenredoblog.blogspot.com

Her shabby chic pieces are always a favorite at local shows. Don't you love the pearls worked in.
 She does custom work for people. Check out her website.

http://oldnewgreenredoblog.blogspot.com

She had trays upon trays of scrap pottery, glass, baubles---
plus we all brought some things of our own to use.
 I think there were 18-20 people in this class. 
We each used a dollar store tray to pick out our pieces. 
It is surprising how many pieces it takes to cover a bowling ball.

http://oldnewgreenredoblog.blogspot.com


This was a large class for advanced or beginners. Lisa has quite a following. Here you can see the first of many weather changes---we went from HOT, to RAIN, to HAIL, to SLEET, to SNOW 
in three hours.

 The bowling balls were set hole down on flower pots for ease of working.


http://oldnewgreenredoblog.blogspot.com

First you cut your pieces into workable sizes. The curved surface provided a few challenges. 
E worked with lots of interesting bits and pieces: 
jewelry, small figurines, glass, mirrors, game parts, fun stuff. 


http://oldnewgreenredoblog.blogspot.com

Some people are extremely controlled and methodical and
 follow directions to use pieces of the same thickness. 

http://oldnewgreenredoblog.blogspot.com

You can't help but get movement in your designs on a round surface. Members of the class 
were nice enough to let me roam around and take pictures.

http://oldnewgreenredoblog.blogspot.com

E again---concentrating. You really have to think small areas with this sort of projects, or

http://oldnewgreenredoblog.blogspot.com

...go with a pattern and stick to it, long as those pieces don't run out!

http://oldnewgreenredoblog.blogspot.com

Here's Lisa gave technical advise and encouragement. 
Mosaics like this are not for the hesitant, because the adhesive can become crusty in no time. 
Then, you spend more time scraping stuff off then getting anything done. 


http://oldnewgreenredoblog.blogspot.com

Group shot, to show you how different the bowling balls morphed into gazing balls. 
Flowers were a big theme and super for the round shape.

Everyone was encouraged to take home extra pieces to complete the bottom at home. 
A quick tutorial on how to grout your piece, was given and after three hours or so--
we were all sent home in the snow. 


http://oldnewgreenredoblog.blogspot.com

I started with these sort of flower mandalay type shapes.

http://oldnewgreenredoblog.blogspot.com

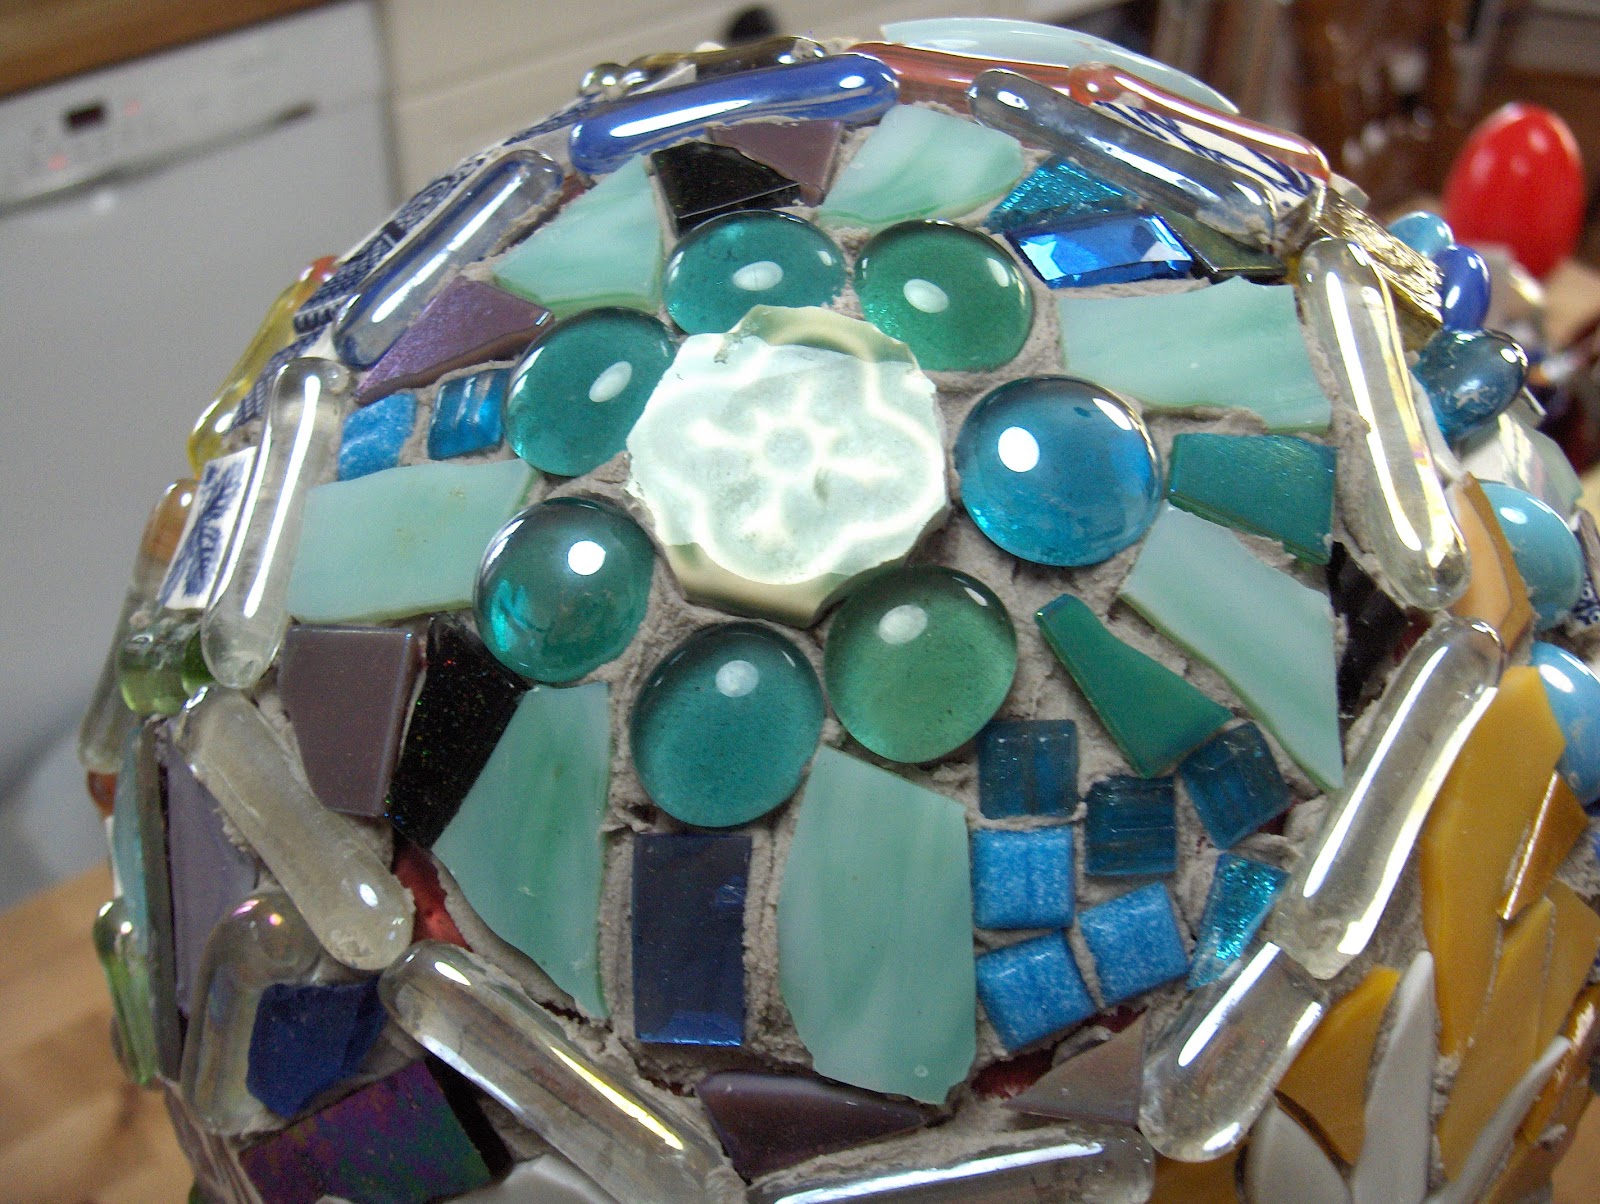
The leaves are toward the bottom.  I worked with glass pieces surrounding my focal points.

http://oldnewgreenredoblog.blogspot.com

Loved all the vintage dishes worked into shapes. There is some transferware here.
I'm pretty freeform and work with however my pieces break.

http://oldnewgreenredoblog.blogspot.com

This circle has mostly iridescent glass---which should show up brilliant with sunlight.

http://oldnewgreenredoblog.blogspot.com

Blue and white----Most of my chipped cracked dishes were blue and white. I used a few low bowl pieces on here, which were great for the round shape.

http://oldnewgreenredoblog.blogspot.com

on the other side more blue and white.


http://oldnewgreenredoblog.blogspot.com
I finally found this wire vase late last fall, perfect as a stand for my first Mosaic Garden Ball. 
I think this post qualifies for vintage, even though I created something NEW.

Now to mix up some mossy green grout...
http://oldnewgreenredoblog.blogspot.com

This made quite a mess in the kitchen but went very fast. Roughly 30 min, from mixing to the end.


http://oldnewgreenredoblog.blogspot.com

After the grout is totally set, I will go back and scrub the surface clean with a scrubby.

http://oldnewgreenredoblog.blogspot.com

Now to spray the base, that will be another day, if we ever get Spring.

Thanks always for visiting. 
I will try and respond to every comment and answer every question.

All the opinions and photographs in this blog are my own, I have not been paid or reimbursed in anyway for my opinions, posts or any products shown or anywhere I shop.
 Please do not use photos without linking back to this blog without my permission. 
Thank you for your cooperation, Sandi Magle

I will be sharing at these fine Parties!


Sandi


Tuesday, September 22, 2015

Supporting Fine Arts and Crafts #1


Visiting Midwest Artist-Kellie Truppa


Good morning, grab a cup of coffee and sit down
and enjoy some NEW stunning artisan works by Kellie Truppa.

Every now and then, I'm going to showcase an artist who works with an OLD vintage feel, or GREEN recycled materials, or is just darn gorgeous. 
And, Kellie Truppa's work demonstrates all of these.

OldNewGreenRedo


Unbelievably, this was Kellie's first art show, and she has apparently been doing this intricate beadwork for quite awhile. We found her at a small art fair on the square in Palatine, Illinois earlier this month. Her inspiration for this piece was the ceramic medallion as the focal point.

OldNewGreenRedo

 I love the way she echoes the motifs and works them through the whole piece.

While we gushed and 'ooh-ed and ahh-ed', Kellie told us she is basically self taught. She chooses natural stones or materials and found pieces...and 
lets the key focal dictate her other choices of beads and stones. 
I can't emphasize how gorgeous these pieces are. The subtle mix of the natural stones and iridescent beads, besides the intricate designs, were breathtaking.

OldNewGreenRedo

She had quite a few larger pieces elegantly displayed on black velvet 
and a few accessories in her booth. 
One side was filled with bracelets, that my pictures didn't quite catch. 
So I'm just going to show these stunning necklaces.

OldNewGreenRedo

Here you can see the wide variety of beads and stones she uses, 
all had stitched onto a backing and then lined with microsuede. 
I should have taken a picture of the back of one of her unfinished pieces,
 as the web of threads is art work in itself.


OldNewGreenRedo

 I love the Egyptian feel of this piece. 
We recommended she contact the Natural History Museum gift shop here in Chicago, 
for that venue would be perfect for this gorgeous work.


OldNewGreenRedo

Here the natural Carnelian and Malachite stones and beads are accented 
with several different kinds of gold and metallic beads.
 Exquisite!


OldNewGreenRedo
 Here's Kellie generously sharing her process and her goody box of unfinished pieces, 
each one more beautiful then the last.

OldNewGreenRedo
The box of works in progress.

OldNewGreenRedo

 Here is how she begins a work...starting with the focal bits and then building out. 
All the beads are stitched onto a base of felt like fabric. 
She told us everything is double stitched so nothing will ever become detatched or lost. 


OldNewGreenRedo
I love the rustic look of this piece with the wood-like stones surrounded with the pearl beads. 
The backing is eventually trimmed away and the face-lined with microsuede. 
The edges are then enclosed by beading and stitching the collar shut. 

OldNewGreenRedo
Wow! This one is going to be a stunner, I can see it now...with just a touch of bling with those iridescent Czech glass cabochons encircled with stone-toned beads. 
STUNNING!

OldNewGreenRedo
Kellie says, she is never quite sure where the design is going to take her and takes the organic approach of 'going with it for the ride'.

Even the simpler designs are intricate, 
here the focal stone dictates the bead rings in the collar. 
Remember every stone and bead is double stitched 
to the backing with amazing craftsmanship.


OldNewGreenRedo
Kelli has yet to start a website...but can be reached by email, please send your comments or inquiries to her or here, because this work needs to be appreciated and seen. 
Kellie Truppa -- k.truppa@att.net

Hope you enjoyed visiting an artist's work.

 I will be linking here to the following sites:

Sandi


All the opinions and photographs in this blog are my own, I have not been paid or reimbursed in anyway my opinions or posts. Please do not use photos without linking back to this blog without my permission. Thank you for your cooperation, Sandi Magle