Showing posts with label crafting. Show all posts

Wednesday, May 23, 2018

Craftroom: Moving In

Good weather finally hit in Chicagoland, so we were outside. I'm not fully moved into the basement craft room, but it is beginning to look like a real work/play room. This is just a preview, as with all new spaces you have to make 'friends' with it. Everything will eventually find it's 'space'.

oldnewgreenredo

The huge table is the BEST for sorting items. I did get tired of walking around it for two days while I moved things around in circles, LOL.


oldnewgreenredo

The sink still isn't hooked up, saving that for a rainy day. 

We added two IKEA corner tables for work stations. We opted for the tables for their work surfaces instead of cabinetry. The left one will be for painting, small assembly, and paper work. The right one will be for power tools, (dremel, sawing, jewelry, and hot gluing.) 
During this photo, I'm still sorting.

oldnewgreenredo

The pegboard rings hold plastic pots on the wall for storing pens, pencils, brushes, etc. I do have some for sale in my Etsy shop. They take a 7 1/2"-8" pot. IKEA has some perfect white metal pots that fit, but they are $5.99 each, so I'm making do right now with Dollar Store pots, and a couple of my own ceramics. 

oldnewgreenredo

I will eventually put up hooks for all my tapes, adhesives and small tools. A few pretties have been added. The bag was from a TJMax/Homegoods store. Just love the photo....great for a backdrop or I may frame one side.

oldnewgreenredo

I really had a lot of stuff to sort through and organize. I couldn't believe I had stuff stashed everywhere.

oldnewgreenredo

My Etsy Shop storage is below. Five of those bins are full of goodies I have to list.

oldnewgreenredo

Here is my collection of baskets, I probably have 7 or so more of these. 
They will be used for storage and eventually specific projects. Labels are temporary until I decide of something more attractive. The baskets will slide under the tables for easy access. 
This little corner to the left will be slotted for a permanent Vickie's Vintage 
and the new second floor addition. 
I hope to install shelves above for standing doll display, if I ever find my doll stands.

oldnewgreenredo

We've found that the doll houses aren't sitting level despite propping up here and there on the small tables. Everything is wonky and wobbly---as the floor is uneven, mostly higher at the walls. So, some rainy day the empty doors (raw wood you see), will be secured to the wall by sitting on an installed small ledge. Then the front will be on supported by adjustable legs so we can get the entire surface plumb and level.


The Grand (she's five now) Moved everything back into the houses. And she designed the back yard. 

oldnewgreenredo

(Seems the old garage was taken down during the move...so now the yard is larger.)
We have yet to reinstall the decks. I will wait and do that when we redo the support doors. All the clothing and accessories have been sorted and labeled in bins below.

oldnewgreenredo

Vickie's townhouse was enlarged by a second matching house I found for $4.99. This will be fun to rework, paint and really decorate. The garage will be enlarged when the new bases are finished.

oldnewgreenredo

The pegboard above will be flexible for storage and/or display. Quick shelves can be put up for lighter items. 

oldnewgreenredo

Here is the holding corner for projects. The lower shelf left is the stranded on the island set, above will be Joe's apartment. Parts of Vickie's Vintage shop, the bowling alley, the cabin in the woods, the bar setup from the Halloween setting, are all here along with extra dolls.

oldnewgreenredo

This eight foot long banquet table will be perfect for setting up temporary dioramas, having art/craft parties, and sorting through my antiques for the Etsy shop. Come on over and have a cup of coffee or some iced tea and have fun with me.

NEXT: Plumbing and Lighting


All the opinions and photographs in this blog are my own. I have not been paid or reimbursed in anyway for my opinions, posts or any products shown or anywhere I shop.

Thanks always for visiting. 
I will try and respond to every comment and answer every question.

Sharing at these Ad Free blog parties-with ads not in the middle of the blog (I'm going to try and see if this is possible)
Share Your Cup
Friday Favorites
What to do Weekends Party
Thank you for your cooperation, Sandi Magle
Sandi


Tuesday, March 28, 2017

Garden Mosaics Class


So a year ago---yes, a year---I took a CRAFT mosaics class with my friend E. 
I did a lengthy post on it, then, lost it---somehow. Disgusted, I went on to
do something else. Cleaning my folders, I found these photos all ready to go. 


http://oldnewgreenredoblog.blogspot.com


http://oldnewgreenredoblog.blogspot.com

Here is our instructor, Lisa Tolbert (left) from Mosaic Whimsies  setting up for the huge class.
I know this is a long post, so bear with me. 

http://oldnewgreenredoblog.blogspot.com

A greenhouse was the perfect place to do this kind of messy class. 
This was in March 2016.  We had 60 degrees when we went in, and then a rainstorm, then hail (not fun in a greenhouse) and finally snow in the three hours we were there---just an average spring day in Chicagoland.

http://oldnewgreenredoblog.blogspot.com

Well, here is the OLD bowling balls, all ready for us to choose from. Yes bowling balls to become 
mosaic gazing balls for your garden. A great REDO and GREEN project, everything used would normally end up in a landfill.  All your chipped dishware and trinkets, reused.

http://oldnewgreenredoblog.blogspot.com

Lisa had a few of her gorgeous pieces on display to inspire us. These were glass on glass windows. 
She teaches many classes and travels all over Chicagoland and N. Indiana.


http://oldnewgreenredoblog.blogspot.com

Her shabby chic pieces are always a favorite at local shows. Don't you love the pearls worked in.
 She does custom work for people. Check out her website.

http://oldnewgreenredoblog.blogspot.com

She had trays upon trays of scrap pottery, glass, baubles---
plus we all brought some things of our own to use.
 I think there were 18-20 people in this class. 
We each used a dollar store tray to pick out our pieces. 
It is surprising how many pieces it takes to cover a bowling ball.

http://oldnewgreenredoblog.blogspot.com


This was a large class for advanced or beginners. Lisa has quite a following. Here you can see the first of many weather changes---we went from HOT, to RAIN, to HAIL, to SLEET, to SNOW 
in three hours.

 The bowling balls were set hole down on flower pots for ease of working.


http://oldnewgreenredoblog.blogspot.com

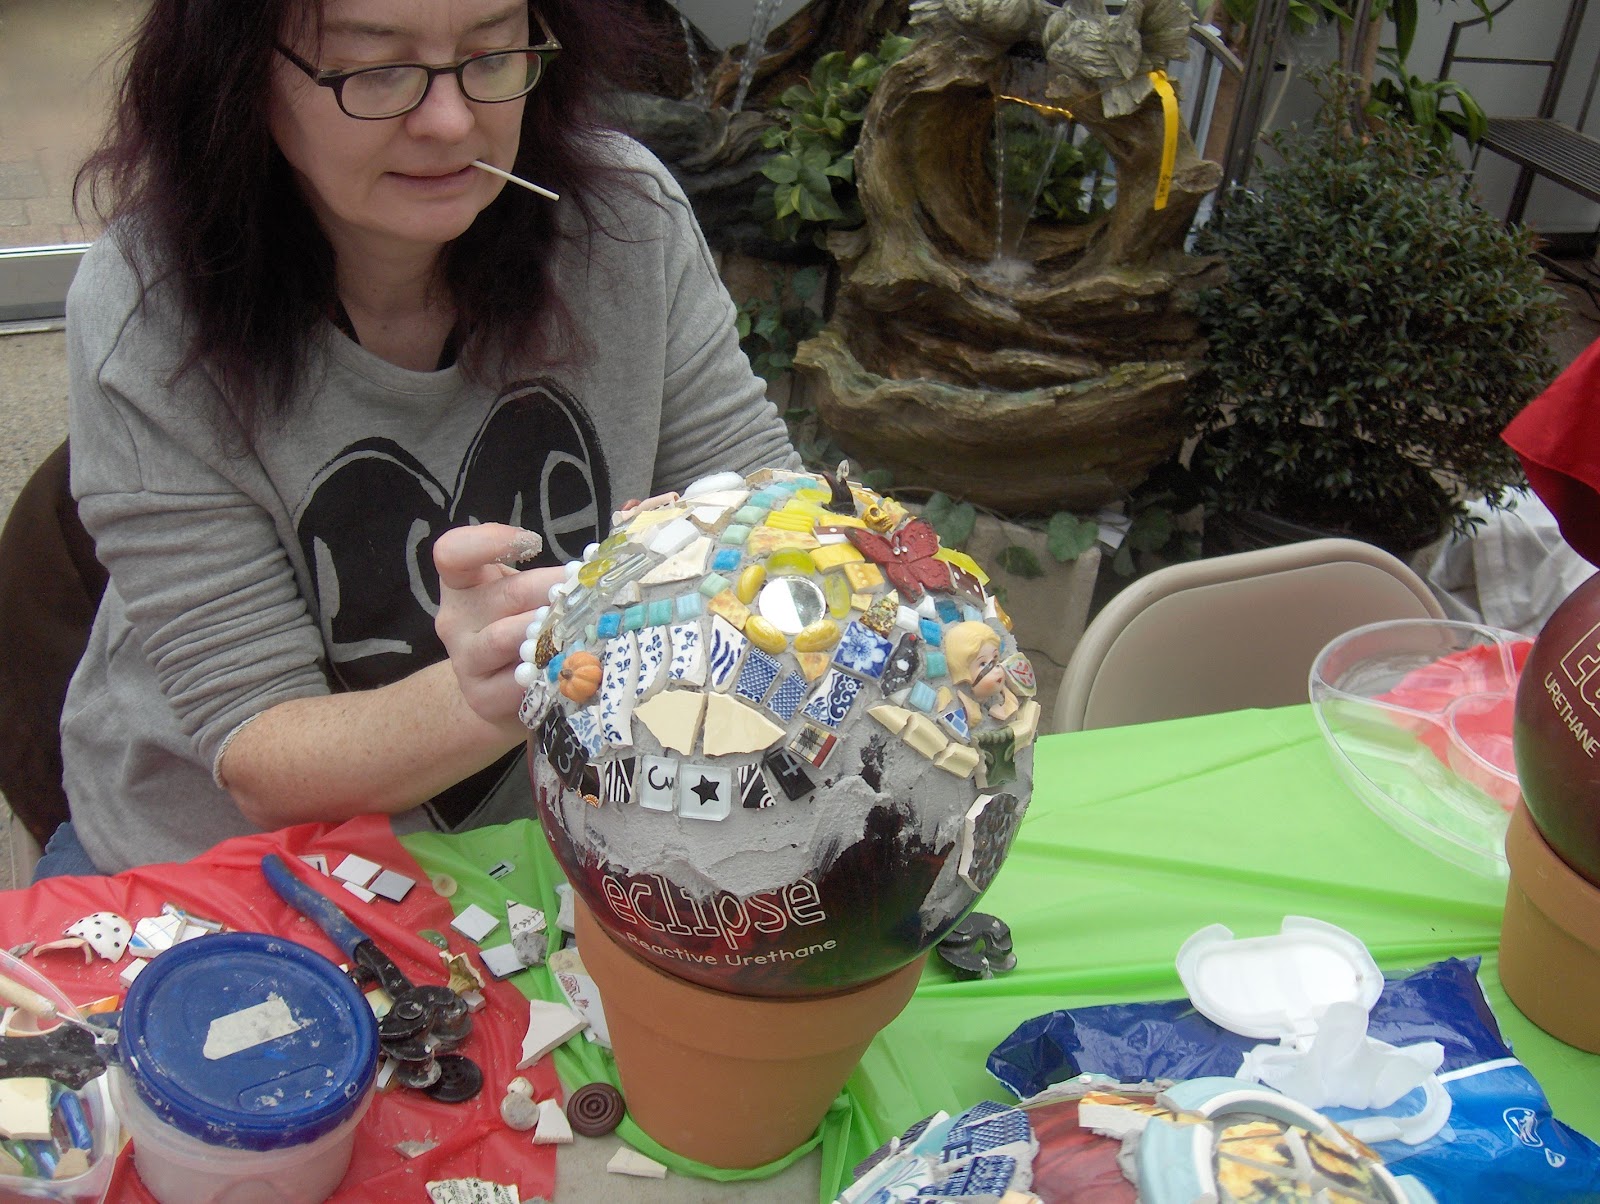
First you cut your pieces into workable sizes. The curved surface provided a few challenges. 
E worked with lots of interesting bits and pieces: 
jewelry, small figurines, glass, mirrors, game parts, fun stuff. 


http://oldnewgreenredoblog.blogspot.com

Some people are extremely controlled and methodical and
 follow directions to use pieces of the same thickness. 

http://oldnewgreenredoblog.blogspot.com

You can't help but get movement in your designs on a round surface. Members of the class 
were nice enough to let me roam around and take pictures.

http://oldnewgreenredoblog.blogspot.com

E again---concentrating. You really have to think small areas with this sort of projects, or

http://oldnewgreenredoblog.blogspot.com

...go with a pattern and stick to it, long as those pieces don't run out!

http://oldnewgreenredoblog.blogspot.com

Here's Lisa gave technical advise and encouragement. 
Mosaics like this are not for the hesitant, because the adhesive can become crusty in no time. 
Then, you spend more time scraping stuff off then getting anything done. 


http://oldnewgreenredoblog.blogspot.com

Group shot, to show you how different the bowling balls morphed into gazing balls. 
Flowers were a big theme and super for the round shape.

Everyone was encouraged to take home extra pieces to complete the bottom at home. 
A quick tutorial on how to grout your piece, was given and after three hours or so--
we were all sent home in the snow. 


http://oldnewgreenredoblog.blogspot.com

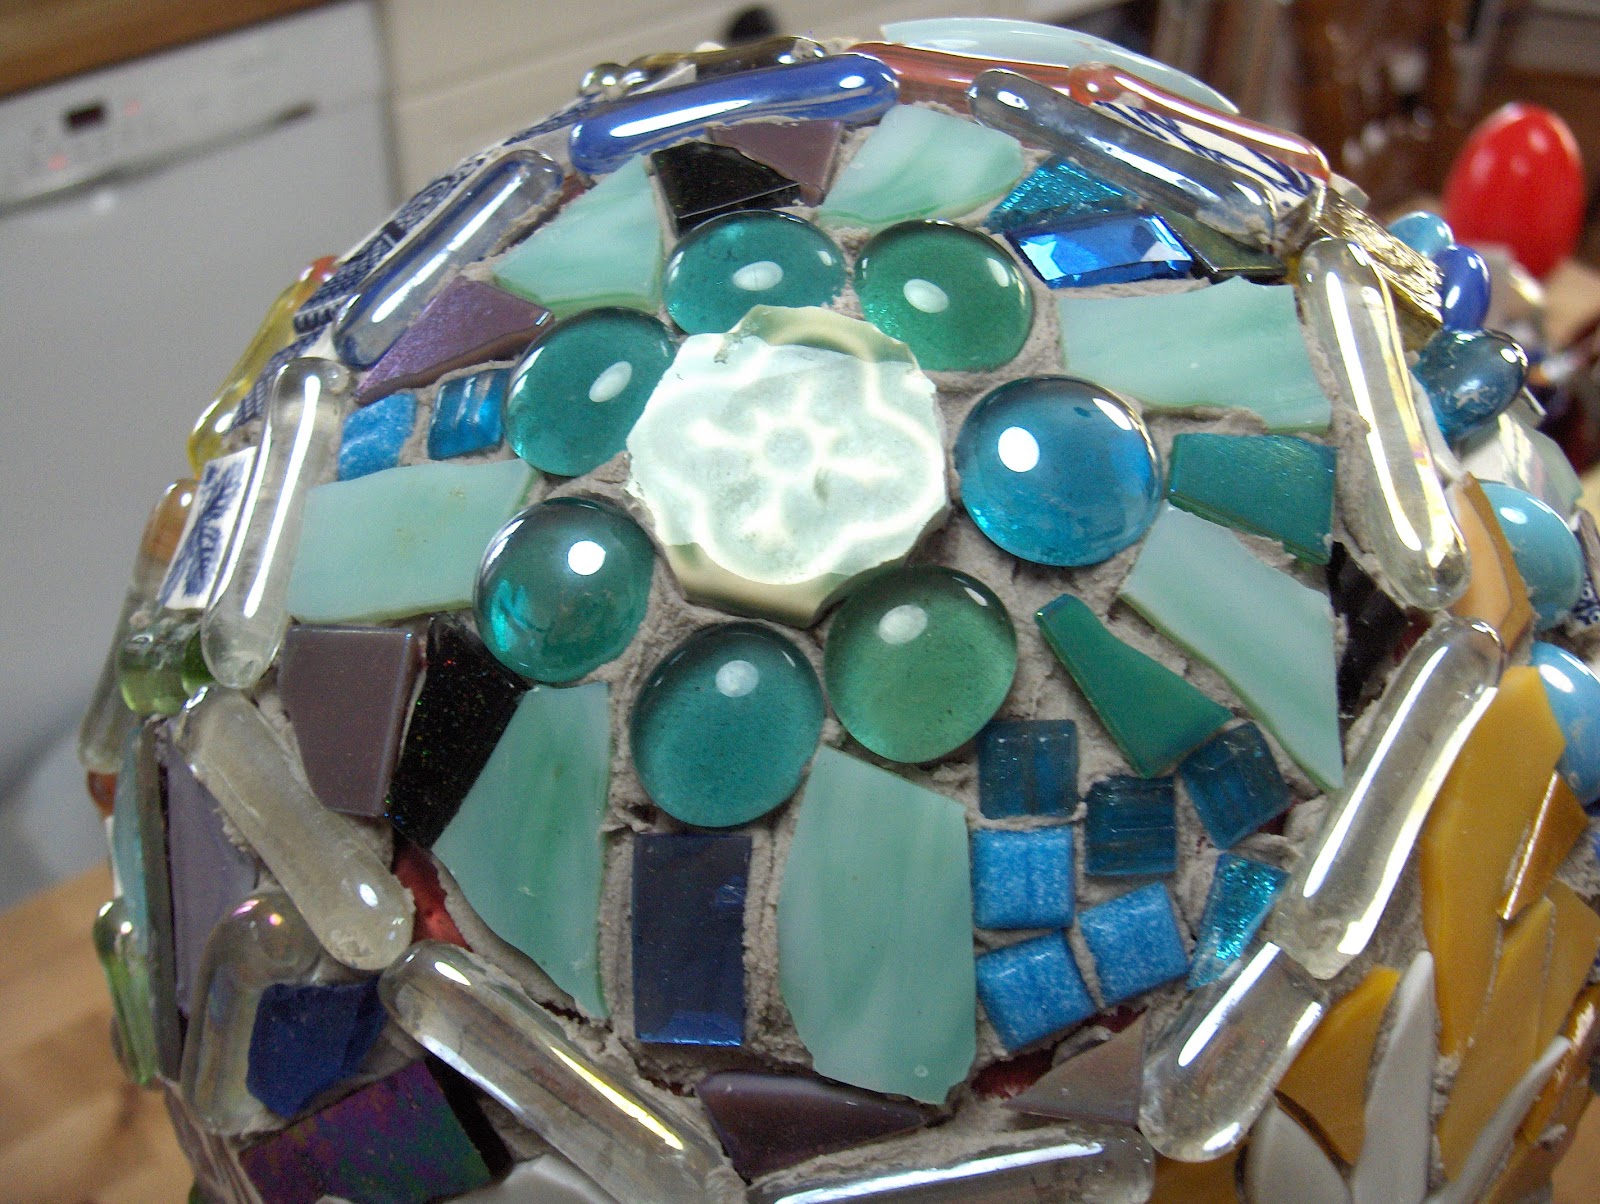
I started with these sort of flower mandalay type shapes.

http://oldnewgreenredoblog.blogspot.com

The leaves are toward the bottom.  I worked with glass pieces surrounding my focal points.

http://oldnewgreenredoblog.blogspot.com

Loved all the vintage dishes worked into shapes. There is some transferware here.
I'm pretty freeform and work with however my pieces break.

http://oldnewgreenredoblog.blogspot.com

This circle has mostly iridescent glass---which should show up brilliant with sunlight.

http://oldnewgreenredoblog.blogspot.com

Blue and white----Most of my chipped cracked dishes were blue and white. I used a few low bowl pieces on here, which were great for the round shape.

http://oldnewgreenredoblog.blogspot.com

on the other side more blue and white.


http://oldnewgreenredoblog.blogspot.com
I finally found this wire vase late last fall, perfect as a stand for my first Mosaic Garden Ball. 
I think this post qualifies for vintage, even though I created something NEW.

Now to mix up some mossy green grout...
http://oldnewgreenredoblog.blogspot.com

This made quite a mess in the kitchen but went very fast. Roughly 30 min, from mixing to the end.


http://oldnewgreenredoblog.blogspot.com

After the grout is totally set, I will go back and scrub the surface clean with a scrubby.

http://oldnewgreenredoblog.blogspot.com

Now to spray the base, that will be another day, if we ever get Spring.

Thanks always for visiting. 
I will try and respond to every comment and answer every question.

All the opinions and photographs in this blog are my own, I have not been paid or reimbursed in anyway for my opinions, posts or any products shown or anywhere I shop.
 Please do not use photos without linking back to this blog without my permission. 
Thank you for your cooperation, Sandi Magle

I will be sharing at these fine Parties!


Sandi