Showing posts with label Paper Explorations. Show all posts

Monday, August 18, 2025

Text Collage Explorations with Mather for Seniors

Ad-Free Blog

Text Collage Explorations with Mather for Seniors

oldnewgreenredo

The prompt for my Mather Paper Explorations class was to use Text as the theme for your Collage. I frantically ripped papers...far faster than cutting. I had chosen a bunch of pages to use, almost the only thing I cut was the focal point boat "Blue Bayou" from keyboard tinted music sheet.

oldnewgreenredo

 Starting with black cardstock paper...for a background...moody and a great base for collage. Again we were working so fast, I just have photos of the finished product. I love the time limit... which makes me flow with gut instincts instead of over-thinking everything.

oldnewgreenredo

Here is the entire piece after completing. I tinted blued music with a tan alcohol, and also used some tan on white music sheet ripped for tree trunks and roots. 

Accents were added with blue metallic pens...and gold/copper pens. Also using bits and pieces of foliage from oodles of garden pages.

oldnewgreenredo

A log cabin porch inserted as a houseboat in the bayou, with a dock. adding all the bits of leaves and folliage was fun and interesting. I would have loved more hanging moss, but used blurred photos of greens for that.

oldnewgreenredo

I did color many of the torn edges with pens to let the foliages blend..and accented others for shadows. Water shows here and there.

oldnewgreenredo

The left side of the page has some added streaks of light creeping through the trees.

oldnewgreenredo
oldnewgreenredo

oldnewgreenredo

In another class we worked with printed TEXT torn into shapes and doodled on. Again, dark paper was suggested for the background. 

 I had an old craft magazine from the 60's that I tore the advertising pages out from....classifieds...this was craft shopping in the 60s-70s...no online businesses at all. Craft stores were few and far between except in larger cities.
oldnewgreenredo

Some of the classifieds, had photos or accent stripes/frames or photos of products. Photos, which I used very few. I tore shapes mostly diagonally across the classified pages. Fitting the shapes on the black page, and gluind down, but leaving lots of black card-stock base showing as was suggested.

oldnewgreenredo

Composition was basically to fill the paper. The marking and doodles were all done with alcohol markers on the text. The markers have varying strengths and opacities. I liked how the text still showed through and the ad dividers became part of the designs.

oldnewgreenredo

I sort of like this alignment...giving this a landscape feel.

oldnewgreenredo

Fun play exercise. I also used some colored pencils subtly on the black areas. Colored pencils didn't work very well on the vintage glossy classifieds,  but the markers were splendid in color and intensity.

Fun class with Mather Paper Explorations on Zoom.

More Mather free online classes for seniors can be found HERE

All the opinions and photographs in this blog are my own unless identified, I have not been paid or reimbursed in anyway for my opinions, posts or any products shown.  


Friday, July 11, 2025

Paper Explorations: Natural Resists on paper.

 Ad-FRee Blog


Like any art project some things that are 'pro' level are expensive. One of those items is watercolor resists. $15.00+ per small bottle. Since this is OLD NEW GREEN REDO...how about using some household items for resists.

oldnewgreenredo

The Mather handout for this week's Paper Explorations was interesting.

Materials:

  • Acrylic paints, (I used craft and tube)
  • Thick paper such as mixed media or watercolor paper ( I used rough finish watercolor paper, I used FineArt (Walmart) 140# pad bought on clearnace)
  • Paintbrush or sponge
  • Pencils


All of these are inexpensive resists

For soap resist:

  • Liquid dish soap (Dawn)
  • I wondered about drawing with bar soap????

For glue resists:

  • Washable glue stick 
  • Washable liquid washable glue (I used Elmer's Clear)

 OTHER OPTIONS for resists.

     Wax crayons, oil crayons/pastels, grease pencil for black lines (These will all repel the acrylic or watercolor on top of them)


Optional materials:

  • Stencils or paper cuttings to use with glue
  • Hair dryer (to speed up drying)
  • Spray bottle (for rinsing)
  • Alcohol markers (for background colors accents)
  • Paper toweling or soft towel
oldnewgreenredo

First my supplies...trusty alcohol markers, some luminescent acrylic craft paint, my clear washable glue, FineART (Walmart on clearance)140 Water Color paper, (rough side, if I do this again, I'll try the smooth (tight) side.)


PLAN B. I left the bulk of the washable glue partially on the paper as it was let it dry spread out and some spots bare. 

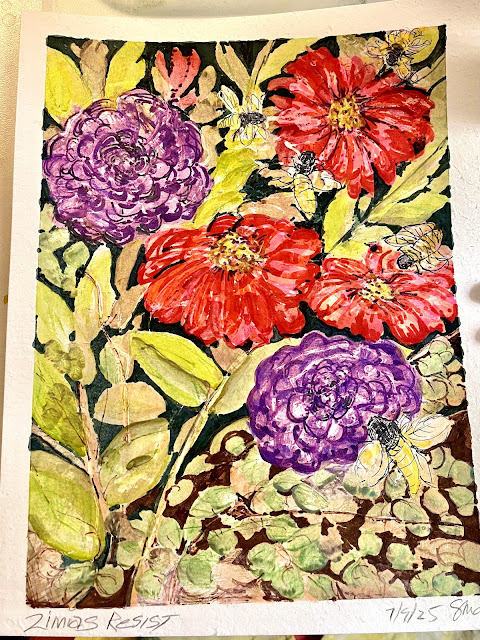
I had a night-time painting idea with Fireflies on Zinnias with a dark background and the highlights of the glue to be the lightning bugs and moonlight on the Zinnias...well.... I scribbled some rough outlines in green Prismacolor pencil (also a bit resistant) for guides and then the glue as lines.

Original Directions:

Apply glue/soap resists and sketches on paper, let dry. Paint Acrylic over, let dry
Then wash by spritzing with water, or wet cloth/paper towel, or under the faucet. 
Wash the acrylic off the top of the glue and then wash or rub the glue off to expose the light areas paper. 
Treat the open areas with more paint, markers or leave exposed. SOUNDS SIMPLE.


After the sketching, glue and drying.  I painted my first washes of Acrylics I left them to dry.

To remove the paint on the glue, I carefully tested my paper first with paper towel and spritzing to lightly rub off most of the paint, then the glue and found very quickly the paper began to peel a bit, while the glue broke down and just thinned out covering larger areas  still on the paper. A mess of sorts and blotchy.

PLAN B. I decided to leave the bulk of the washable glue partially on the paper as it was and let dry spread out and some spots bare. Results Below


oldnewgreenredo

Okay, I used the resist for stems, sticks, bug outlines flower edges(lined), but the glue wouldn't dry so I tried to wipe some off or make petals, to get it to dry within the class time. 

The rocks on the bottom of the painting were scribbled with White Oil Crayon that melted with the hairdryer, so I scratched on that  surface to remove some for texture. I may try an entire piece with this crayon and see what happens. The brown marker filled in the lines I scratched out. 

I used the acrylics thinned out a bit...letting these dry again and then began working on the background in Dk Green and Dk Brown alcohol pens. It's really not night-time at all by this point.

PLAN B. I left the bulk of the washable glue partially on the paper as it was let it dry spread out and some spots bare. 

oldnewgreenredo

It's hard to see the glue textures, but you can see some of my green sketch lines underneath that I used and then added the glue.

oldnewgreenredo

Quite the mess? Now what?

oldnewgreenredo

I was afraid to try and scrub all the glue further than this. Well, instead of working with more Acrylics, I grabbed my alcohol markers in lighter shades first, then darker colors which worked right on top of the glue residues transparently. HMmmm, VERY interesting.

If you haven't tried inexpensive alcohol markers from 5-Below...do....these types of markers in name brands cost 3-5$ each and a whole set is $5.00. I have had to add alcohol to a few drying ones after having them for 7 months. Easy peasy and cheap. I have papers and papers covered in these markers and the tips have held up well. I seldom make recommendations but this is a must have.


oldnewgreenredo

With light marker colors I went over lots of the whites, then accented with darker pens on top of that...still leaving bits of white here and there. We do have Peppermint Zinnias coming up here.

oldnewgreenredo

Before working over


oldnewgreenredo

These are the same areas, after adding some yellows to brighten it up to match the flowers...now Day light and the bugs will become Bees... I just need to add some black stripes.

oldnewgreenredo

Yikes scribbled ZINNIAS...missed an N.?


Same areas after applying the alcohol markers and details.

oldnewgreenredo
oldnewgreenredo

Both photos the same areas. Since this wasn't the plan, I don't consider it a failure, but a learning experiment with unexpected results, lol.

oldnewgreenredo

I will definitely play with these homemade resists and applications. And, I didn't have to go to the store and spend $15.00. Upside of the glue, it could be brushed on with a bit of water easier than actual masking fluids, which are instantly gummy and sometimes difficult.

oldnewgreenredo

My favorite bit from this exercise.  You can see my expensive watercolor tape, actually lifted the paper surface after two hours.???

 I will be using this paper I think for Sketchbook bits or quick watercolors. Or I will try the backsides and see if it holds up better on the smoother side.

Next art post will be all the other resist techniques in a more clinical way with examples. Finding out what a specific product does or doesn't do, 
 is worth the effort!


WHAT NEW IDEA-TECHNIQUE 
HAVE YOU TRIED LATELY?

Thanks to Free Mather Senior Online Classes 


All the opinions and photographs in this blog are my own unless identified, I have not been paid or reimbursed in anyway for my opinions, posts or any products shown.  


Thursday, July 3, 2025

Paper Explorations and Paper Cutting, Two summer themed projects!

 Quick post, such a busy week. We have two birthdays here and the 4th festivities...so hope you all are busy and having fun, too.

Paper Art Explorations and Paper Cutting!

My first Paper class was assigned to do postcards of a vacation scene, cutting or tearing your papers. I had been in the garden all morning, so I was madly tearing bits and pieces from magazines and some papers I had in my file as the instructor talked about the concept of postcards.

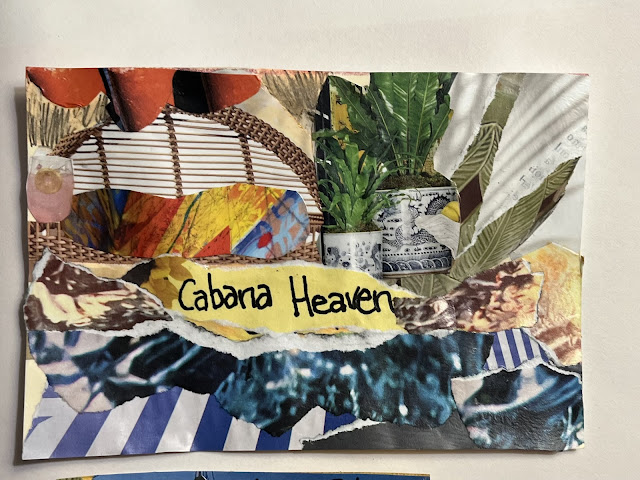
This  Size of 4" x 6" is really small for me, but I followed the class guides. I worked on some card stock. The first one started with the cool potted plants image and a screen which I used as a back to an imagined deck lounger..the blue torn strips are water and the rest is jus shadows, colors, rocks...and bits of pebbly beach all from various papers and images from magazines.

Again, two little projects in roughtly 40 minutes. I use Elmer's school clear water-based glue and love it. It dries quickly and doesn't disturb the colors of anything, and you can work on top of it. The glue does slightly repel alcohol markers. 

oldnewgreenredo

If I had time I would have searched for an interesting vacation related word...for the center, instead of my lousy lettering.

oldnewgreenredo

Warmed up, the only thing I cut for this postcard was the tree shapes at the top...everything else is torn papers, in fact so much was off the page of 4"x6" that I just trimed all the edges even with my measured card base.
Niagara Falls is gorgeous and on a sunny day the water is every color and glistening. I tried to capture that memory with cool and warm blues and whites.

oldnewgreenredo

Tools and Materials Used for these were 
card stock, scrapbook papers, magazine pages
Elmers Clear school glue, 
magic marker...
oh, and a square/ruler! 

Paper Cutting Class
This Piece was from this week and it was supposed to be distressed by removing colors of the pieces and background by sanding/salt sanding with a texture underneath. 

oldnewgreenredo

I'm learning to work really fast. I have some of those expensive craft magazines, and create magazines besides files and files of articles on antiques, gardening and home decorating---these are from before Pinterest., When I purged my magazine collection I saved so many pages I have file boxes of them sorted according to topic. Now, with pinterest, there is no need to have printed materials...when you can have every image available there.

oldnewgreenredo

This is page is roughly 11" x 14" on some paper from inside a purchased thrift store frame, a little heavier than printer paper, and lighter weight than cardstock. It has a bit of a sheen to it, but accepted all the materials I used.

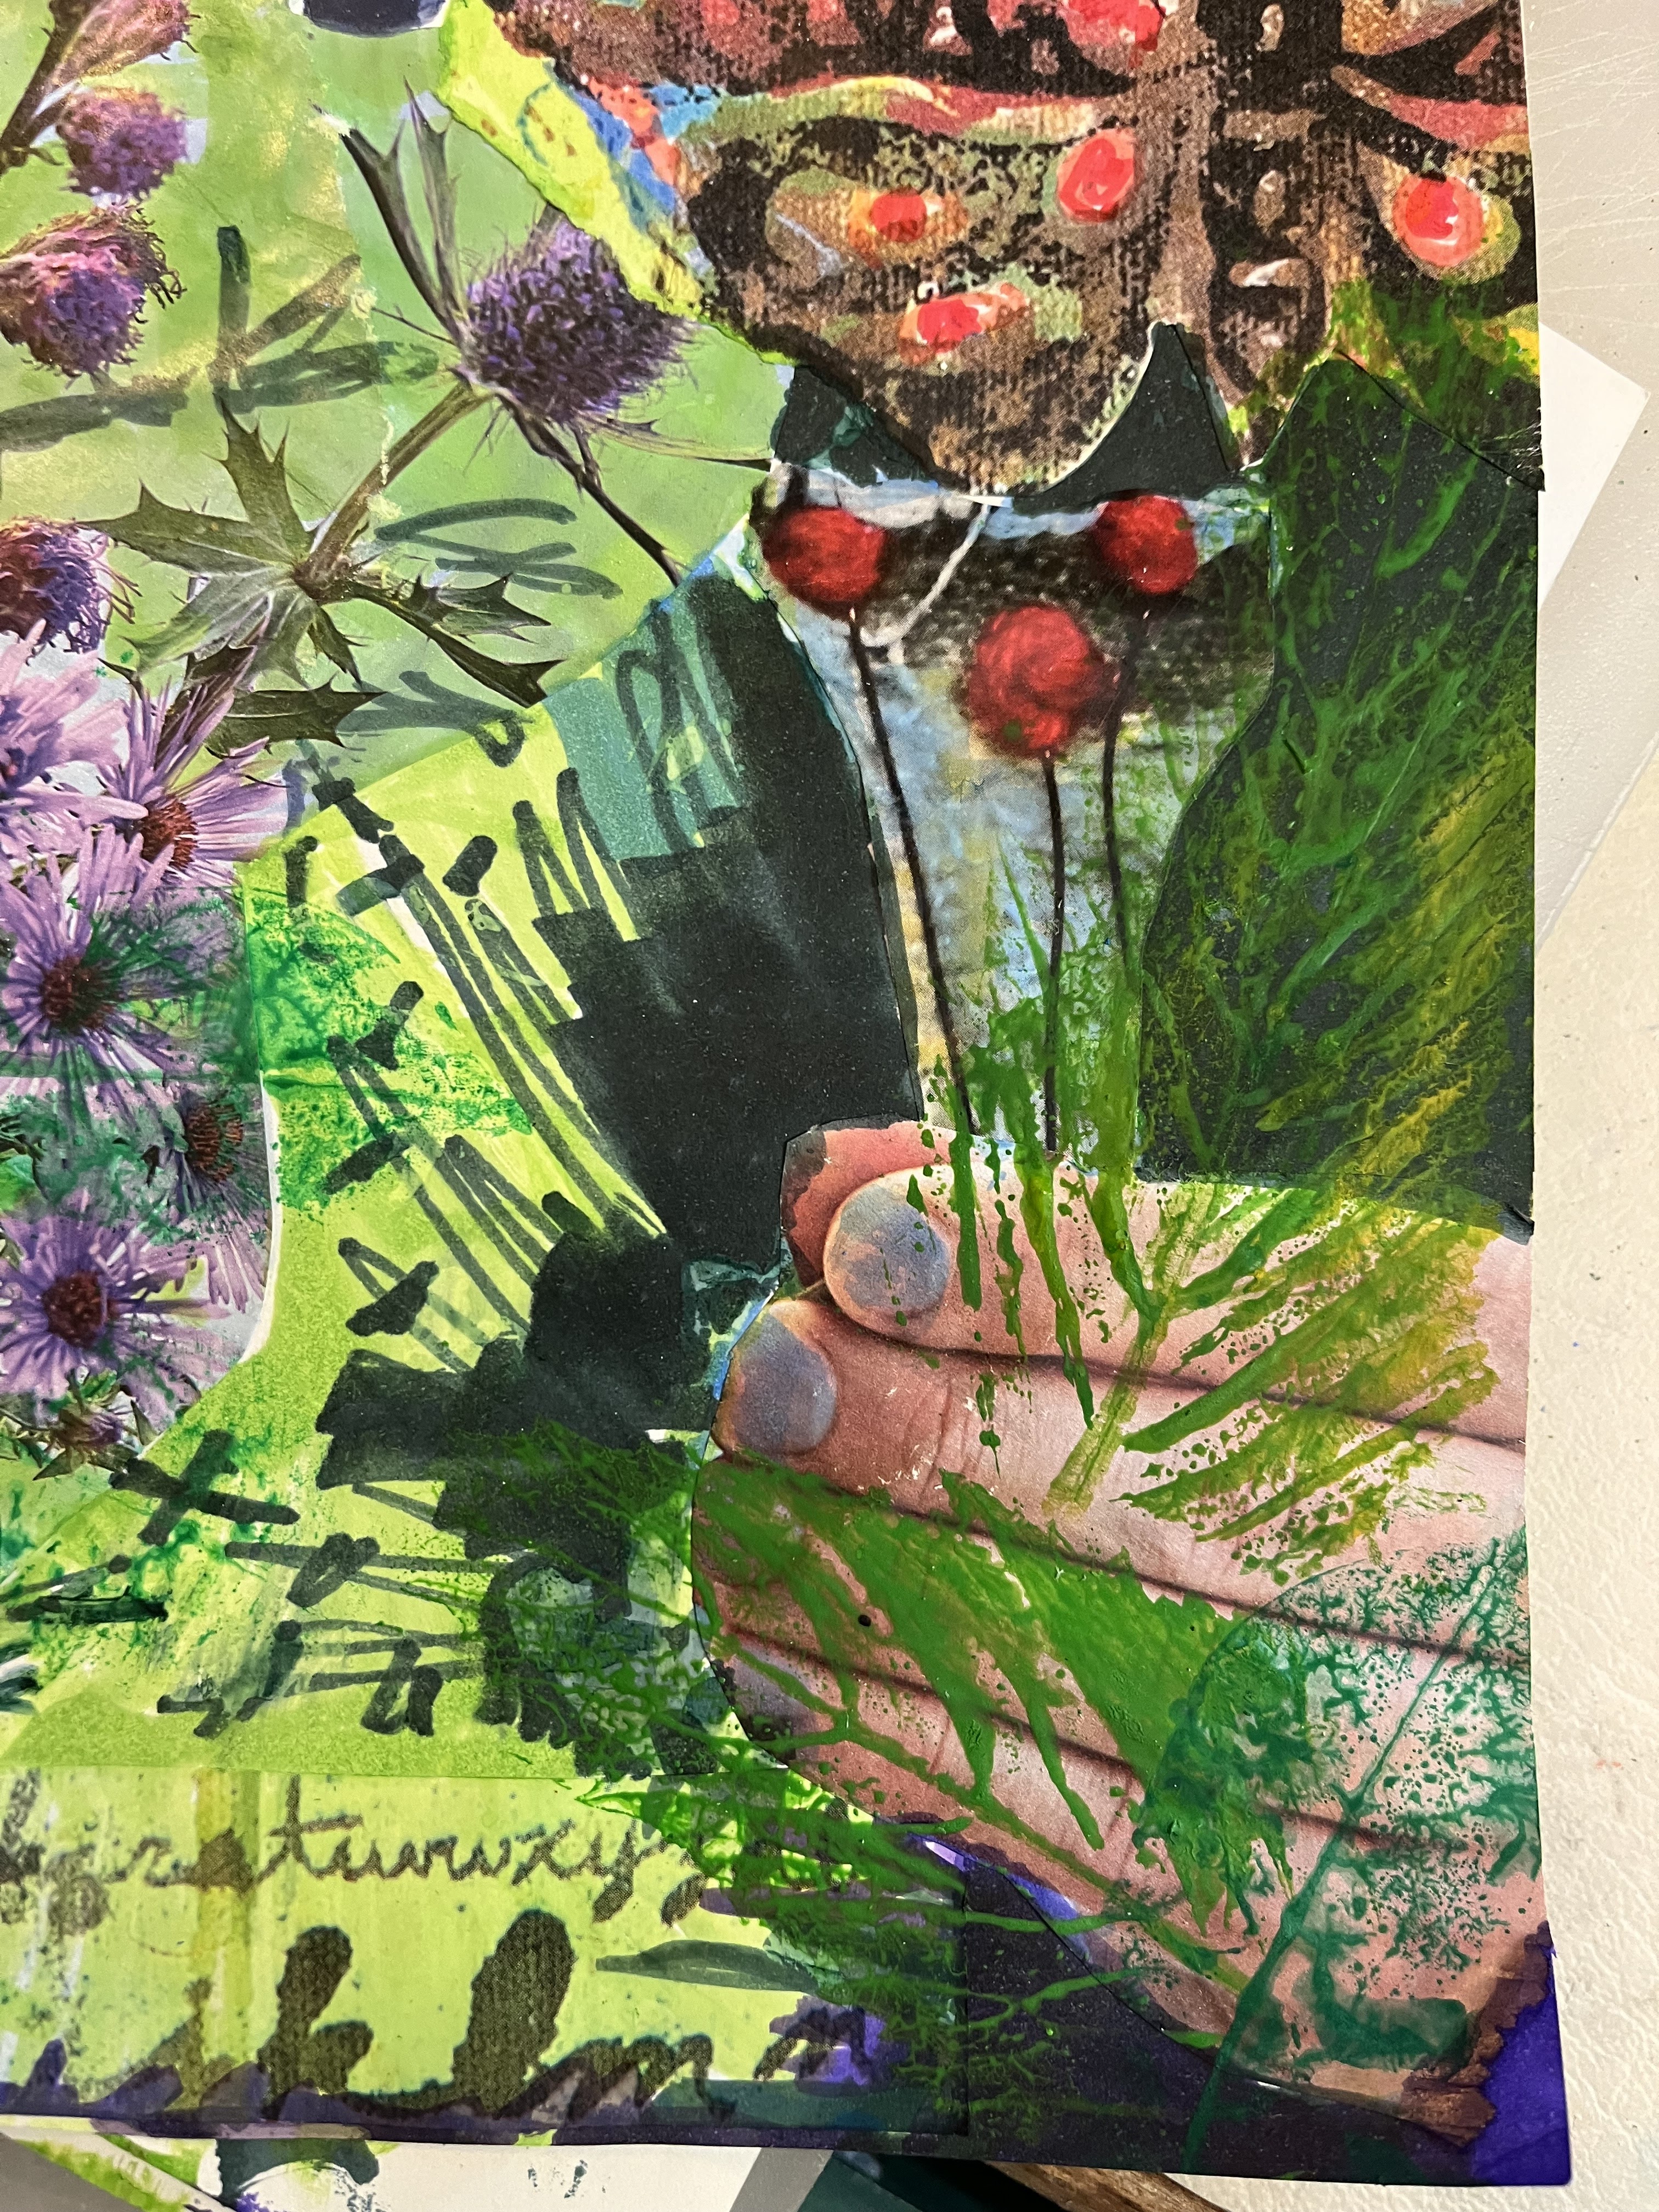
Gardening has been all I have been doing, and that great beetle image was the start and then the Hands...again, working within the 40 minute time frame...I'm getting really fast at making choices on the spot. Paralyzing indecision is really a stumbling block to making Art. Your brain is your worst enemy sometimes. 
Here,  The sun was a design from an article on stamping? 

I loosely cut out the beetle, the background was white, but alcohol markers were a quick fix of that. The dark background where I had planned to do leafl, twig rubbings/distressing were done in alcohol ink, which ended up entirely saturating the paper---which I didn't realize. I thought that sheen would cause the markers to sit on top. NOPE!

oldnewgreenredo

Heres my tools and scraps...the leaves twigs I wanted to use for rubbing/distressing.

oldnewgreenredo

The images of the hands really add a personal touch to this work...touching Nature...I think you can smell those mini Asters and Sea Holly.  I have two big branches of Sea Holly growing in the garden, can't wait until they turn dusty purple.

oldnewgreenredo

Well the distressing didn't work...because of the heavy saturation of alcohol marker and the images on the heavy magazine papers! These really didn't want to distress either...so I painted my leaves and printed the fresh leaves in several  greens of Gouache. (opague/semi opaque water-based paints from tubes.)
I've had the set for ages and just hadn't used them. 

oldnewgreenredo

I also altered othere areas with more ink...added some extra orange, marked the nails in blue/green, and disquised any white background in some shade of green, blue, or dark purple. Lines and business were added for the texture I was missing from not being able to distress.

oldnewgreenredo

The Moth/Butterfly image is marked up, I added more orange and red. The darks are dark blue and green markers in the background and around the leaves.  Here and there are some colored pencil enhancements, mostly in oranges and green.

oldnewgreenredo

To end on the Upbeat, I will try  another simple image and maybe a painted gouache background and then try some distressing with sand paper and stencils, or branches of heavier cedar or fir pieces.  
Lace, mesh, crushed papers/aluminum foil were suggestions. I think I will try them all and do another post. But, not today!

Anyway, I loved doing this and creating the positive message...which is perfect for this time of year!
Summer solstice and all! I do love the experimental aspect of this paper work, which is really a new lesson  for me. 

Thanks to Free Mather Senior Online Classes 


All the opinions and photographs in this blog are my own unless identified, I have not been paid or reimbursed in anyway for my opinions, posts or any products shown.