Showing posts with label sketchbook Revival Bingefest. Show all posts

Thursday, June 12, 2025

Sketchbook Revival Binge Fest with Karen Stamper: WILD GARDEN

Ad-Free Blog

Karen Stamper was the instructor for this 'Wild Garden' multimedia foldout in my sketchbook. 

Karen is an artist who works in multimedia..is a firm believer in working in sketchbooks everyday in a million different ways. 

This particular exercise of the Wild Garden was to use different media: Charcoal, pencils, pens, ink, erasers, watercolor, crayons, resists, mono printing with leaves, scratching...you name it. All in like 30 minutes.

oldnewgreenredo

She uses multi-page accordion sketchbooks. We were encouraged to add paper by taping to make an extra foldout in the sketchbook. I only did three pages, because I was slow. I had gathered materials together, but not everything that she was using.


oldnewgreenredo

Karen is British and talks very quickly...so my scribbles of instructions are a bit garbled. And I write in a sort of crippled shorthand-my own version.

Left column: Wild Gardenm, Multi-media, Charcoal pencils, (drawing Pencils) SMEAR, Soft Prismacolor(white and black), black acrylic or watercolor paint, White eraser, ink pens, sponges, tape, scrub brushes, washi tape, black, fine point markers.
(forgot to write down, pastels, conte crayon, or oil pastel) because I didn't have those available.

Right Column: other recommends, inks, ink sprayer, water sprayer, water. 


oldnewgreenredo

We started working across the page with broad scribble strokes with crayon or charcoal pencil. I used the charcoal pencil layed on it's side. These were to be 'trees/grass/ or branches. Next she wanted ust to scribble some leaves, then add white crayon or wax to make some blank spots, smudge some of the charcoal. We then added printed leaves with paint...I stuck my fingers in the paint and put some blobs, thinking they might look like mushrooms

oldnewgreenredo

Here's my other note. In the middle of the whole thing I tipped over my water (small amount) and not wanting to miss any of the lesson, I used coffee with creamer from my cup to make some washes on the left side pieces.

oldnewgreenredo

Resist was formed with the crayon, and I had a resist pen that made the tiny speckles...circles, loops, lines ---she encouraged all these movements...

oldnewgreenredo

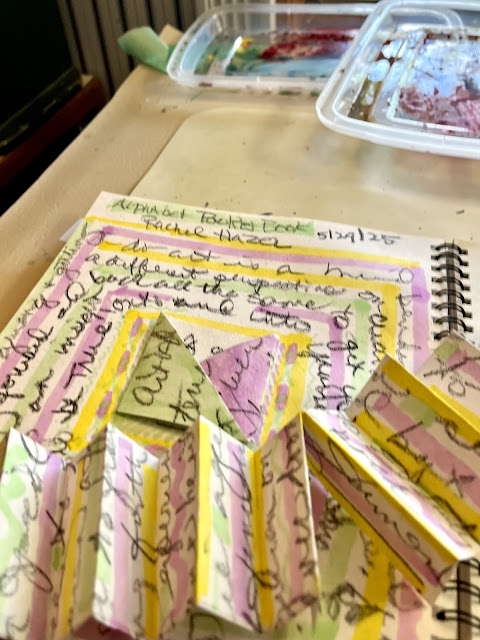
Here you can see the writing is bleeding through on the back side. I mistakenly grabbed mny alcohol spry instead of water and it activated the pen on the other side. I was really scurrying to keep up--so another lesson be aware of what you use on your surfaces.

oldnewgreenredo

Is it art...no....I think it is exactly what it's meant to be...play and experimentation. I found some things I did in the heat of play I will use again. 

oldnewgreenredo
Here you can clearly see the mono-print leaves (peppermint) and the mini fine print pen details of small plants on the garden floor.

Maybe even the coffee ....LOL

oldnewgreenredo

I will definitely explore doing multiple page/accordian style sketchbooks. I have another prompt of hers that I'm going to try ...a city scape multimedia, and I'm collecting collage materials for that, which will be much more controlled and realistic. 

HAVE YOU Had FUN trying
 ANYTHING NEW
LATELY? 

Coffee watercolors Anyone?

Thanks always for visiting, 


Join me at these fine blog parties:


All the opinions and photographs in this blog are my own unless identified, I have not been paid or reimbursed in anyway for my opinions, posts or any products shown.  


Friday, May 30, 2025

To Thine Own Self be True! A Journaling Page in the Sketchbook.


I'm trying to choose different ideas and applications that I wouldn't normally do...Affirmations is something 
I DON'T DO. ?

oldnewgreenredo

So, I viewed this tutorial titled under affirmations titled 
Alphabet Pocket Book with artist/instructor Rachel Hazel 
listed in the 
Sketchbook Revival BingeFEST tutorials.

oldnewgreenredo

First thing we did was make a small envelope after we scribbled words/thoughts/affirmations on an entire piece of paper. We used a portion of the paper to make a small envelope.

I used a thick grease pencil on my sketchbook paper and covered it with words loosely written in cursive. Grease pencils glide across smooth paper, and I knew I could use any medium on top of it if I needed to.

oldnewgreenredo

Then, I made a folded book or sheave of small pages to go into the envelope from that first page.

oldnewgreenredo

I was thinking all the time, how in 20 years time, very few people under the age of 40 would be able to read this...hmmmm? 
I enhanced the lines with some colors and scribbles with some pastel alcohol markers.

oldnewgreenredo

The envelope was centered and glued on the page and the 'book' sheave inserted in the envelope. 

Next for some free expressive writing, also called automatic writing. I really don't know what I had written on the first page and it was all chopped and folded up---so, we will never know. 

oldnewgreenredo


 I started thinking...um, I'm always thinking, I have a brain that doesn't shut off. I did a few deep centering breaths and started on the outside of the page and wrote about my art. Outside and around, by now I was thinking of all my relatives who wrote letters going around the edges of the airmail pages to communicate their last little thoughts and best wishes, and how that sort of writing would center around the little message envelope...so I kept going around and around.

By the time I was done I had no idea of what I had written...true automatic writing, letting the movement and the action take over your words.
 
I remembered the first few words and then my brain took over leaving the experience behind.  Here are my words...scribbled around the page, I had to go back and see what I wrote.


I had a painting teacher in college that was fond of saying, "To Thine own Self be True." That was the 60's when people were trying to experience everything, whether it was something they wanted to do or not. 
It was a time of doing New for the sake of new, of brilliance and fake brilliance, when you look back.

oldnewgreenredo

At this point I added more color...and some doodles around the small envelope. 
So this was my journaling, affirmations and scribbling.
This entire exercise took about 20 minutes, really a quick project.

Somehow I don't think I would have the same result if I started out with any sort of  
INTENTION!


All the opinions and photographs in this blog are my own, I have not been paid or reimbursed in anyway for my opinions, posts or any products shown.  


Thursday, May 29, 2025

Sketchbook Revival BingeFest: Mixed Media Flora Studies with Joy Ting Chardre

 Ad-Free Blog

Mixed Media Flora Studies with Joy Ting Chardre  

Sketchbook Revival BingeFest 2025...this is an online signup free for access to some older tutorials by different artists. A month worth of projects and over 5 years. So that is 131 tutorials to choose from to do in a limited amount of time.


I loved working with Joy, and I really worked on this for maybe 1hour and 45 minutes. The tutorial was roughly a bit under an hour. Joy is lovely and so expressive in speaking about her art and taking some of the fear away. Using sketchbooks as a stepping stone and a license to experiment on techniques and materials.

oldnewgreenredo

This was the perfect though complex first project for me in this series. I'm too cheap to enroll in the 2025 month...but they offered free access to 5 years worth of old tutorials. So I'm picking and choosing which instructors and projects I'm going to work on, emphasizing mixed media as well as watercolor...and maybe just something different. 

oldnewgreenredo

The project focus was to work from a clipping/photo or old artwork, and do a couple of quick studies for colors. 

I chose a 1/2 page scrap clipping from a Fructose Magazine. I don't have the name of the original artist. I love the dark and bright of the colors in this photo of artwork.

oldnewgreenredo

Drawing some small rectangles on my sketchbook, leaving an area open to the side for color ID and color mixing. I experimented with the colors I had on my palette.

oldnewgreenredo

These three palettes were all loaded with the same 3 colors...a crimson, a yellow and a cerulean blue from a watercolor play session with my grandgirl and d-in-love.
 These watercolor tubes were from an inexpensive set from Michael's in an art kit that included an easel, watercolors set, acrylic set, brushes, palette, drawing pencils, paper, and a portfolio. It was one of those Christmas specials...that went on super sale right after the holidays. Basically the cost of the Large portfolio alone.

In one of the three palettes I had originally added some burnt umber. Everything else was mixed from these basic colors. It's surprising how many colors you can get doing it this way.

oldnewgreenredo

After about 20 minutes of mixing and playing with some of the flowers, 
oldnewgreenredo

we were encouraged to do a full size page of some detail from our source photo.

oldnewgreenredo

I lightly sketched with water color pencils. After the sketch was laid out, I used alcohol markers in Dark Gray and Dark Blue to do the background before I painted.  One of the things I couldn't do with the limited palette.

oldnewgreenredo

On this version I also added the small pans of color. I used the upper left blue, a dark teal green and some of the dark browns. This was a inexpensive kit from Walmart, I think.

oldnewgreenredo

The multimedia came in with the colored pencils worked here and there, a charcohl pencil, and I tried several different white pencils, along with some greens and yellows for highlighting. 

oldnewgreenredo

Pencils are charcohl, Prismacolor soft, and watercolor pencils by Artist Loft, Michael's store student brand.

oldnewgreenredo

I was intrigued with the Eucalyptus that was lavender in the scrap photo, but it morphed into greens to balance out the cabbage leaves. The grays in the thistle were balanced out in the dark foreground. Making a large scale subject matter in a small space is always tricky. Composition has to include positive and negative space. I chose the elements I was interested in working on and tried to place them in a cohesive compostion.


oldnewgreenredo

Total working time about 1 hour and 40 minutes for the quick color sketches, the tutorial, and working through the tutorial on the larger page. I did a bit of pencils at the end...the soft Prismacolors work well on top of alcohol ink as well as watercolors. 

I'm going to make sure I look for any other tutorials Joy did over the last 5-7 years.

Please ask any questions...as it's really hard to do photos when you are working from a tutorial. 

But Remember, first of all, 

Most of all------HAVE FUN!!!

All the opinions and photographs in this blog are my own, I have not been paid or reimbursed in anyway for my opinions, posts or any products shown.