Showing posts with label refinish. Show all posts

Saturday, April 30, 2016

 Vintage Church Pew Redo

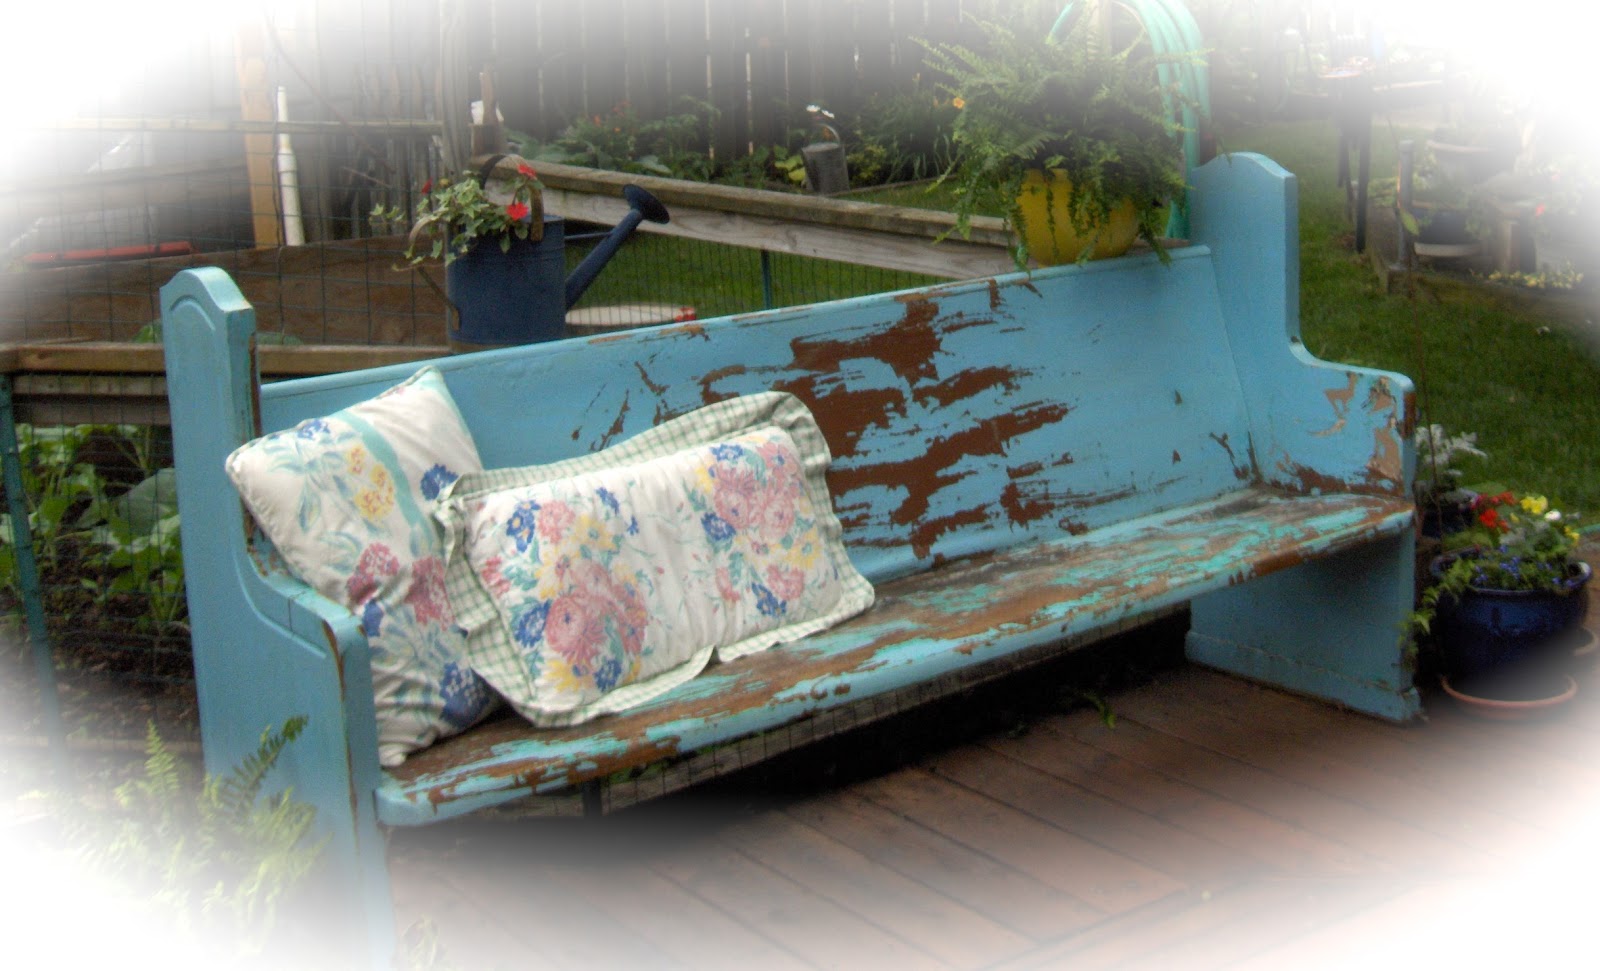
I found this wonderful church pew with at least five coats of paint at the Lake County Fairgrounds Antique Fair in Spring of 2015. The seven-foot length would be perfect extra seating on the backyard deck. I just loved the funky layers, two shades of brown-tan, the varnished oak, a cream, a turquoise and the country blue.

I confess this was an old post I have tweaked from June 2015, but no one saw it then as it was only my second blog post.


oldnewgreenredo

Let's get started on the redo. This OLD REDO, is DIY Ladies, this will be totally doable on your own, except for moving the pew, this oak monster weighs a ton. 

The pew was sound, but I reinforced the legs by pre-drilling holes and inserting deck screws and wood glue from the inside out to keep the wood from splitting at the seams. I drilled a series of holes for drainage in the rear of the seat.
oldnewgreenredo


It's wise to use a mask and gloves when working on old finishes, many before the seventies contained lead and other harmful substances. Chipping paint, while a romantic 'shabby chic'
look, is a true hazard to a curious toddler and the environment. Think GREEN!

After a vigorous scrubbing with Murphy's wood soap and hot water, I scraped and then I orbital sanded with 60 grit to remove all the loose paint layers and evened out the finish. The  shop vac and a damp cloth removed all traces of dust and debris. The surface is  finally ready.

Saftey Tip: remember to wear a mask and gloves when emptying your vac and change the filter before using it again.

I applied two sparse coats of Minwax Helmsman Spar Urethane-clear semi-gloss (indoor/outdoor) varnish. We intend to use this on the back deck for extra seating--so much nicer than tripping over folding chair legs.


oldnewgreenredo
Ready for sealing.


oldnewgreenredo
Church pew seat and Helmsman Varnish with sponge brush


The Helmsman varnish was very runny, and needs to be applied quickly in thin coats. I used sponge brushes (not recommended on the label) to avoid carrying too much varnish on the tilted surfaces. Sponge brushes helped to soak up excesses instead of pushing it around. I had no significant deterioration of the sponges, other than normal wear from the irregular surfaces. I used two sponge brushes for the two coats. They don't last long, but I save the handles to use as dowels for other projects. 

Some drips occurred, but this can be brushed out in the next coat. I only waited two hours between coats, as it was a very warm and low humidity. After curing the two coats for a week, the finish is very tight and very shiny. 


oldnewgreenredo

Waterproofing the legs
Tip: I weather-proofed the legs by submerging the wood into large oil drain pans filled with  Cabot's Wood Toned Deck and Siding Stain, 19200 Natural. This soaked up the feet nicely and used almost a full quart of stain/sealer. This project will be on a raised deck, but this step is absolutely necessary for furniture in contact with dirt, grass, or damp surfaces.

My husband and I have had a difference of opinion on the 'look' of vintage furniture. While I'm thrilled with the existing patina, he would like to see this pew solid country red to match the doors on the shed and house. Temporary compromise; the existing finish had to be stabilized, so he has agreed to give it a chance. The pew can always be painted in the future.

This is just one battle in the history of marriage challenges between a pocket-protector
husband and an artist wife, LOL.

oldnewgreenredo

PS: After a month the finish has mellowed and the shine has gone way down. If you want it even less shiney, a polish of steel wool, will bring down the shine.
I  use it every day, come join me for a cup of your favorite!


Update:

oldnewgreenredo
 Here is the pew about a month later in June 2015.  I haven't found the perfect table yet, but I'm looking. I still love the color, my husband still hates it.


oldnewgreenredo

Here's the bench in September, 2015. I really love the color and finish, my husband definitely hates it, so we will see. Thanks for stopping by, I love all your comments and questions and will try and answer them all.

All the opinions and photographs in this blog are my own, I have not been paid or reimbursed in anyway for my opinions or posts. Please do not use photos without linking back to this blog without my permission. Thank you for your cooperation, Sandi Magle


Sandi


Tuesday, March 1, 2016

Vintage Table and Drawer REDO

REDO an Old Table for the Basement


oldnewgreenredo
 I've had this OLD table forever---I had picked it up for my original antique/craft shop way back in 1998 or so, for $10.00 at a garage sale. Then it had very rickety cross supports underneath. The wood is some kind of  poplar or other lightweight tight-grained wood with an original old dark brown stain. From the markings and construction, might have been from the early 1940's or so. But a solid wood, skinny light-weight table is perfect for REDO displays in a shop.


oldnewgreenredo
The the OLD shelf you see on it now---my husband put on for use in our kitchen after the shop closed. I kept all my canning kettles and supplies underneath. I draped it with vintage table cloths and it was a great way to store the extras big things in the kitchen.


oldnewgreenredo
The curve on the bottom  shelf left room for sliding our chairs back from the table...the kitchen space was that tight. We replaced this with an NEW IKEA white cabinet...shown on my CoffeePot post that was shallower and lower for the new windows.


oldnewgreenredo
The REDO is the rebuild of the shelf and slotted to give the legs better support. The original railings are still underneath and everything was pre-drilled, wood-glued, and screwed together.

This is the final repair for this table, LOL. Knowing the finish was old and full of scratch cover, I  sanded, washed the surface and then did two coats of primer.


oldnewgreenredo
The final NEW color was custom mixed at our TrueValue to match our other furnishings in the basement. The color is a putty beige/gray and works well with our nautical furnishings and the IKEA brown/grey furniture tables, shelves, and bar/service cart.

The two large canvas baskets hold toys and warm throws for curling up on the sofa with. The OLD 1956 Marx dollhouse is a match to the beat-up one I had as a kid. The Granddaughter has great fun with the mish-mosh of furniture we have added (some NEW from the Dollar Store). It's usually on top of the table along with a fleet of wooden trucks made by my dad and lots of dollies and bunnies.

Another REDO project from the same time is this OLD silverware drawer.


Rember this divider drawer from one of my Junkin' posts? It had an uneven front and some real grime on it. I ripped off the moldy felt...gave it a good scrubbing and then pondered what to do. I trimmed off the front uneven bottom edge so it sits flat now. I gave it a heavy sanding all over...the inserts slid out...so I could sand every surface with my pointed front-orbital sander.


Here you can see the dirt and bits of felt still on this piece.


I primed two coats and then two coats of the paint matching the table. The old silverware drawer is now a desk organizer. I slide it onto the keyboard shelf of my basement office desk. One less item in the dump to keep our world, GREEN. I'm still thinking about putting rope handles on it, but may wait until I find something unique and nautical to go with the room.

 Thanks for stopping by, I will be happy to respond to comments or questions.

 All the opinions and photographs in this blog are my own, I have not been paid or reimbursed in anyway for my opinions or posts. Please do not use photos without linking back to this blog without my permission. Thank you for your cooperation, Sandi Magle


Sandi