Showing posts with label DIY gardening. Show all posts

Wednesday, February 22, 2023

Midwest Gardening: February


AD-Free Blog

oldnewgreenredo

The first week in February my hubby came home with new seeds and a few new grow trays. So many of our trays had disintegrated and were disposed of in Fall. One thing we didn't finish in Fall was the stripping of the greenhouse to replace the insulation.


oldnewgreenredo

 I did sort through everything last Fall, but hubby was occupied with other projects and the Greenhouse gutting just didn't get done. As soon as the weather breaks, we will take everything out except the sink, insulate with foam sheet insulation, and cover it with some sort of tight surface. 

oldnewgreenredo

If you remember last year we had mice which harbored wood ticks, and every time I went in there I ended up with ticks.....YUGH!

We've already treated the greenhouse with sulphur bombs, and will continue until we make the greenhouse tighter and rodent free. So, I dodged in there yesterday, grabbed only what I needed to do some transplanting and planting.

oldnewgreenredo

Of course, like all Midwest gardeners with their noses pressed upon the windows, and hoping that the gray/brown/iced landscape will subside into Spring, we begin to plan. We plant indoors and cross our fingers we have guessed the proper time to begin planting. Weather forecasts have proposed (fickly) perhaps that last frost date this year will be April 15---almost full month earlier than normal.


oldnewgreenredo

I have my garden planner in order, and sent off a seed order for over $50.00. 

I'm getting READY for

MIDWEST GARDENING 2023!

oldnewgreenredo

Unfortunately when you live in a small house the kitchen table becomes your work space. It's too cold on the porch---and besides, normally the light is the best in the kitchen.

Tools I use are two teaspoons, a scoop to fill the pots (inside the bag) a bowl to mix water and soil, scissors to cut my skewers in half to make labels, a permanent pen, my tray and of course pots. Those, we save from buying plants. 

oldnewgreenredo

OUTSIDE is not really ready for gardening, rain followed with freezing rain, followed with ICE!

oldnewgreenredo

February 22nd, and this is on again/off again day of icing.

oldnewgreenredo

I'm keeping an eye on my neighbor's monster tree---and all it's dead limbs---huge limbs hanging over our yard, large enough to kill anyone of us and our cars.

Anyway, back to the main course.

oldnewgreenredo

Ages ago, I did a post on covering my Oster chopper accessories container which I kept on the counter. Well the chopper died and parts weren't available, and I thought that it would make a grand seed container!

oldnewgreenredo

Today, it's holding much of my seeds for the Spring. These are seeds we are planting in the ground as well as starting in trays now, and in March. It's the perfect size!

oldnewgreenredo

We have a SouthEast exposure kitchen with two huge windows, adequate to start veggies and flowers in Winter. I also have a bunch of bulbs Hubby came home with---that I will plant by the weekend in another post.

oldnewgreenredo

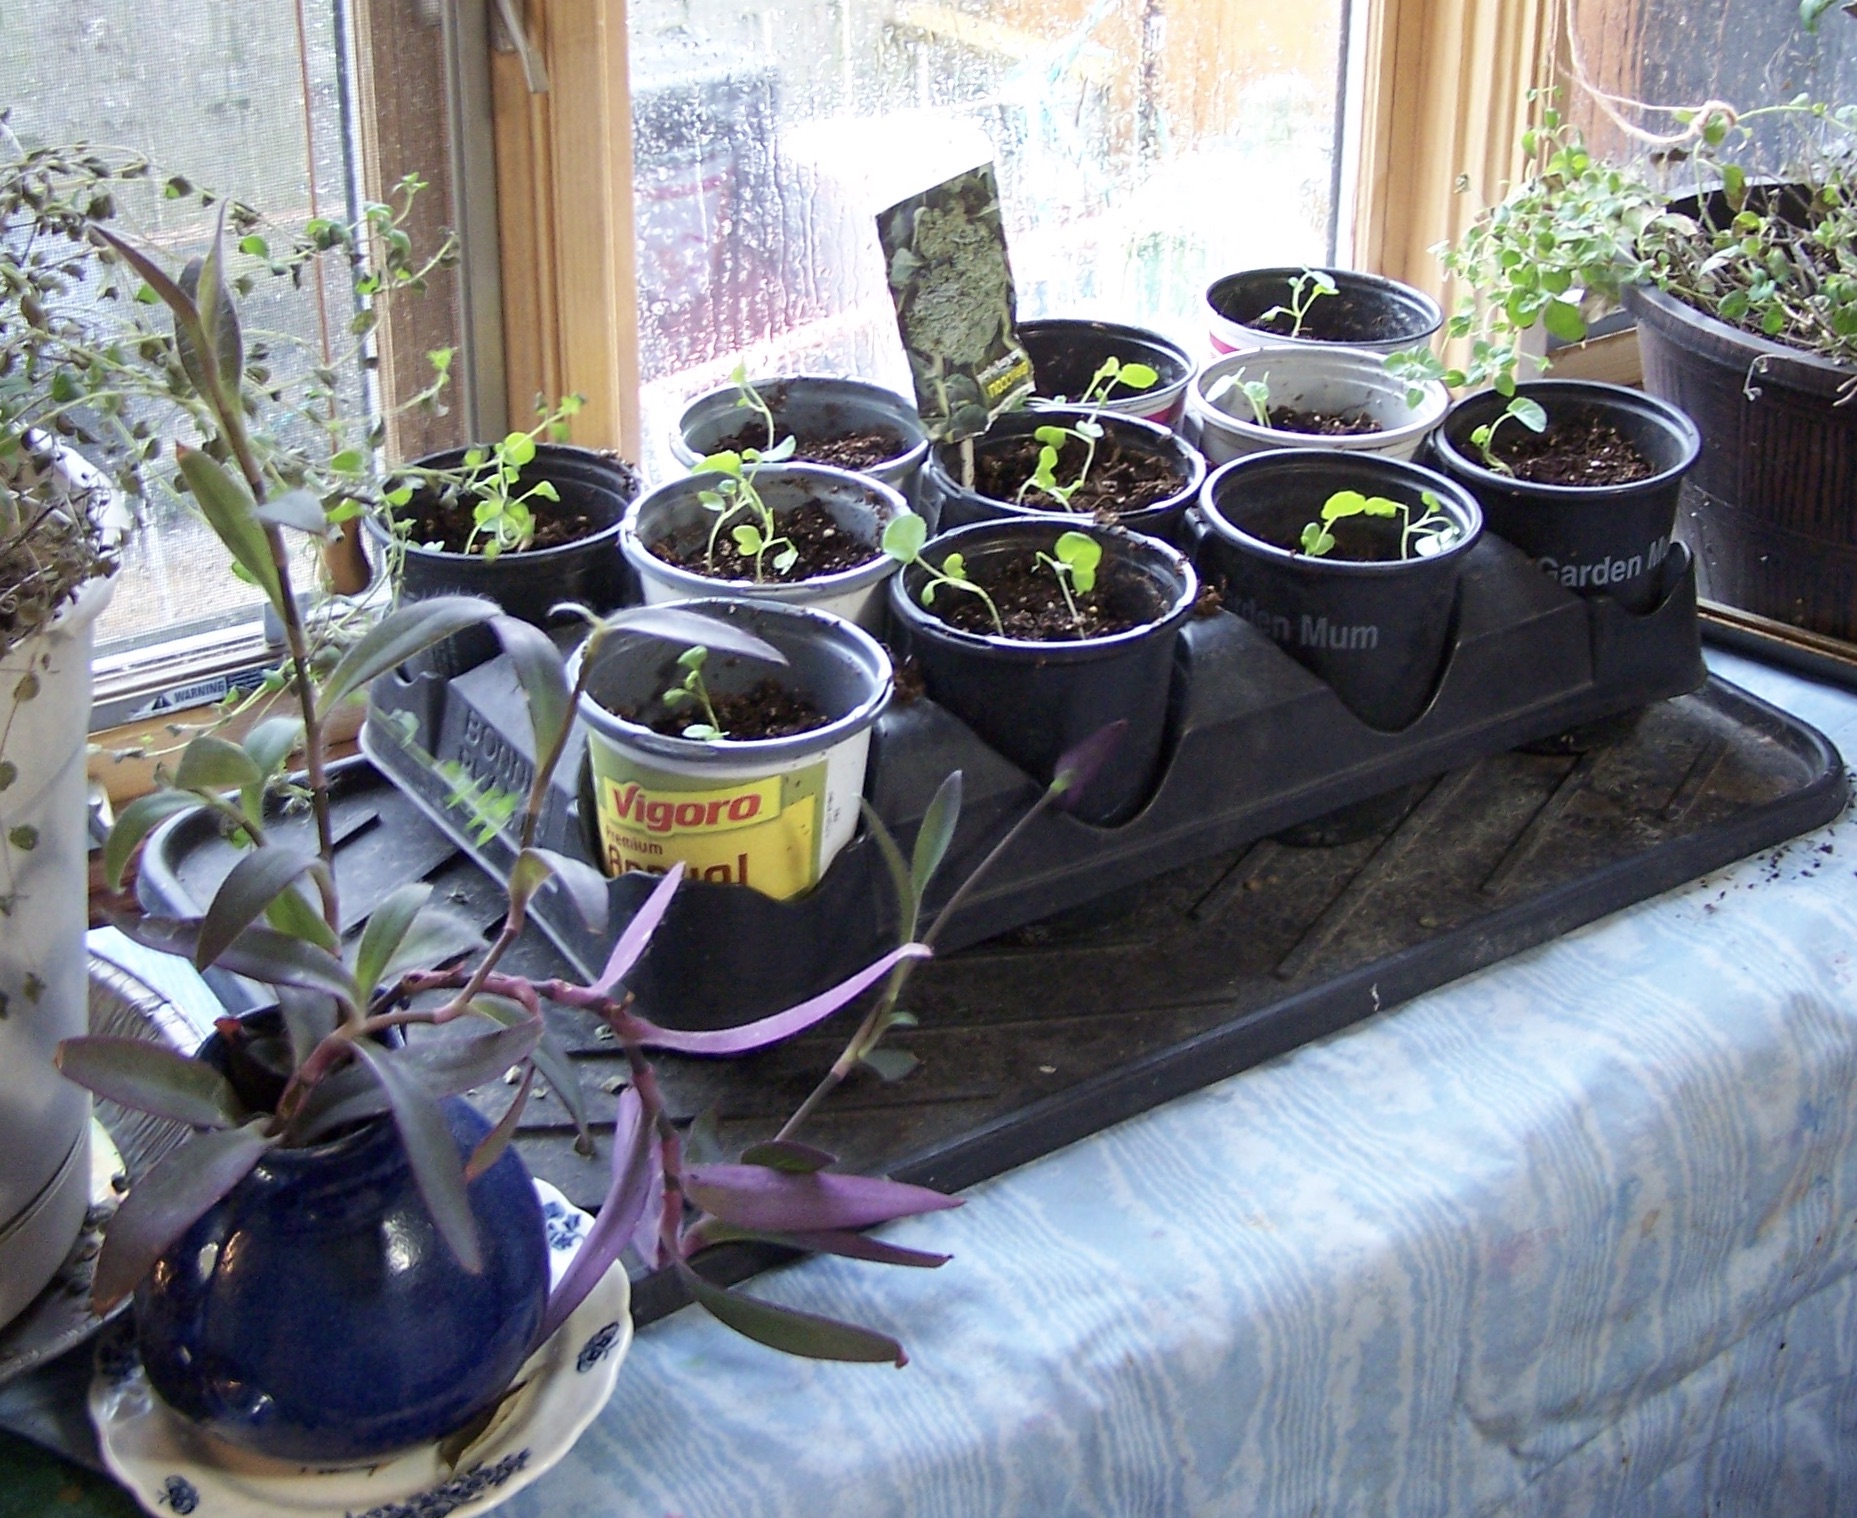
February 1st or so, we started Carnival Peppers, Sweet peppers and Broccoli. We also have tomatoes started later that aren't ready for transplanting yet. Normally they take forever to come up--but we had warm sun in the windows and moderate temps outside...so they really got big in three weeks.

oldnewgreenredo

All our containers and pots of dirt were put in  put into the compost pile with leaves and garden waste, so we have a couple of fresh bags of starter soil, and potting soil in the house. 

I filled my containers with dry potting soil and stirred lots of water in them. I worked on a large baking tray, we purchase these at a restaurant supply store. I also use boot trays that have been purchased on sale for long containers and inexpensive cookie sheets from the $$ store to place the transplanted pots on. They contain the extra overflow from the pots, and also add moisture to the air.

I also mix a bowl of wet soil to spread around the plants as I place the seedlings deep as possible inside the containers. Roots will grow along the buried stems giving the plants a healthy start.

oldnewgreenredo

I've transplanted one or two in each pot to see which will do the best. So I have ten pots of red/green peppers and 10 of Carnival/mixed peppers. We will give some away to friends. 

oldnewgreenredo

The worst part of transplanting is the 'Planticide'---the sacrificing of all the weak plants and transplanting only the seedlings with the strongest stems.

oldnewgreenredo

After two days in the pots  are doing very well.

oldnewgreenredo

These big trays hold 20 of these pots and space along the side which I will use for bulbs in bigger pots. Space will become an issue.

oldnwgreenredo

The East window is set up for the Broccoli starts because it is a bit cooler here. The sun disappears but there is still great light. We will set up some grow lights for cloudy days like today to supplement light. 

Young plants need at least 12 hours of light to grow strong. We also run our ceiling fan on low to encourage thick stems.

oldnewgreenredo

I have a thick vinyl tablecloth covering my furniture.  We will add some plastic shelving to this cabinet, when more plants are started.

What I have planted and date so far for 2023.

Vegetables:

Broccoli  on 2/1 transplanted 2/20
Yellow Honey Gold tomatoes 2/7 
Yellow Pear tomatoes 2/7
Carnival Peppers 2/7 transplanted 2/20
Japanese eggplant 2/20
San Marzano Tomatoes 2/20
Best Boy Tomatoes 2/20


FLOWERS:

Green Zinnias, old package and harvested seeds 2/21
Black Eyed Susans, harvested seeds 2/21
Cherry SF seeds (2022) 2/21
Autumn SF seeds (2022) 2/21

I plant old seeds early to see if they are viable. If they don't come up in two weeks, I will plant same or similar with new seeds. 

NOTE: 
Seeds have become so expensive and so few in a package, harvesting and sharing with friends is really a good way to try and make a savings while gardening. Reusing old containers is excellent for the environment, and recycling plastics is also good when they are no longer viable. 

Some greenhouses take back containers and trays, be sure to ask rather than throwing them away to live forever in landfills.

OUR Goals: will be to move into the newly insulated Greenhouse with heat by March 10---but this will all depend on if we can get the new insulation in there! April 15th isn't that far away---we won't plant peppers or tomatoes in the ground, but many seedswill be ready to go into the ground then. I hope to get lettuce started next week if we can find a place to do it!

HOW ARE YOUR GARDENING PLANS DOING?

If you enjoyed this post please follow this blog by blogger or FOLLOW IT which you will find in the upper right hand corner of this page. 


Thanks always for visiting. 
I will try and respond to every comment and answer every question.


I will be sharing at these fine Parties!


All the opinions and photographs in this blog are my own, I have not been paid or reimbursed in anyway for my opinions, posts or any products shown. Please do not use photos without linking back to this blog without my permission. Thank you for your cooperation, Sandi Magle

Sandi


Monday, February 10, 2020

Midwest Gardening February 2020

Ad-Free Blog

February 2020

Well, gardening in the upper Midwest is still just a dream. 

Here is our pond. Sunlight doesn't even touch this area yet, this photo was taken at 12 Noon today, a sunny day. The sun is still so low, it never creeps over the pitch of the garage. The light you see is the reflection off our huge kitchen windows--bouncing sunlight down on the ground.


And, still we dream of Spring. 

So far we have had little snow and mildish temps. 
Lots of freezing and thawing, rain mixed with snow, then rain again. This week we have a 0 degrees in the forecast and snow---hard to have both, but we will see.


I had to send my two herb planters outside. 
All that was alive was the rosemary and that also began to give up. I will have to totally replace the soil in these, I think all the nutrients were washed out or used up by the exuberance of the plantings, and our constant rain last year.

Planters that have excessive water, literally wash their nutrients out. Think how many times you dumped saucers last year, or gave up on saucers. 


One week ago, Hubby started seeds in the south window of our kitchen. Tomatoes, Chinese Eggplant,  Mixed Peppers all take forever to germinate. But, we had quite a few days of sun this week. Hubby currently uses pellets which I'm not fond of---but they do wick up the moisture and keep the seedlings started.

TIP: I'm not fond of pellets because if you follow directions and transplant them straight into the ground, the roots never break through--and that casing is forever around a root bound plant. We now cut them and totally remove the fabric with a scissors when we transplant into large cups. Usually when the plants are 2-4" high.


Here is our East window. Which gets about 2 hours of sun in the morning--but this increases every day. Eventually we will fill the top of the credenza with more plants and some shelves. 


Yellow Jubilee Tomatoes left and Red Cherry Large.  Then we did a container of broccoli to the right.


It will be another long month before we can plant the different types of squash, chard, and some summer squash, zucchini, pumpkins, and pickles. I'll directly plant lettuces, and onions in planters on the front porch as soon as it begins to warm up in April. Sunflowers will begin in deep cups when we move out to the greenhouse.
You can see we buy seeds from everywhere! 
We have given up on the plastic small greenhouses---it is just too windy here. Last year we draped heavy plastic around two portable scaffolding units, added a couple of shelves and even a heater, as we had planted in the house so early.  

Our spring was so slow in coming, and it was so cold and wet---the new greenhouse just wasn't completed in time to use!

Observation Note: 
We moved here in 1984. The first few years we tilled the garden in March, and had cold plants in the ground (beets, carrots, cabbage, onions) the first weeks of April. 
 The last four years---we have been lucky if we haven't hard-frosted after June 1. I lost all my pumpkin, sunflower, and zucchini mounds to frost that went deep enough they didn't make it up. We had planted the week of the 20th May.

How much has your planting schedule been effected by our changing climate? 


We keep the pellets/pods covered 
until the seedlings, push them off, LOL. 
Hubby checks the moisture each day, and a small amount of water is added when needed.


Crazy, but in one week, broccoli was up! Actually they came up Sunday morning! Cruciferous veggies, like cold temps so the East window should be fine for them.


It's hard to imagine all our vegetables coming from seeds. Any extra plants we have get passed on to family and friends. But it isn't just about vegetables, is it? It was too wet here for large onions, 
so I had to purchase those to make pickle relish! But we had a huge crop of pickles last year.

We plant more than one type of everything. Each variety wants different conditions, so something should be successful.


Soon, I will  start coleus again, only much earlier than last year. I will do a whole tray of these directly into a pan of soil. Then they will be transplanted into large cups, later. 


This is what they grew to, last year, before I found homes for all of them. The tiny pink pots were Icelandic poppies, that really did much. I will see if they managed to survive over the winter, but with the freezing and thawing, I don't have a lot of hope.


2019 Homegrown Coleus, and Hostas (left) started from a package of roots. ($5.97 for 12 starts and they were slow, but if they made the winter, it will be a great savings). I also start Caladiums. Our entire backyard is shady so having those plants really helps the budget.

I also plant trays of marigolds---which go very well with our gold/burgundy home. Besides the BEES love marigolds and they are hearty and last far into the Fall. 


These are my 10-12" high marigolds that spread two feet wide and almost two feet high You are looking at no more than 3 homegrown seed plants. These I will plant in trays of dirt the beginning of April, and they will be ready to transplant into the ground in late May, early June.


2019-Here are transplanted plants in the NEW greenhouse! We really didn't finish the greenhouse early enough to use except at the tail end of 2019 Spring. We will try and move plants out there by April 1st this year, with a quartz heater on in the evenings and a temperature gauge we can watch from inside. 


It's not unusual for a 45 degree day to send the greenhouse to 80-90 degrees or more. We added a  fan and vents in the peaks, screened windows and door, for adjusting the temperature. We will see how it goes, before moving the plants in. Hubby worked very hard wedging all sorts of insulating foam in all the crevices last Fall, we hope it will be tight and work for our Spring season!


I think we will have to go to the Botanic Gardens next week to smell warm earth!!!

What are your gardening plans? 
Are you going to try anything NEW this YEAR?


Thank you for any and all comments.
Finally I am able to reply to comments by using Chrome. So all you Mac users who have upgraded to Catalina---this might help the glitches on Safari Blogger!

 Please do not use photos without linking back to this blog without my permission. I am not reimbursed or given product for any of my opinions, or for use of a product in this blog. 

Thank you for your cooperation, 
Sandi 


Friday, November 6, 2015

DIY Gardening: Christmas Tree shaped Topiary

Making Your Own Topiary Frame:

Tools and supplies needed for this project:
Wire Tomato cage,
Wire clippers and/or Bolt-cutter,
Small shovel,
Large flower pot
Dirt
Green electrical wire
Ivy plants

With the gorgeous weather we had in Chicagoland this week, much of our time was spent out in the yard, and not so much blogging this week.  But seeing all the Christmas posts inspired me to plant all my ivy in one pot (I use ivy in almost all my outdoor planters) and try and make a Christmas tree topiary from scratch. Topiary frames are hideously expensive, so I had to make it from scratch.

oldnewgreenredo

First thing, I planted all my ivy (7) in one large pot...and made sure the plants were around the edge. I already had treated my plants with an organic fungus/pesticide ecologically safe for pets/children when we had the frost. I bagged all my plants after heavy spraying and then tightened the bags around them for three days. In the two weeks since I have only seen one tiny spider. So this really works well. I did this for every plant I brought into the house.

Since I wanted a Christmas tree shape, I began with a large green tomato cage, and clipped the bottom rings off. This left me with a 24" tall frame on the left. I used green plastic covered electrical wire and closed the top three wires first. TIP: use the heaviest clippers or bolt cutters you have to cut the cage.

oldnewgreenredo
Here is the dissected Tomato cage...I used the part on the left, really one ring with legs and the long original legs used as the top.

oldnewgreenredo

I set the frame into the pot to see if the proportions were right. The bottom legs were a bit larger than my pot, so I had to secure them inward. Removing the frame from the pot I worked on tightening IN the bottom legs, first.

oldnewgreenredo
Here I am just deciding where I may want my extra wires. The greens of the wire are different but when they are covered with ivy it will not matter. You could spray everything with spray paint to match if you wanted.

oldnewgreenredo

I added an inner ring on the bottom to bring the bottom ends in to fit the pot. Then I added an additional bottom outer ring securing at each of the frames legs by wrapping around twice. From the outside bottom ring, I added three more vertical sides up to give the outline of the tree, these were attached at the top and to the originally frame by double wrapping.

oldnewgreenredo

Next, I took two long pieces and wound them from top to bottom loosely to give the horizontal wires. In the shadow above you can see my rings mimicing the original ring...the shadow looks great.


oldnewgreenredo

Pushing the legs deep into the pot, I began untangling and spreading out my ivy vines. This took some patience. Working some on the lower rings and the longest on vertical wires, it actually started to look great.

oldnewgreenredo
 The bottom will be completely covered because of all the short vines. Using the longest to wind up all the wires on the frame will fill it up.

oldnewgreenredo

It is sparse for now, but I have done simple circle frames before and know the ivy thrives with light, daily sprays of water and plenty of plant food. So hopefully in a month or two this frame will be totally full and will be ready for bitty lights.

oldnewgreenredo

 I have it in the front window right now, as it receives lots of indirect sunlight as we have a large overhang here.

oldnewgreenredo
 If I get desperate, I can always add another ivy or two.

oldnewgreenredo
But it so thick on the bottom with short vines, I'm sure they will go nuts now. I will wait a week and let the plants acclimate to their new surroundings before fertilizing.

TIP: Turn your pot everyday or two...as the ivy will go toward the light source and you want it to grow toward the outside.

This project cost nothing, as we had all the materials on hand. Ivys were originally purchased in garden centers in spring for 1.99 or less. Tomatoe cage was used, originally 4-5$ because plastic covered.

Time: 1-1/2 hour at most.

Thanks for stopping by, commenting or questions always welcomed.

 All the opinions and photographs in this blog are my own or I am in possesion of the originals, 
I have not been paid or reimbursed in anyway for my opinions, posts or products used. 
Please do not use my photos without linking back to this blog without my permission. 
Thank you for your cooperation, Sandi Magle

Sharing at these fine parties: 


Sandi