Friday, August 26, 2016

Kitchen Remodel:Plumbing, Holes, and Gurgles?


Hello, people, wondering where I have been?

For those new to this blog, we began a whole house remodel in February---We are in our late 60's and with help of friends and family, are slowly (methodically---LOL) reaching our final mess, the kitchen.

July 6th  We began plumbing and the cabinetry remodel. (My job is to fetch and clean up, hold flashlights, pipes, or wires, and ooh and ahh over progress.)

With tarps on floor to cover the new bits of sub-floor already installed Hubby began demolition.

We placed our first order for this run of NEW base cabinets at IKEA.

oldnewgreenredo

We decided to start with the plumbing run wall. Plans for moving the dishwasher and replacing all the OLD plumbing runs in the basement (2 sump pumps, exterior pump outlets, back porch sink finally hooked up and the new kitchen layout).


First the cabinetry. Notice the mismatch we have been living with for at least 10 years.

oldnewgreenredo

Our sewer outlet is very high in our basement, pretty much just before floor level, one of the reasons we moved the washer/dryer on to the first floor a few years back.

Because of all the different things getting a REDO, Hubby cut out the floor to give easier access. We have to put down new subfloor anyway, so this wasn't a big issue.  The black pipe is the air/vent stack which had several bends to it and went to where? (PS, this is a gun on the wall--for those familiar with the term---don't mention anything unless it is important later on?)

Side note: Now was the the time to add and improve the insulation and make electrical to code. This house was built in 1974--so some upgrades are needed all the way along.

oldnewgreenredo

When the new cabinetry goes in--this white sewer outlet will have to be cut---exactly where not sure--so Hubby was holding off.

oldnewgreenredo

Also electrical issues for the garbage disposal taken care of here also.

oldnewgreenredo

Here was my attempt to still have a functioning kitchen, ha, ha, ha, ha!
And the new cabinet bases are in the garage for this wall.
Order-in, anyone?


oldnewgreenredo

July 10- Sunday our grown kids came and we had a cabinet party---everyone had screw drivers/drills-picture directions, levels, and assembly went---Bing! Bang! Boom! The pieces fell into place.


oldnewgreenredo

Planning out the butcher block counters. Notice the levels---Long levels are necessary to hang the  wall hardware for the cabinetry and the countertops. 

One comment I will make--IKEA cabinets are solid when installed and easy to square and level. I am no way being paid for my opinions on IKEA products.

oldnewgreenredo


Long lengths of butcher block counter were installed. Now--planning the hole cut for the sink. 
We chose a drainboard sink-even on sale! 
Discussion then ensued on the original layout. It's an off-center sink and placement of faucet was an issue with the centered window and the crank handles. 


oldnewgreenredo

No matter how much you plan things on paper, in the flesh/wood/metal so to speak, 
everything can look different.
More discussion on the sink, exactly which way to put the drainboard---but the dishwasher is installed, YAY!


oldnewgreenredo

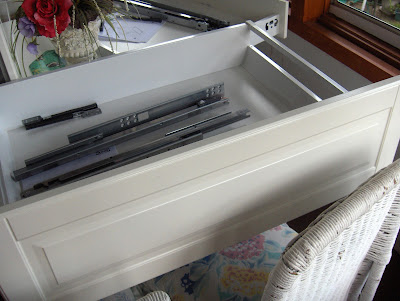
Meanwhile, on the porch were the gals, with the drawers. LOTS OF Drawers. It was HOT!
 oldnewgreenredo
oldnewgreenredo


Nine drawers in total. The hardware for these is heavier than anything I have seen before for drawers. 

Awesome! Drawers wereconsistently easy to put together.
The process works well with two people.

oldnewgreenredo

Drawers and more drawers.


oldnewgreenredo

And more DRAWERS!


oldnewgreenredo

Hubby's stash of plumbing parts for REDO's.

oldnewgreenredo

Okay NEW cabinet in---water hooked up...now the dishwasher and drains? 

oldnewgreenredo

Drawer hardware installation all the holes are predrilled. Just lots of screws.


oldnewgreenredo

Adding the hardware for drawers.

oldnewgreenredo

Faucet installed and the garbage disposal on the counter. 

oldnewgreenredo

New plumbing, Yay!


oldnewgreenredo

Love the NEW faucet, simple and brushed finish. We have really hard water so the cold water here leaves spots.


oldnewgreenredo

Okay we finished this project with five people working we built and installed 4 base cabinets, all the drawers and mechanisms in place, countertops installed,  and the faucet installed and hooked up in about 5-6 hours, with breaks and dinner.

The edges of the NEW butcher block were heavily oiled and a silicone seal was applied along with the manufacturer's seal.

We continued oiling the countertops with mineral oil, multiple times, maybe 5-6 times until the wood would absorb nothing more. We have had the island with butcher block going on 4 years now and I love it.

The next few days hubby and I installed the sink and then the garbage disposal. YAY! Now we can at least put some things back in the drawers and maybe function for the rest of the remodel.

oldnewgreenredo

The base cabinets on right now complete.

Next removing OLD soffits, adding NEW bead-board ceilings, centered electrical over island, followed by new subfloors and vinyl plank.

Week of July 15th, Picking produce, HOT, rain, two days, cool, porch door open.

What is that gurgling sound?


Thanks always for visiting. 
I will try and respond to every comment and answer every question.

All the opinions and photographs in this blog are my own, I have not been paid or reimbursed in anyway for my opinions or posts. Please do not use photos without linking back to this blog without my permission. Thank you for your cooperation, Sandi Magle

I will be posting at these fine parties:


Sandi

oldnewgreenredo


Wednesday, August 10, 2016

Junkin' Finds: July/August 2016

In the middle of a very hot summer and a major remodeling, I haven't had that much time for perusing thrift stores or garage sales. The last couple of weeks I have found what I call interesting bits and pieces.

oldnewgreenredo


I have been on the lookout for OLD picnic baskets in great condition for storage in my craft room REDO. Ha, the before pictures will be humiliating, but I promise to post them. The top basket is vintage Baskerville, from Putney, Vermont. Split Oak, these baskets usually go for $25.00-$40.00 in great condition and are no longer made in the USA. Many different styles are on the secondary market now. I snagged this one for $3.99 at GoodWill.

The bottom basket I got at a thrift store and is a Redmon picnic basket made in Peru, Indiana. These were popular in the 1930's to the 70's I believe. Very good quality and stable, they go for $12-$50 now depending on size, condition and the style woven pattern on the side. I think I have picked up maybe 5 of them over the last year, for $6.99 and under to use for craft storage.

oldnewgreenredo

The next item in the vignette here is the sheer drape at the bottom---which is a netting of some sort/poly probably from the 90's...it's a scarf very long maybe 20 feet long and 60" wide with the most adorable embroidered rosebuds sprinkled across. 

oldnewgreenredo

I think this will end up in my grand's bedroom at sometime--and was only $3.00 at a thrift store. This scarf washed beautifully. 

oldnewgreenredo


Here's an unusual cutwork on sheer organdy in blue (hard to find) and a white chainstitch decorations. It has the look of the late 1940's or early 50's. This was in very good condition and washed out nicely. I have to press it though before I can display this. Cost-$.50.

oldnewgreenredo


This is my favorite find. A wonderful very OLD ironstone pitcher. Crazed or not, I snagged this so fast before I even looked to see what the condition was. Cost---$6.99. Can you believe that, no chips or cracks--crazed but who cares, only adds to the gorgeousness of this piece.


oldnewgreenredo

I could have taken a hundred pictures of this-from every angle it was just superb. It has what I call raised flourishes and curly-cues under the clear glaze. I just love it, the size is about the size of a medium washbowl set.


oldnewgreenredo

Marked WARRANTEED 
over  a crowned Lion and a crowned Unicorn with shield in the middle 
Princess (pattern)
So many pottery marks are similar, best guess, attributed to Empire Pottery of Trenton NJ. This company was in business from 1863 - 1884. IThe bottom has a "Lion and Unicorn" mark and reads Princess (which I assume is the name of the pattern line), 
White graniteware or ironstone was produced by many Trenton, New Jersey potteries. The lion and unicorn was a common mark, and several companies used variations of this. Anyway I love it and it was a steal at $6.99.

oldnewgreenredo

Not so old is this spatterware cheese crock, maybe as old as the 1980s. Which I love and it was $1.99. The NEW ladybug clothespins for holding a banner or whatever were $.50 and in their original packaging.

oldnewgreenredo

On top of the baskets is a gorgeous old square tin. I soo love the colors in this.


oldnewgreenredo

The embossed patterns are quite intricate, the tin box is in good shape and has a domed embossed double thick lid.

oldnewgreenredo

I can't even guess how OLD it is, but it is marked "Container Made in England".
In excellent condition, I can't even hazard a guess at the date or who made this with no further markings. I did find one other on the Internet, but also with no information.

oldnewgreenredo

This was only $1.99. I think the sticky spot to the right held a label of some sort. No doubt it was a candy box.

The weather has been too hot to do garage sales for an old lady, lol. Air-conditioned thrift store are the only way to go---or your side table in your bedroom.


oldnewgreenredo

I found these seven in my sewing table of my grandmother's. And they are very Old, very fine mending threads with their original labels and an old wooden spool of purple thread.


oldnewgreenredo

Not very many items for a whole month, but they are all going to be perfect 
for my bedroom, grand's room, or craftshop REDO.

Thanks always for visiting. 
I will try and respond to every comment and answer every question.

All the opinions and photographs in this blog are my own, I have not been paid or reimbursed in anyway for my opinions or posts. Please do not use photos without linking back to this blog without my permission. Thank you for your cooperation, Sandi Magle


Sandi


Tuesday, July 26, 2016

Whole House Remodel: Kitchen--Finally!

For those of you who have commiserated on remodels, here is where we are: the front half of the NEW kitchen floor went in pretty much without a hitch. LOVE, love, love our vinyl plank floor. The interlocking pieces look and feel like real wood, are waterproof and easily replaceable. We chose a plain wood that looks like oak and blends with our existing door frames and trim.

More on installing this type of floating flooring at this post, Vinyl Plank Floors.


oldnewgreenredo


oldnewgreenredo
First step in the kitchen after the floor is the ceiling and tearing down the sofits. The blinds are drawn because of the heatwave. I removed all my decor, and items from all the walls, counters and shelves. Then everything was washed and stored on the table. Then I began to pack.


Add caption

and pack

oldnewgreenredo

and pack

oldnewgreenredo

and packed it all, from my Grandma's Monk cookie jar to the bitty bunny. 

oldnewgreenredo

I can't believe I had this much on the shelves and walls.

oldnewgreenredo

I had no idea what of my OLD treasured decor I will be able to use, since the soffits and shelves held so many of these items. Rather than make the decisions now---I washed everything and packed it up to wait for their REDO.

oldnewgreenredo

These are the totes of all the kitchenwares plus 2 cardboard boxes and two heavy tubs under the dining table removed from the kitchen. 

oldnewgreenredo


The table is in the living room now with chairs on top and storage below.

oldnewgreenredo


Here, hubby removes  OLD shelf brackets. The molly-bolts were stripped, so he basically yanked them through the dry wall. I sorted through the OLD blue Mason jars, dumped some of the herbs and washed the jars. They are in cardboard boxes now and a huge tub.  


oldnewgreenredo

We had a wasps' nest in the attic a few years back that had been patched. 
Here you can see the painted cardboard patch disguised behind lots of fake and real greenery.


oldnewgreenredo

This room originally had Mediterranean beams on the ceiling at one time, but it chopped up the room and rough cedar caught more than it's share of ceiling cobwebs. 

oldnewgreenredo

Since we are in our late sixties and do everything ourselves, we opted for lightweight bead board to cover all the existing ceiling issues instead of huge pieces of heavy drywall.  This bead board came in long strips-two boards wide and unpainted. Hubby gave the boards one coat of primer and one coat of  enamel. A final coat will be rolled on when all the installations, electrical, and moldings are on.


oldnewgreenredo

Here hubby and buddy push the boards into position after gluing and then they pneumatic nailed them. This way no missed nails and hammer damage. It is very rustic though. Very country kitchen, which is what we are going for. 

oldnewgreenredo

Two $69.00 scaffold units made it safe and easy to walk across for the correct height for installation of the beadboard. (We figured the right equipment was still cheaper than someone walking through the door to do the work.)

oldnewgreenredo

The boys pieced around the fan-light. I'm keeping the fan because of the eating area being in the kitchen and when fourteen people are around the table, it gets hot.


oldnewgreenredo

I love how the ceiling ridges echoe the fluted trim around our windows and doors. So the floor and ceiling are done to the center soffit. Eventually the wallpaper will have to go, but probably not immediately, since I have to get a feel for an all white kitchen.

oldnewgreenredo

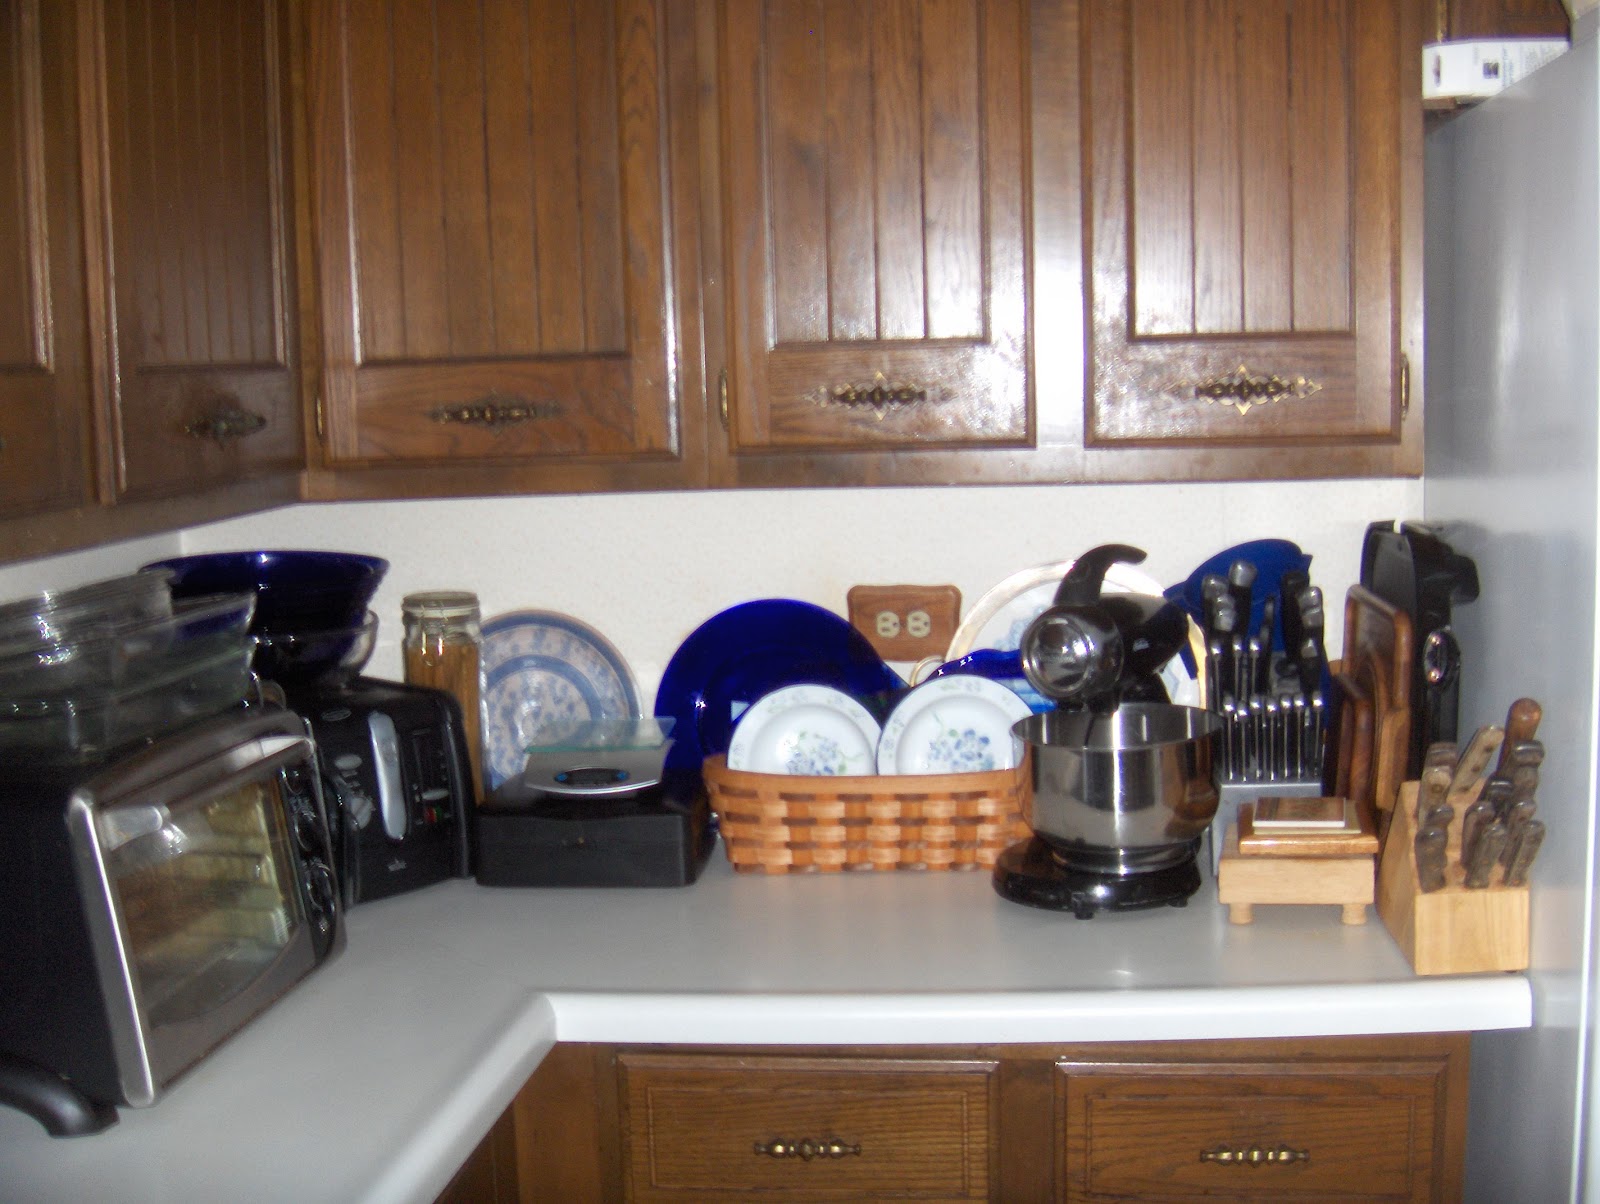
Here are some old pictures of our existing kitchen cabinets---builder-plywood grade, circa 1973 with the original Mediterranean hardware. At one time I had bought all new hardware to use but the holes were different. We did not opt to paint the cabinetry---because it's falling apart and some cleaning product in the past had messed with the finish, it's cratered, gooey and really banged up.  

That corner is a dead space...no cabinetry and wasted space. All of what is on the countertop will be able to be stored in the new swing-out corner cabinet. I will have a carousel in the upper in the corner.

oldnewgreenredo

I'm hoping for some more interesting shelving for the coffee station---and some hooks for cups.
 Also looking forward to almost all drawers in the NEW cabinetry. No more standing on my head and dislocating a shoulder reaching for something.


oldnewgreenredo

I'm still not settled on colors for the walls as there will be very little surface. I do like this combo here, Red, blue (of course) and a bit of yellow from the vintage towel. 


oldnewgreenredo

Here's the white cabinet that fits under the windows we purchased last summer. Stock cabinetry was all too high to put under the windows as built-ins.

oldnewgreenredo

We put the island in a few years back by chopping off a peninsula counter and adding butcher block countertop which I love. I have arthritic hand issues and drop things all the time, and the non-slip surface is great for someone who is klutzy, and super for baking and canning. 

My mixed stools will all get a REDO coat of some color and new seats.

oldnewgreenredo


We had upgraded our appliances within the last five years, so we will stick with those. I can't live without the extra oven. Too many people eat here for just one oven. The microwave will be on a shelf in the same location with a shorter cabinet above.

oldnewgreenredo

Our cabinetry is being planned to the ceiling with a crown molding at the top. The added storage space will be wonderful. The cabinet above the fridge will be full size out to the edge and perfect for trays and large baking sheets. But, where-oh-where will all my bowls go? 


oldnewgreenredo

Here's the cabinetry plan. A 30"built-in pantry on the left. A hood will go over the double ovens. The plan at this time is the counters will be butcher block, and that's not shown on the island or over the dishwasher on the right. Two double glass door cabinets will hold glassware and entertaining next to the fridge, and my everyday--un-matched blue and white dishes and serving pieces on the right above the dishwasher. These will be lit and have glass shelves, and all the other cabinets will have lighting underneath.

The stainless sink on the right will have a built-in drainboard. I'm not sure what sort of light I will have above the sink, as I have to wait and see the space with the soffit gone. We have chosen school house pendant lights for over the island with maybe a hook in the middle for hanging a rack or something interesting.

So tomorrow the plumbing's getting gutted, the dishwasher moved, and the sink plumbing and a new air stack vent installed on the porch.

oldnewgreenredo


This is our cabinet/sink on the back screen porch set up for a party---the sink did not have water at the time. When hubby installed a new drain and running water last week...we discovered a problem that ruined the whole works.


oldnewgreenredo

Water from our sump pumps were shooting out of the sink and up into the kitchen sinks. What a mess. Ground water everywhere---and here's the aftermath. Since we need the porch for eating and cooking while the kitchen is gutted, this plumbing is the major issue right now. Hopefully in a couple days everything will be resolved.

Meanwhile my best friend from my school years is coming on August 3rd for a week for our
50th High School Reunion! That's in 7 days, good grief!

OMG, please will the Plumbing Fairy be kind. Luckily my BF and I will be gone for three days, and leaving all this mess for hubby and his buddy to deal with.

Thanks always for stopping by and I will be happy to answer any comments or questions.


All the opinions and photographs in this blog are my own, I have not been paid or reimbursed in anyway for my opinions or posts. Please do not use photos without linking back to this blog without my permission. Thank you for your cooperation, Sandi Magle

I will be posting at these great parties:

WowUsWednesdays
Moonlight and Mason Jars


Sandi