Wednesday, February 26, 2025

Mather Creative Mindfulness: Paper Construction

Ad-Free Blog

Mather Creative Mindfulness: Paper Construction  

Last Monday's class was a whirlwind of scribbling and paper scraps. Our inspiration was African-American Artist and Educator, Charles McGee, 1924-2021. Goodness such a long productive life. His history and Estate site is HERE. Born in South Carolina, McGee worked in Detroit and was Active in the civil rights movement. Much of his works were based on Black History. So many great black and white medias were the base of his collections.

oldnewgreenredo

The class handout gave a pretty good description of  how we were going to make a construction. 

oldnewgreenredo

Basically two pieces of black paper for the background or a large folded in half.
And one piece of white. Again, I used a good quality scrapbooking 12x12 cardstock. 
My base was 2 pieces 8 1/2"x11" card stock glued together.
The pile of scraps was all I had left after cutting my pieces of white out.

oldnewgreenredo

Because the class moves so quickly, roughly 40 minutes working time---I have to take photos when completed. I used black and two shades of gray alcohol markers, pencil and eraser to draw my shapes, and a black Sharpie.

On our white paper we drew large and small shapes at least 1" wide and filled the white paper with these shapes. I really had nothing in mind, but I wanted shapes that weren't wormy or buggy...lol. I had a lot of triangular, box, and round shapes. A few were organic and undulating, and one Paisley shape. Again no plan. 

Then we were encouraged to make repetitive patterns as we have been doing. I began with the Paisley which had an eye? Because I was working so fast...I didn't get photos of individual pieces. Notice the Paisley, eyeglass shape, striped triangle and circle forms.

oldnewgreenredo

Before I even thought about it,  circles became cymbals, the triangles-horns, the eyeglass shape--eyes, Paisley was just an teardrop eyeball--watching. My large long box shape became a keyboard, another long triangle became a mandolin/guitar. 
oldnewgreenredo

Random strip pieces were reminiscent of 1960's ties.
Once all the shapes were colored in...they were cut out...

oldnewgreenredo

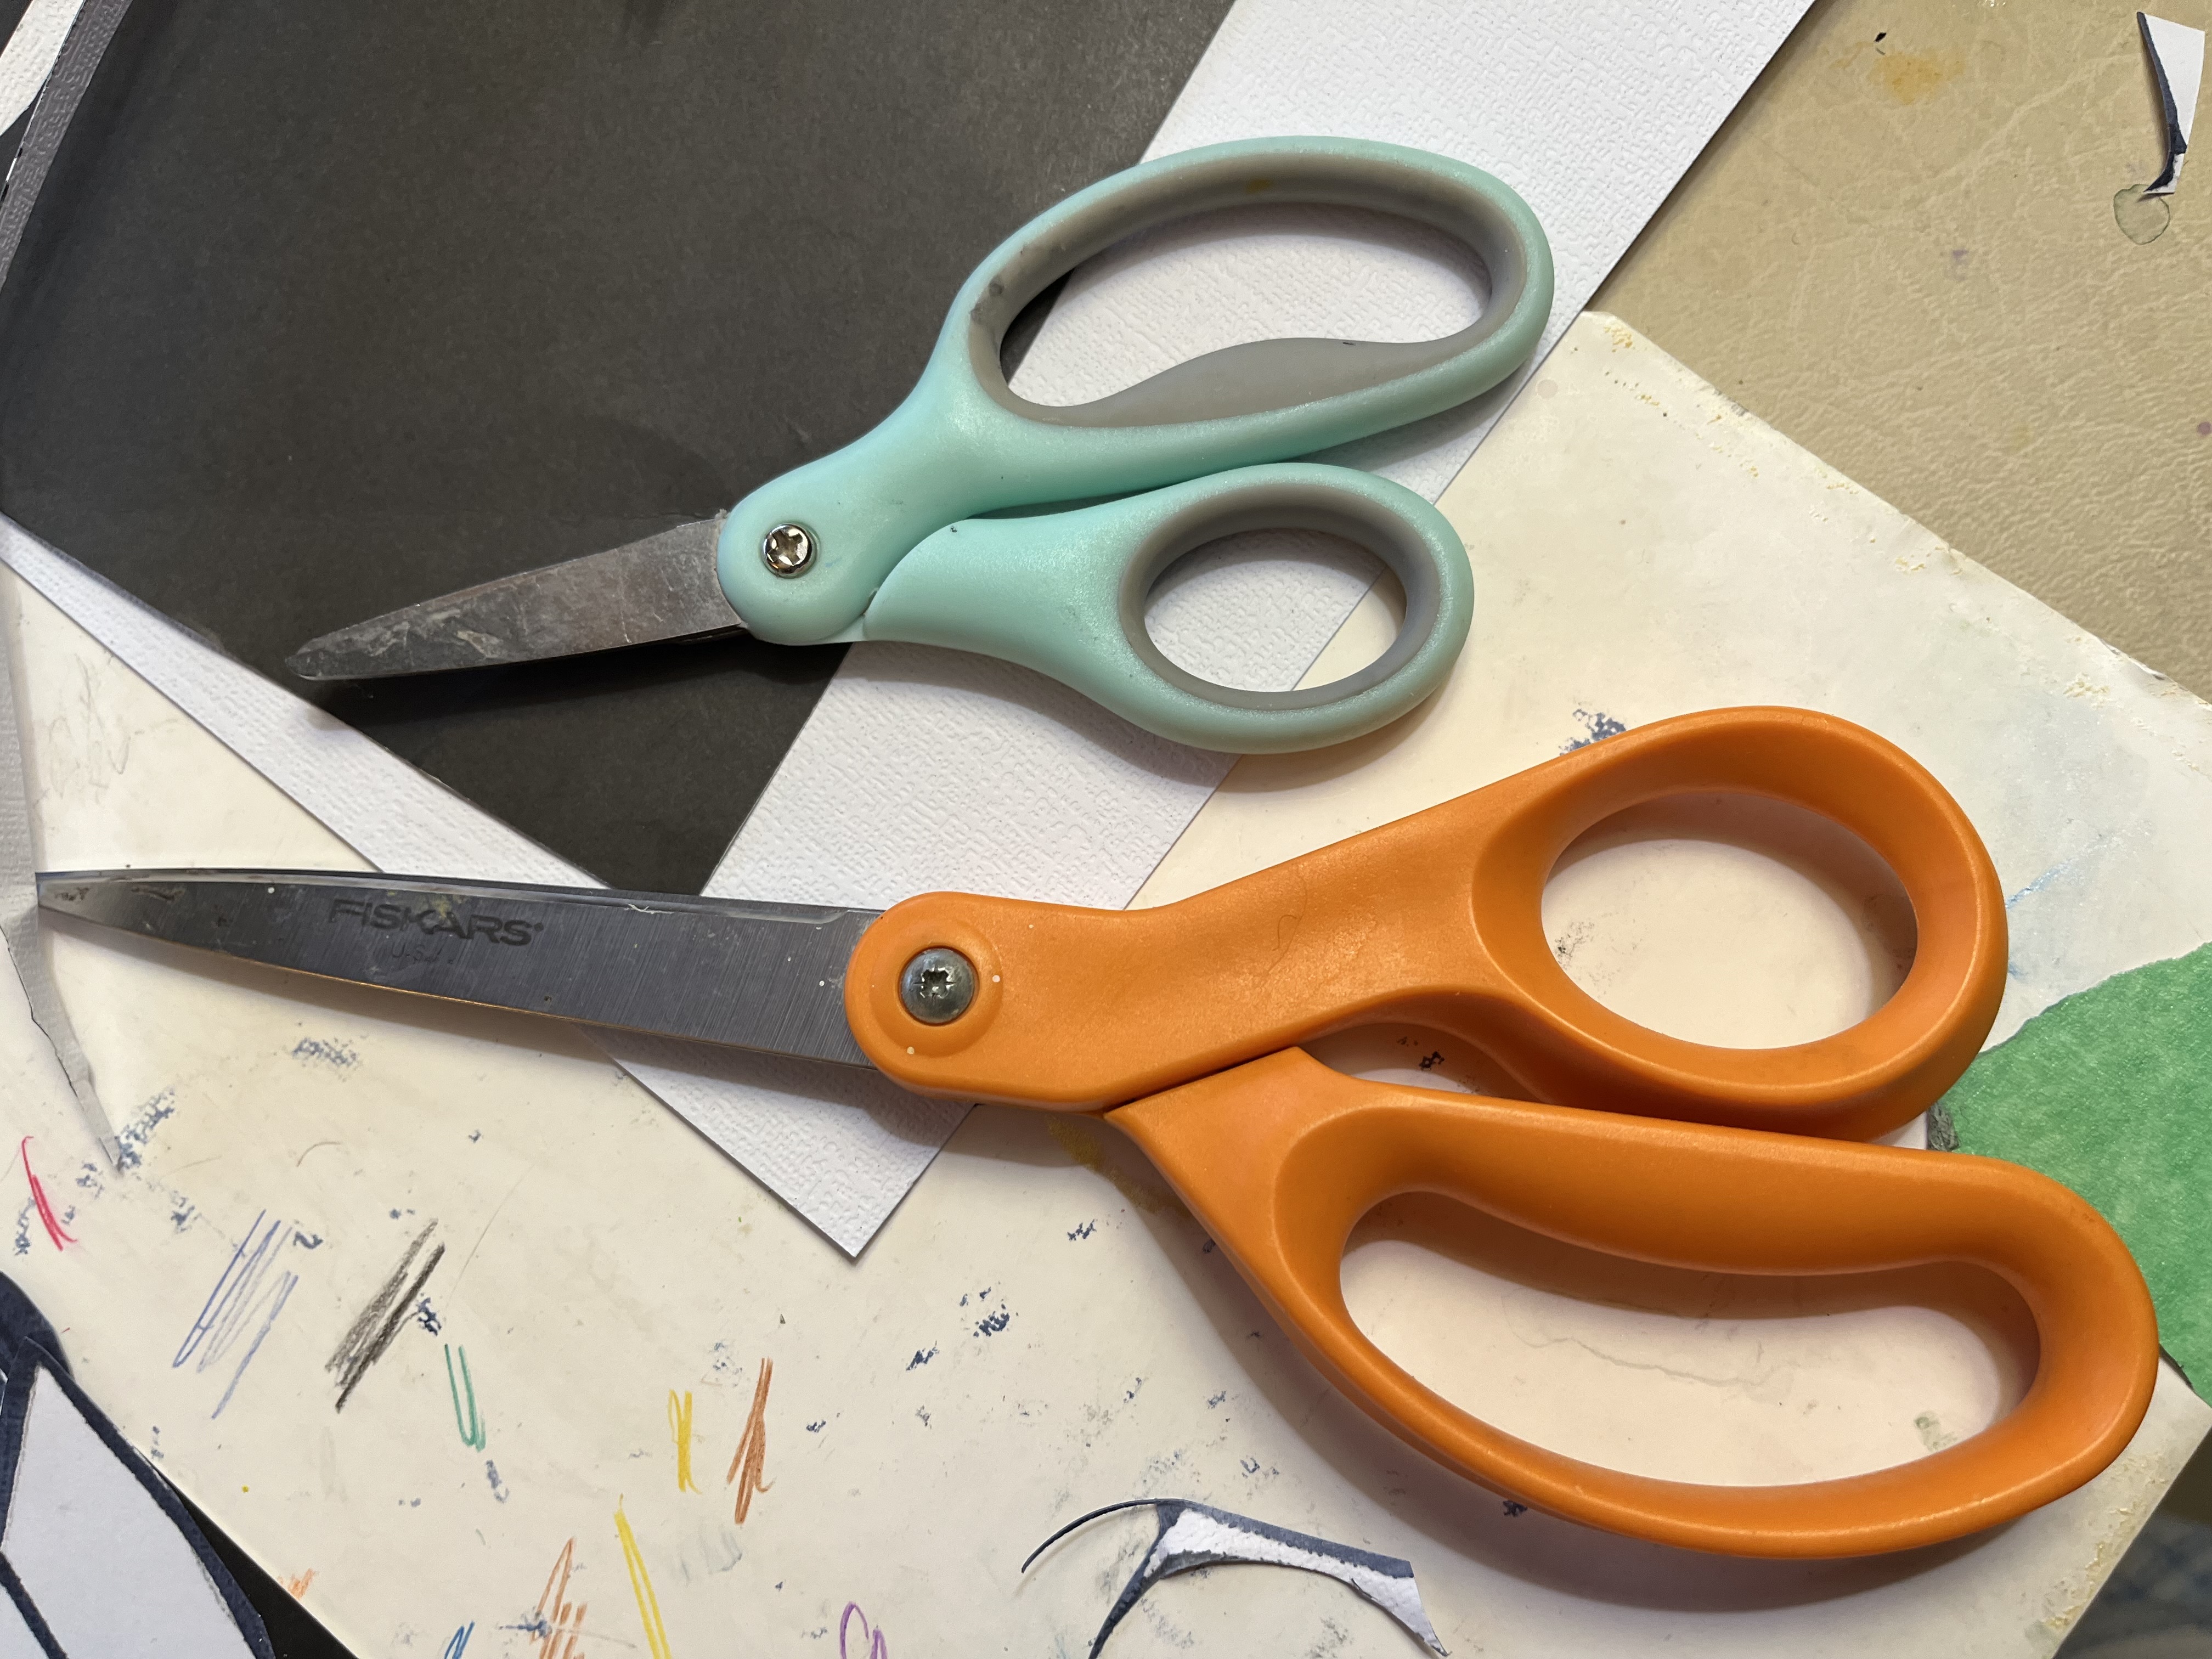
My scissors.


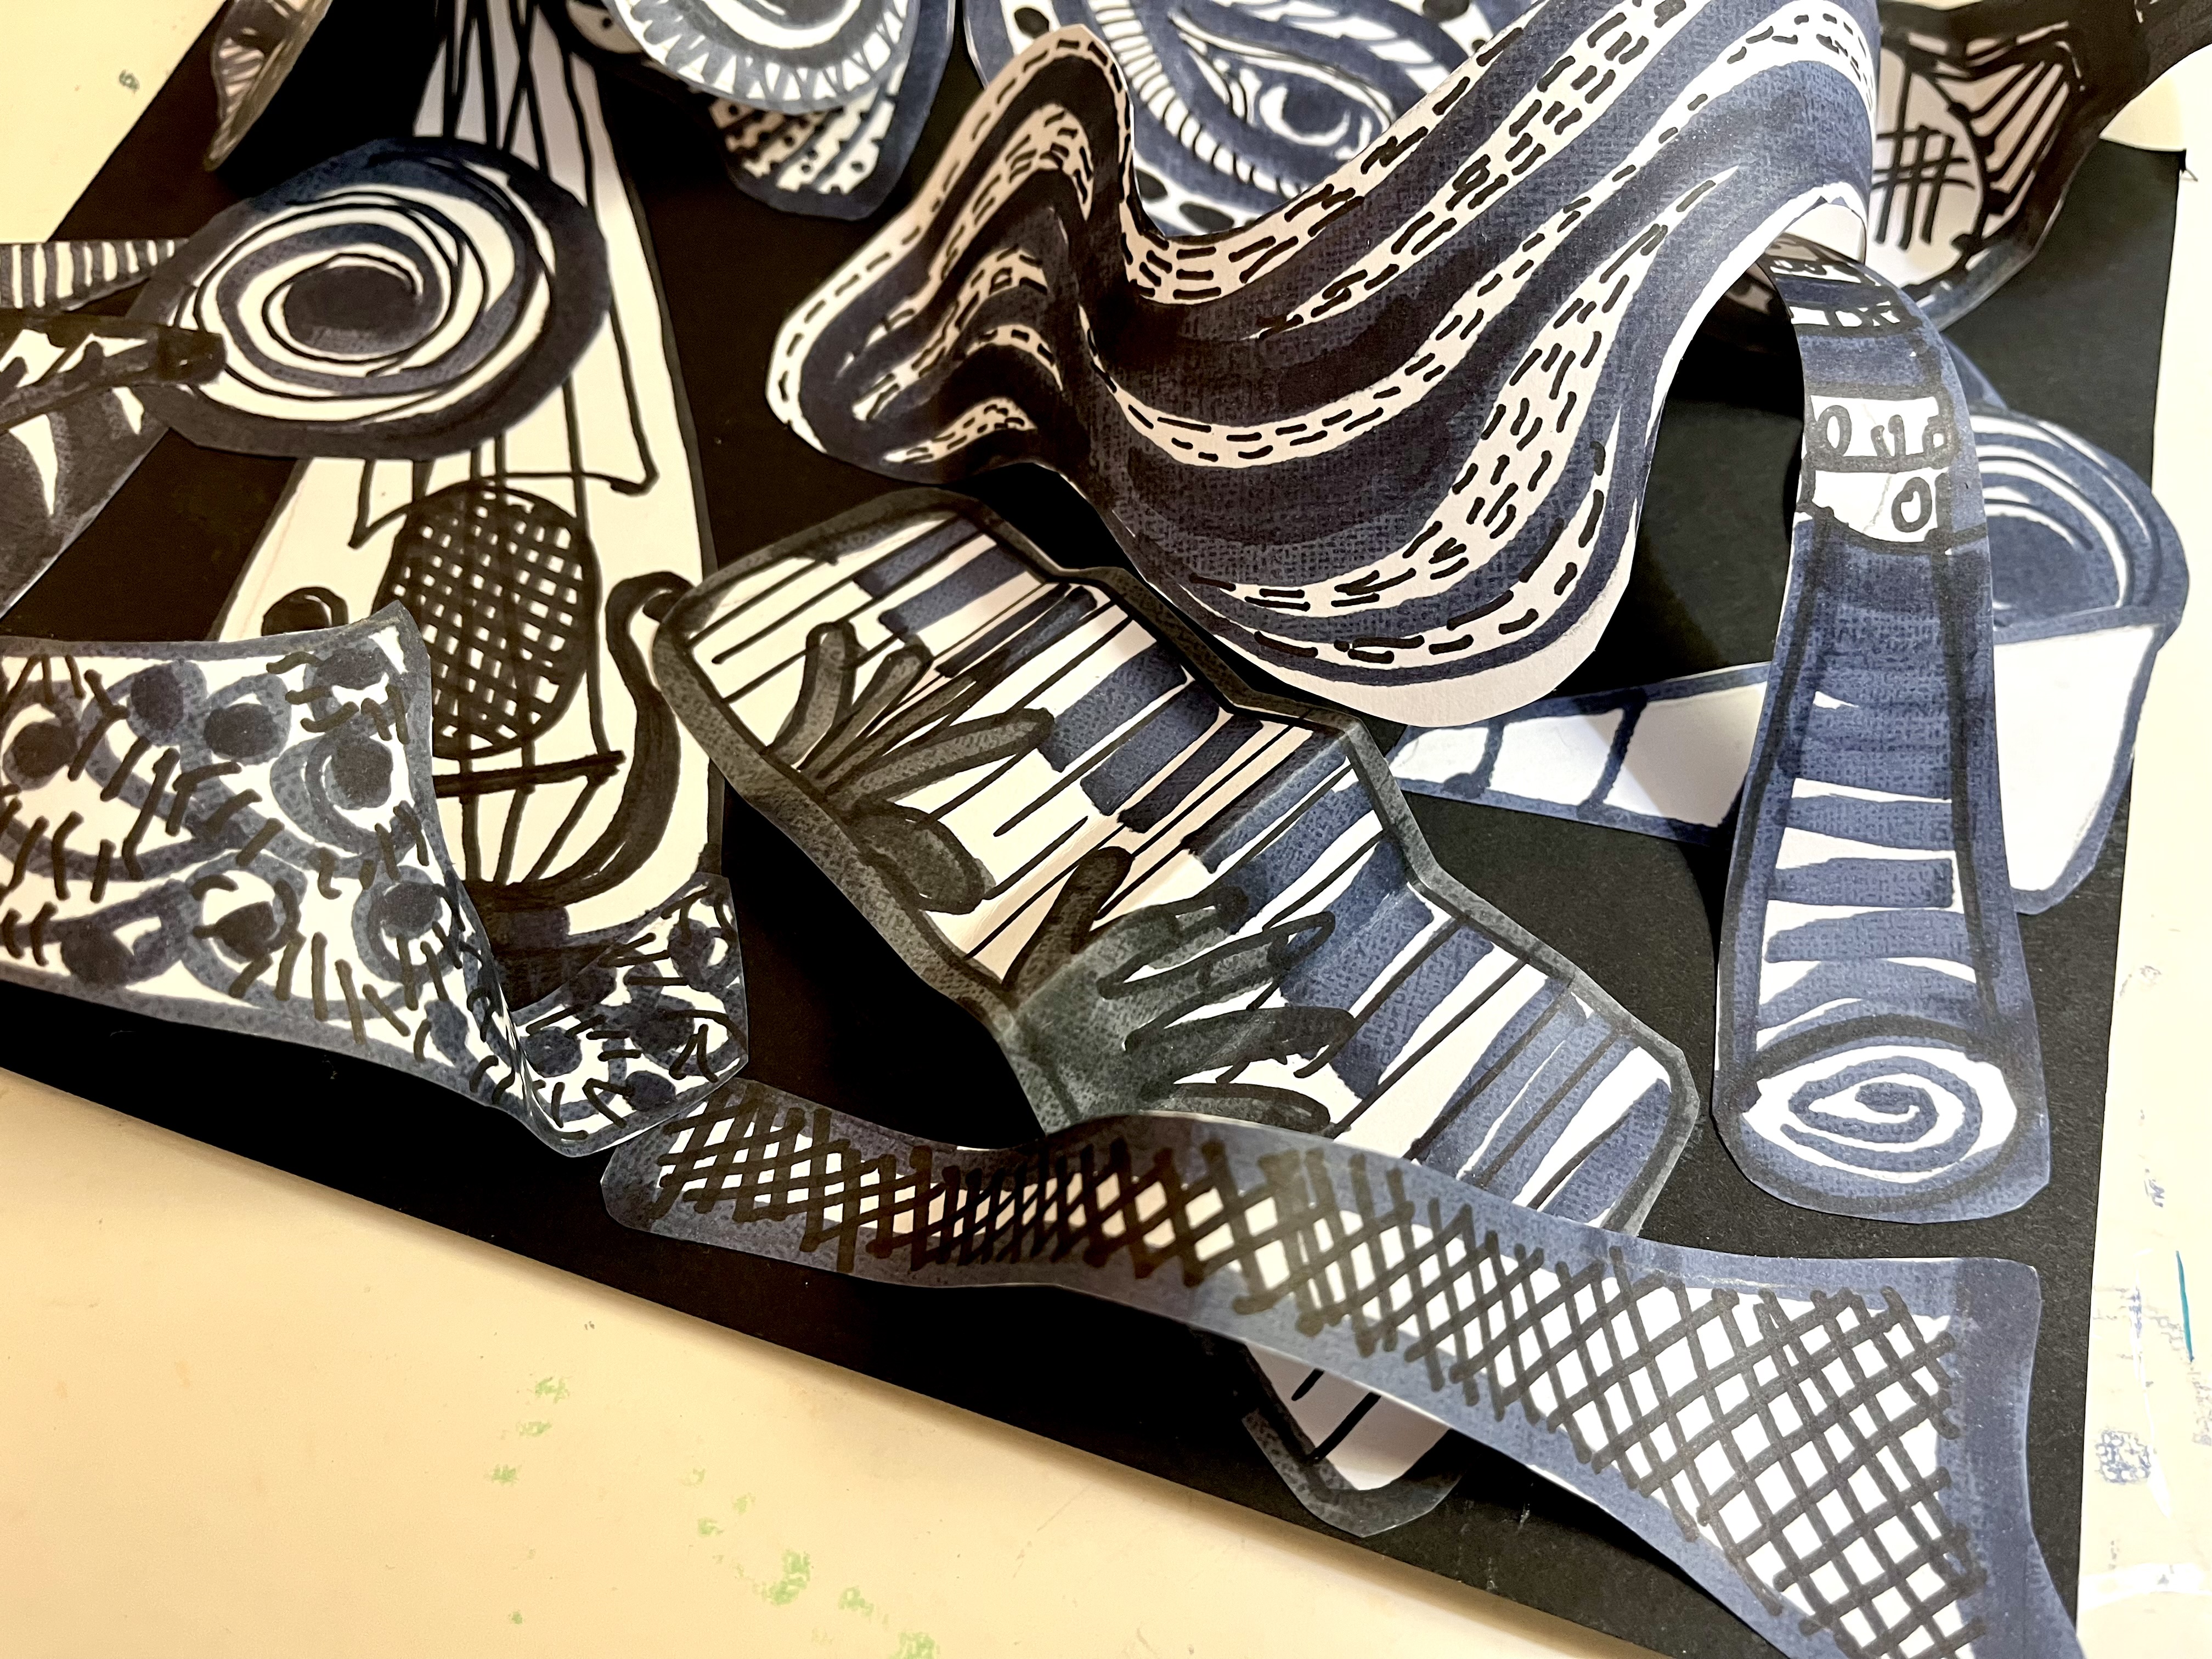
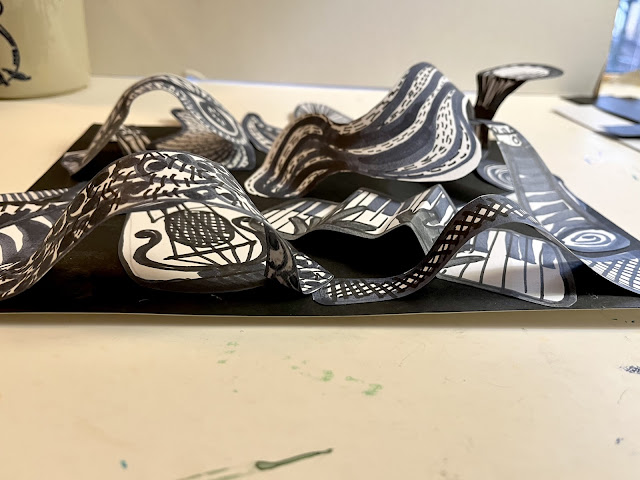
Pieces were bent, twisted, folded, arched and glued on and spilling off the paper with a simple glue stick. I used everything that filled
 my 12x12 onto the 8 1/2"x11" base. 

Those circular ovals became bongos up in the right hand corner. My one major organic shape is across the middle and is sort of an exaggerated music score, totally unintentional. 

oldnewgreenredo

1960's tie patterns across the bottom. Black hands on the accordian-fold keyboard. 

oldnewgreenredo

Everything was glued with an Elmer's glue stick...

oldnewgreenredo

Assembling was done in about 5-6 minutes...YIKES. Sometimes time crunching really is a savior...I could have pondered this to death.


oldnewgreenredo

Personal Story: Black History has been on my mind this month as well as some great memories of 1964-5. My HS boyfriend at the time was a substitute clarinet player for the Chicago Symphony's summer orchestra. So, on Saturdays we would take the hour and a half trainride from Wisconsin to Chicago for rehearsal and I would sit in Orchestra Hall and listen to a 3-4-5 hour rehearsal of the Chicago Symphony. 

oldnewgreenredo
       

My BF had close acquaintances in the Orchestra and many times after practice we would jump in a cab and head to a club somewhere on Chicago's South Side with a young black trumpet player. Mind you we were the only two UNDERAGE or white folk in the place. My BF would jam with the jazz band of odds and end musicians playing, he'd borrow an Alto Sax (his favorite) and the music was amazing. The band and people were amazing, then we would take a cab to the train station and back home, smelling of smoke and who knows what else...?

"Gee, Mom...rehearsal was soooooo long, that's why we are late."

At the height of the Civil Rights movement surrounded with all the protests, destruction and anger---Music was still a safe space. I'm sure I would have been grounded for life, if my mom had known. I was a violin player, but definitely learned an appreciation for Jazz.

oldnewgreenredo

I think that is where all this came from...so it's titled "Chicago Jazz 1965". The clarinet was a long triangle and the bongos are up on the right.

oldnewgreenredo

Another shot from the top to see the construction.

"Chicago Jazz 1965"                      S.Magle 2025

It's amazing where art or music can take you. I'm in the process of getting music into my work room. The doll room has classical on all the time, maybe upstairs I'll try some Jazz or Blues, who know where this will take me.

Mather Classes for Seniors can be explored HERE.

Thanks always for visiting. 
I will try and respond to every comment and answer every question.

I'll be participating at these fun parties.


All the opinions and photographs in this blog are my own, I have not been paid or reimbursed in anyway for my opinions, posts or any products shown. Please do not use photos without linking back to this blog without my permission. Thank you for your cooperation, Sandi Magle

Sandi


Tuesday, February 25, 2025

Mather Abstract Watercolor Landscape

Ad-Free Blog

Water color fun, finally a real painting, still an exercise, but a real painting with a subject matter! 

oldnewgreenredo

Everyone was very excited to start this class because we were going to paint an actual Abstract landscape. Armed with the experimentation and previous technique classes, Ruth, our instructor, showed us a lovely photo of Mt. Ranier.

I prepared my palette with the tube water colors I thought I would use.

Grumbacher Hookers Green Deep
Grumbacher Hookers Green Light
Windsor Paynes Gray
Windsor Cobalt
Grumbacher Indigo
Grumbacher Red (an earthy red for mixing shadows)
Grumbacher Thalo Violet

oldnewgreenredo

In the end I added a bit of Pearl Solid WaterColor by YiWu a cheapy tiny set of paints from Temu. I used gold, steely silver, and a bit of greens and a touch of the lavender and blue.
oldnewgreenredo

Synthetic Brushes I used
3 rounds in graduated sizes( larger the area the larger the brush) I don't think I used the smallest one, but I had it set out---in case.

3/4" wide flat (for wetting large areas)
and thin 1/2" flat for edges and straight lines.

(I like synthetics because they are a bit stiffer and you can get some nice edges with them. They carry plenty of water and are easy to clean and shape after use. Natural bristles (even good ones) tend to shed, and I hate picking hair off my painted areas, it always leaves a mark.) 

Class began with a discussion of our subject matter
Our Inspiration   a photo of Mt. Ranier.
Pinterest

This is a similar photo of Mt. Ranier than we used, with a different light location. I didn't get a copy of the original we used in class with all the still water and  reflections...but you can see some of the same basic shapes.

Picking something for inspiration helps on the decision making. You can pick and choose which elements of the photo or print that you might want to emphasize. I highly recommend working from other sources...what you include is up to you ---The ARTIST. 

I'm working on a Good quality Strathmore  140# water color paper. I choose the smoother side of the paper since I planned to work in flat shapes and blocks of color.

oldnewgreenredo

Ruth had us sketch the basic shapes of triangles, lines, blocks. We moved between the three projects to let them dry. The class working time is about 40 min....so you don't have time to PONDER and ANGST...YOU JUST PAINT.

I earnestly tried to keep them different with the prompts from Ruth.


oldnewgreenredo

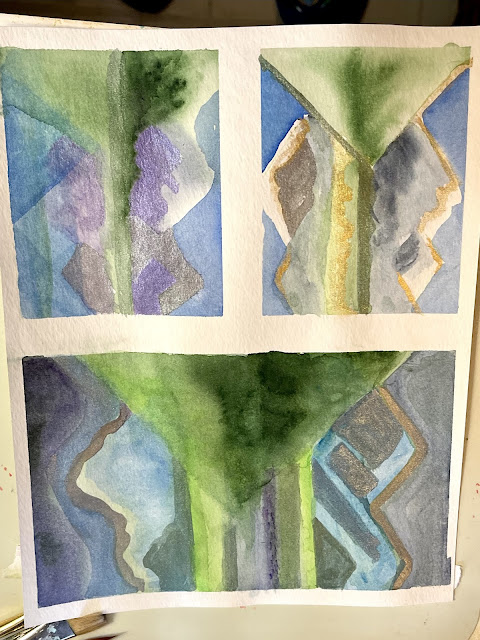
The large triangle on the left (GreenS) was wet on wet. We painted a large triangle in water and then striped a wet green loaded brush across. I blew on my painting to make the color spread instead of adding more paint. Carefully moving my brush around the shapes.

The stripes and reflections were last with the greens. The snow is paper left bare. This isn't terribly abstract---you know it is mountains, trees, water ...and sky. But the details are eliminated and the basic shapes still tell the story. 

We did the same on the blue sky and water. The mountains I used Payne's gray and Thalo Violet working on a wet surface and loaded color. 

The accents of the pearl paints were added when dry. I emphasized the green triangle with edges...and I like how it becomes a stronger shape. 

(Remember we were working on all three paintings at once)

oldnewgreenredo

This is the largest of the painting...which means more water and more paint.

On this one we did some flat applications of wet paint on dry paper. I stylized my shapes a bit more and had the reflections a bit wavy and more suggestive. Trying to mixing up what I was seeing in my head. Trying very hard not to do details(I so wanted to paint fir trees)...I kept the blocks of color pretty intense and defined.

I added more pigment to the green triangle after the first painting. same with the deep colors in the water. The blocks in the mountains were done in gray---and weren't terribly exciting, emphasized with the pearl paint...they took on an icy shimmer. I echoed the steely gray in the water in ripple waves. 
This one is more moody and I really like some of the areas color variations.
The pearl paints were limited to the Mountains and the water (blue and steely gray)

NEXT!

oldnewgreenredo

This is the other small block. The zig-zag in the water was a mistake as I was trying to block out the reflections. I went with it and emphasized it, and well it adds a pattern to the painting that is interesting. Worked wet on wet as well as wet on dry with lots of layering/glazing of colors over colors. Only the Pearl steely gray paint on the the one mountain, and violet purple on the other.

This one was done the fastest...and even more simplified. I'm beginning to understand why artist's do a series of painting with the same subject matter---just to see all the avenues a project may go. 


oldnewgreenredo

And a surprise---I Photo'd and Viewed from the end.....the paintings no longer become mountains and a lake...
but EXPLORATIONS OF PATTERN....

oldnewgreenredo

Tip it upside down.....

ISN'T THAT COOL? 


My Mather classes for Seniors 
are so much fun and they are free, 
if you are over 55 and interested, 


Thanks always for visiting. 
I will try and respond to every comment and answer every question.

I'll be participating at these fun parties.


All the opinions and photographs in this blog are my own, I have not been paid or reimbursed in anyway for my opinions, posts or any products shown. Please do not use photos without linking back to this blog without my permission. Thank you for your cooperation, Sandi Magle

Sandi


Monday, February 24, 2025

Mather Abstract Water Color:Techniques and Shapes

Ad-Free Blog
This winter my escape has been my art classes with Mather. I love both of them, but the Water Color classes has been the most demanding. Water Color in itself is demanding...water everywhere, too much water, not enough water, water where you don't want it, watering not drying...LOL. 

It's the not the same with color. Abstract watercolor is a style not a technique...working with simpler shapes, colors for mood and balance...well, just a bit more to think about than painting a leaf or a flower from real life.

oldnewgreenredo

Here's my set up---minus the masking/painters tape I use to hold down my 140# water color paper to my wet proof (upside down) placemats.
oldnewgreenredo

We've been working on techniques as well as abstract shapes and styles. This particular class had us painting in similar styles of these artists, Rothko, Kandinsky and Albers.

oldnewgreenredo

The class goes very fast...and my palette shows the scramble of color mixing and shading.

Mark Rothko 1903-71 was a Latvian American artist working in Abstract Expressionism. He almost exclusively worked in blocks of color and lines in simple patterns such as this..

Amazon: Cover to Mark Rothko Book


oldnewgreenredo

My shapes: Under all my red and dark blue squares/lines are the basic shapes of Rothko. I was bored and just had to play later on top of the simple blocks of color. The exercise definitely showed how layering colors really changes the areas. Definitely a good exercise and lesson in color layering.

The next artist we took a look at was Vasily Kandinsky 1866-1974 considered a pioneer in Abstract art. With such a long career he worked in many themes and styles. Hard to believe that the painting below was painted in 1913. I'm sure a lot of people shook their heads at this, but I still find the play on colors and the simple shapes of the circles and squares really interesting.

Kandinsky 1913 common domain

My other art class is Creative Mindfulness and we have been working with repetitive styles, so this was definitely hitting the ideas from both classes. The most important thing is how the colors on top of each other effect those nearest it.

The red/oranges are represented in every square in one way or another, but even they can seem cool and dark when combined with the moodier side of the color wheel.

oldnewgreenredo

We began in a blank square with large solid circles of color and then built more circles in layers...because I didn't structure my circles in a pattern they seemed to be bouncing all over the page. 

Impulsively, in the end I roped all those bouncing balls in with the blue loop, which became purple and even green here and there. Again we are emphasizing learning about layering and just how color react with one another. 
Surprisingly the Blue Loop worked for the compostion and anchored all those floating balls. Sometimes you have to improvise.

Our next artist was Josef Albers 1888-1976 was a German-American artist-educator who also worked in geometric shapes and color theory and is considered a Geometric Abstract-ist. His wife Anna/e was also an artist and here is a great place to start experiencing their art forms. HERE Albers Foundation. They worked in decorative arts as well as painting, weavings, fabrics, drawing and prints. Lots of interesting ideas here.

oldnewgreenredo

This was the most controlled of the exercises for me.
This simple exercise was the use of one color for each square, only the applications of more or less water in the color applied in layers, creating the monotone 
thematic mini-paintings. You begin with the background lightest layer and work forward with darker applications of the same shapes. 

The lower right square, apparently the paper had some water on it previous to this and dried. This effected how the paint absorbed here, but I found that texturizing very interesting.

I'm so used to working very large, working on these little blocks is definitely taxing for my brain and hands. 

But, there is a peacefulness when working with such a restrained use of color, you don't have to make choices, only just how much water to use. I think I have seen a lot of mid-century fabrics that had similar motifs of simple rectangles/squares and lines. Not everything is about crazy color combinations.

oldnewgreenredo

We did all of these small paintings in about 40 minutes, bouncing between the squares and styles to let the different layers to dry. Working on multiple pieces is actually a great idea, and it keeps you from MUDDYING up a painting into a mess. 

I worked on Strathmore 140# water color paper
A bunch of different paints and colors in my messy palette. I used two different flat brushes and two different round brushes, all synthetic.
I'm anxious to try something similar larger. 

I'll be happy to answer any questions 
and you can take a peek at other 
FREE Mather Classes for Seniors HERE.

Thanks always for visiting. 
I will try and respond to every comment and answer every question.

I'll be participating at these fun parties.


All the opinions and photographs in this blog are my own, I have not been paid or reimbursed in anyway for my opinions, posts or any products shown. Please do not use photos without linking back to this blog without my permission. Thank you for your cooperation, Sandi Magle

Sandi


Tuesday, February 18, 2025

Creative Mindfullness: Visiting African Art

AD-Free Blog

Thank Goodness I have my ART classes, between the news and the weather, YUGH!

And gosh, time flies when I have my hour long Mather Monday online class of Creative Mindfulness. We begin with a few minutes of meditation/breathing just to settle down and get calm. Then Casey gives us some background on the handout for this week. February we have been celebrating African Artists and inspirations. 

oldnewgreenredo

The artist for this day was Reggie Laurent. The examples we used  for class were from his DNA series, very organic and helter-skelter shapes and repetitive designs.

 One of the reasons we use the repetitive design themes in these senior classes is they are an easy way to tackle an art project, removing a lot of the 'should I do this-or do that'. Once you start a pattern you are a bit committed to it, and that can free up your inhibitions in making art. Many of the people in the classes have never done art, others are retired teachers and real artists. 

oldnewgreenredo

Our suggested materials were black cardstock, a bunch of assorted papers or magazine pics, scissors, glue or glue stick, pens,  markers, crayons, or paints for enhancing your paper shapes.

oldnewgreenredo

We began just cutting out organic shapes. In lighter colors as our base was dark, then adding layers and pieces as we went along. Organic is great for me because I can't do a straight line for Anything.
I was cutting madly and not really worrying about what it was or was going to be.

oldnewgreenredo

I had pulled some patterned as well as plain papers and lots of colors of cardstock. Working very fast we really only have 40 ish minutes before we share online---the shares are amazing as everyone goes in a different direction.

oldnewgreenredo

After the shapes are glued down, you get to go wild and add patterns to emphasize the shapes This was really fun. I didn't get everything decorated, but worked another 30-40 minutes before it felt finished. 

oldnewgreenredo

Laurent adds another set of lines in paint on the background color in white, outlining all the shape---which I thought would be too stark around my shapes/critters. I am considering an acrylic paint pen in some sort of dull/green, but I need to do some tests on the back of the cardstock/scrapbook paper to make sure it will take the paint.

oldnewgreenredo

Meanwhile I had fun with my alcohol markers...which just worked so well on the papers. I've talked about them before---cheap set from 5-Below and I LOVE THEM.

oldnewgreenredo

I've titled this 'Under the Rock'  considering this artwork copyrighted with this post 
2/18/25, Sandra W Magle

The following week we visited another African American Artist: Alma Woodsey Thomas (1898-1971)  who was an African American Artist and art teacher working in the Washington, D.C. area through the Civil Rights Movement and is now recognized as a major American painter of the 20th century. Many of her works are in the Smithsonian. 

The inspiration for this class were some repetitive paint brush patterns in controlled shapes or as vague landscapes. Small blocks/bricks of color were continued to make the designs or scenes. 

oldnewgreenredo

I am again working on heavy cardstock/scrapbook paper, but pale gray. I was going to try and do this with colored pencils, but pooped out as the pencils weren't as bright as I wanted. So, I moved on to markers again. The technique has a very mosaic feel to it...I chose my friend's NEW backyard (buried) in snow that has the inlet of a lake a fence and someday a path. Trees are here and there, but I simplified the design using artistic license.

I ended up using a few pencils to accent, and mostly the alcohol markers

oldnewgreenredo

I'm not much for straight patterns and I let the pathway really undulate. I sketched very loosely the tree and path, the boat and dock and then filled in with the 'bricks' of color. My hands really like the square markers, and turning the corners and curves is still a bit tricky.

oldnewgreenredo

I couldn't help but think of Georges Seurat and the "Sunday Afternoon on Grande Jatte' at the Art Institute here in Chicago. It's a huge painting, inspired the Musical of the same name, and was painted entirely in small dots. Colors were shaded by placing separate colors next to each other. I used this technique by adding some green squares over the blue in the water to make this more shimmery? spelling.


I also worked small black or brown lines to emphasize areas in the trees and dock. AlmaThomas left her white between all her blocks---but I felt that was too stark everywhere for this landscape. I may even water color a tint over the path to remove some of the white. I lightly colored the white on the tree trunks with a flesh/brown. 


The dock is grayed with pencil---the white/gray blocks just weren't doing it. The boat became purple over the black marks, and the seats were shaded with a brown pencil. Here you can see the sparkles of the bright green on the blue water. 

oldnewgreenredo

Close up on the brown pencil shading around the blocks on the tree bark. The picket fence really is something else now...but interesting. I imagined green plants showing through the slats.

oldnewgreenredo

Consider this artwork copyrighted with this post February 18, 2025 Sandra W Magle.

I really enjoyed making this...the process was fun and soothing, the outcome interesting and I can't wait until next week we are doing some three dimensional paper cutting construction...Wow! 

By all means looks up Reggie Laurent or Alma Thomas and see how varied and interesting their work is. And maybe even try something similar for a quick art project. Great for working with kids also!!

Mather classes for seniors are the Best!
FREE


Thanks always for visiting. 
I will try and respond to every comment and answer every question.

I'll be participating at these fun parties.


All the opinions and photographs in this blog are my own, I have not been paid or reimbursed in anyway for my opinions, posts or any products shown. Please do not use photos without linking back to this blog without my permission. Thank you for your cooperation, Sandi Magle

Sandi