Showing posts with label moldings. Show all posts

Wednesday, February 24, 2016

Vinyl Plank Floors: Hubby's Room

I have only been on the fringes of blogland for over a month.  For  three weeks I had that 'creeping-chest-crud virus' that has hit so many this season in Chicagoland. Despite my flu-shot in November, this one hit me hard. I did peek at peoples' blogs, but rarely commented, because typing took too much effort.

Meanwhile...

oldnewgreenredo

The last two weeks we have begun a huge whole house remodel. Here all my plants migrated to the livingroom window.


oldnewgreenredo
This is part of my spring decorating in the kitchen--at the moment, as every room is a disaster.

Today, I looked around and I really couldn't find a few square feet to take a picture as we are doing the bedrooms' fruitbasket upset.

After thirty-two years in this house, many changes are needed. Not just for looks, but for safety, health, easy maintenance and OMG...simply to change things. This house was built in 1974, and we moved here in 1984. We basically haven't redone much since the late 1980s other than new windows, doors, woodwork, and changes in paint and paper.

oldnewgreenredo
Hubby decided to work around some of the furniture in his bedroom.  He painted the ceilings, removed all the old shelving brackets and wallpapered.

Our house is small by today's standards, 1400 square feet on one floor, but now perfect for retirees. It's hard to believe we raised two boys and had two businesses in this house over the years.

oldnewgreenredo
My poor porch which has even more stuff on it now. It's still cold here (snow forecasted for today) so we aren't using it. Furniture, bedding, treasures, lumber, 6-foot fish(2)--don't ask, and all the extras you need for remodeling.

Every corner of the house has been affected, because of moving so many things out of the way. We are proceeding one room at a time, as we are doing the work ourselves.

oldnewgreenredo

Here is the bank of cabinets from the master---which is moving to hubby's room. Sorry for the blur, but my eyes are bad closerange and it looked fine in the viewer and we moved the shelves and dressers immediately after I took this.

oldnewgreenredo
Here is the hallway---with what was in his room. We just finished swapping furniture between my snoring husband's bedroom and mine. (We do visits--though, lol), and this is the pieces in the hall before we moved them.

oldnewgreenredo
After the walls and ceiling were done, hubby laid new subfloor (1/4"plywood) and an interlocking vinyl plank flooring system. This is the first piece starting at the wall. The planks are 6"x36" long. He cut some in half to stagger the edges and mix up the pattern. Every plank seemed to look different.

oldnewgreenredo
Vinyl plank uses NO GLUE and that's a plus in installation. Hubby says, hard part in the beginning it floats, so you need to constantly check to make sure your joints have stayed together. I stood on many edges for him while he gently tapped them into place. But, basically it is a one man job, eventually he used a full box of tile to take my place. It took him a day and a half to complete the floor and the moldings, and he is sixty-eight. The compressor was used for nailing the moldings. The vac was used to constantly clean your surfaces while laying the plank. The tiniest bit of dirt or foreign matter on the floor can damage the edges. Once they are locked in though it is a smooth, seamless floating surface

oldnewgreenredo
 The plank wallpaper has a hint of moss green between gray-white-beige weathered planks.

The new trim was finally finished (project begun years ago) and the walls with new weathered plank wallpaper and paint.


oldnewgreenredo

We have the option of hanging curtains over the blinds in very cold winters under the valances hubby has made for most of the windows in the house.

oldnewgreenredo
 In the last ten years we have replaced all the woodwork with bulls-eye corners and ribbed moldings throughout the house, along with the new windows and doors.

oldnewgreenredo
We moved the NEW for him, OLD furniture in.  We will probably give the dressers a NEW coat of min-wax stain sealer in Spring when the windows can be opened. These are my childhood dressers purchased in 1962 from Goldblatt's, a Chicago chain at that time. I chose the oak over the fussy white girly furniture, and it has served us well, as it is solid oak except for the backs and bottoms.
We added the all oak bookcases a few years ago. Some of his boxes will be covered with the wallpaper. Cords need to be corralled, and the toys (LOL) he is a doting grandparent, and they need to be put away. For the first time, he has empty drawers--and we will be tweaking his closet later.


oldnewgreenredo
We still have to 'stage the room', as I will replace all the plastic containers with NEW linen look storage boxes etc, add a small rug and coordinate the linens.

oldnewgreenredo
This empty wall will be filled with OLD nature and wildlife pictures, we have quite a collection. Maybe a few OLD antiques here and there---an antique powder horn, probably more.


oldnewgreenredo
This lamp was an OLD thrift store find, a vintage Stiffel solid brass lamp base for $15.00 and it's perfect for a man's room.


I love the NEW windows in our house, they are triple-pane crank-outs, and we have wood or white blinds on all of them for privacy. I simply like the simplicity of the look. They keep the house cool in the Summer, blocking sun and warm in Winter when they are closed. We have our one monster window to replace yet in the living room. Hopefully that will happen next year. That's a homebuilt play area in our backyard for the grand and guests.


oldnewgreenredo

Back to the flooring, why did we go with vinyl?---this was a big decision. First quality vinyl plank is about the same cost as hardwood, so that wasn't really a factor and we knew we had to lay NEW subfloor no matter what.


oldnewgreenredo
We are retirees, but have most of the holidays and our home is in a lake community, so we have lots of summer company. We GREEN garden, do lots of canning and freezing our produce, do crafts and REDO furniture. Hubby does carpentry and has rebuilt the outside of this house and the garage from the slab up---so our floors take a beating with all the traffic in and out.


oldnewgreenredo
The NEW hallway completed.

We had done our basement family room with a similar plank product three years ago,  and it has stood up well to paint, playdoh, kids, scratches, heavy traffic and rough use. We had always planned to do the upstairs in solid oak, but we started asking around about using hardwood in the kitchen, as we wanted the same flooring throughout the whole house.

Everyone we know---and many--who have hardwood in their kitchens---HATE it: the maintenance, the scratches, the stains, and the popping up because of having to use water in a kitchen. One couple we know has already had theirs refinished once and it needs it again in less than fifteen years and they are retired.

oldnewgreenredo
The tile to the left is the smallest bedroom, my son was allergic to dust---so we did a REDO and ripped out his carpeting when we moved in 1984 and did tile, super for a 10 year-old boy.

So---but hardwood is so gorgeous, and our decision continued to waffle.

A visit to our nephew's new home with vinyl plank installed helped. I bent down and touched it, and couldn't tell it wasn't wood, and it was gorgeous. In their last home they had hardwood throughout, but chose vinyl, again because of maintenance. Another upside, it's so quiet: no clicking heels down the hallway, more of a swoosh-swoosh.

Finally we are in our late sixties and this product has a 25-year warranty and it is easy care. We aren't going to be moving, so resale is not an issue. If one plank is damaged, we can replace it.

So the decision was made: the VINYL PLANK over hardwood, which is also GREEN for the planet.

So one bedroom/hallway down and two to go. On to the master bedroom!

oldnewgreenredo
Now the master bedroom dressers are in the living room.

oldnewgreenredo
And I'm sleeping in the extra bedroom/office.

There are  more things added to this room since I took this picture, all the bedding and mountains of pillows, magazines, and clothing from the master bedroom.

Notice the chandelier, hanging from the shelf...can't wait to use that in the bedroom. I got it from Chippy Shabby at the Elkorn Flea Market last June in this post.

oldnewgreenredo
In the master, yesterday the peach carpeting was removed and all the moldings. The corner bump out is the furnace flue. The wall with the lamps has had some cold issues and some moisture issues so we are planning on taking that out---who knows what we may find.


oldnewgreenredo
The opposite closet wall I need to paint all the trim and REDO the ceilings here. So I will be busy doing that while hubby works on the opposite walls.

oldnewgreenredo
The bulk of the largest pieces are now on the porch. The kitchen is the only place that is basically a haven from construction now.

oldnewgreenredo

These little bunnies look scared, all that pounding, etc. An egg to be modpodged eventually.


Sweet vintage blue tulip tablecloth for Spring---I don't iron---we go au-natural around here.

And I think I need a cup of coffee. What are you doing for Spring remodels or spruce ups?


Thanks always for stopping by, I will be happy to answer any questions or comments.

 All the opinions and photographs in this blog are my own, I have not been paid or reimbursed in anyway for my opinions or posts. Please do not use photos without linking back to this blog without my permission. Thank you for your cooperation, Sandi Magle

I will be sharing at these fine blog parties: 

Sandi


Tuesday, November 17, 2015

DIY BarbieDollhouse:Wk#5 Final Lighting

This is the second half of last week's post. Last week just got away from me. So....you will see some inconsistencies in continuity here.

Point is, this post is about lighting our NEW DIY Barbie dollhouse. After searching online, I saw Christmas lights dangling from inside cardboard houses (shudder)---battery candle lights dimly lighting cubbyholes of rooms, and rooms conventially lit with dollhouse lighting totally in the wrong scale of 1:12 instead of double that, or 1:6 for Barbie. What should we use?

Christmas lights and sockets, with little wires sticking out,  was out of the question for a three-year old.

Convential dollhouse lighting would run over $100.00 with this size dollhouse and would involve metallic tape, wall sockets, tiny wiring and still having to secure/hide it. Light fixtures were all over the place in price and would be scaled too small. So we started another search.

oldnewgreenredo

Looking online, I found rope lighting and LED under cabinet lighting. Our china cabinet lights (round) LED's would be too bright. They were designed to light up an entire cabinets. So I looked for something softer and scaled smaller.

IKEA had some LED strip lights (set 4) that could be hooked together or installed individually. They gave softer light then other things we saw. Price was good---19.99 for a set of 4--we bought two sets and used 6 light panels-one for each room, so actual cost was 29.99.

oldnewgreenredo

Hubby began by drilling holes in the back large enough to run the wires through. Because we wanted everything enclosed, we made plans to encase the wires in the 'magic' plastic molding and then cover with ceiling trim afterward. The LED's strips came with ample cord, more than enough cord for the 4'x4' size of this dollhouse.

From the back Hubby ran the cords along the divider walls, along the center beam, across the front to the fixture strips.

oldnewgreenredo

Here you can see the slack wires hanging in each room and the actual lights showing at the front of the rooms. By lighting from the front, the lights cast light all over the rooms. We planned on scalloped molding trim to cover the lights, making the light shine into the house.


oldnewgreenredo

On the upper right room, you can see the pieces of 'magic' plastic channel molding I used in the last post,  Wk#5 Landings and Stairs getting ready to secure the wires. Hubby glued the plastic channel directly to the walls and beam with Gorilla Super Gel Glue.
oldnewgreenredo
 Here is a fuzzy closeup of the plastic channel molding. Very inexpensive, cuts with an exacto knife or a scissors. Also flexible so easy to work with.

oldnewgreenredo

Here is a light strip attatched to the ceiling. These lights are attatched to screwed in clips. Nothing is exposed. and the channel covers the wires in the front and along the dividing room walls.


oldnewgreenredo

Sorry for the tilt--getting these pics was tricky. Here you can see the pink wall with the molding installed over the plastic channel all the way to the back.

oldnewgreenredo

In the back the light wires were pushed into these little junction boxes which will be covered by a fake box/chimney, which we will show when completed with the rest of the exterior completion.


 This picture is taken of the kitchen area with some furniture just set in place...that rug has to go. No flash, RL lights, so the light looks perfect. Kitchen plans are still not final, but the table will become a drop leaf---and painted either green or white? What do you think? The pink is going on the appliances, they will be white with stainless steel..look--and we have to build the stove and counters.

oldnewgreenredo
This room was also lit with only the dollhouse lights. The master bedroom furniture temporarily laid out so we can see what we need to do. All the ceiling moldings are installed and the lighting is complete. The matress is on the floor, bed still needs to be delivered, but of course Ken is napping, again!

oldnewgreenredo

The bathroom roughly laid out. One piece of floor molding still needed to be installed, but all the touch-up was done. The strips of white are more bits of trimmed plastic channel from the landings, simply glued on the walls. Looks like a tile edge.


oldnewgreenredo
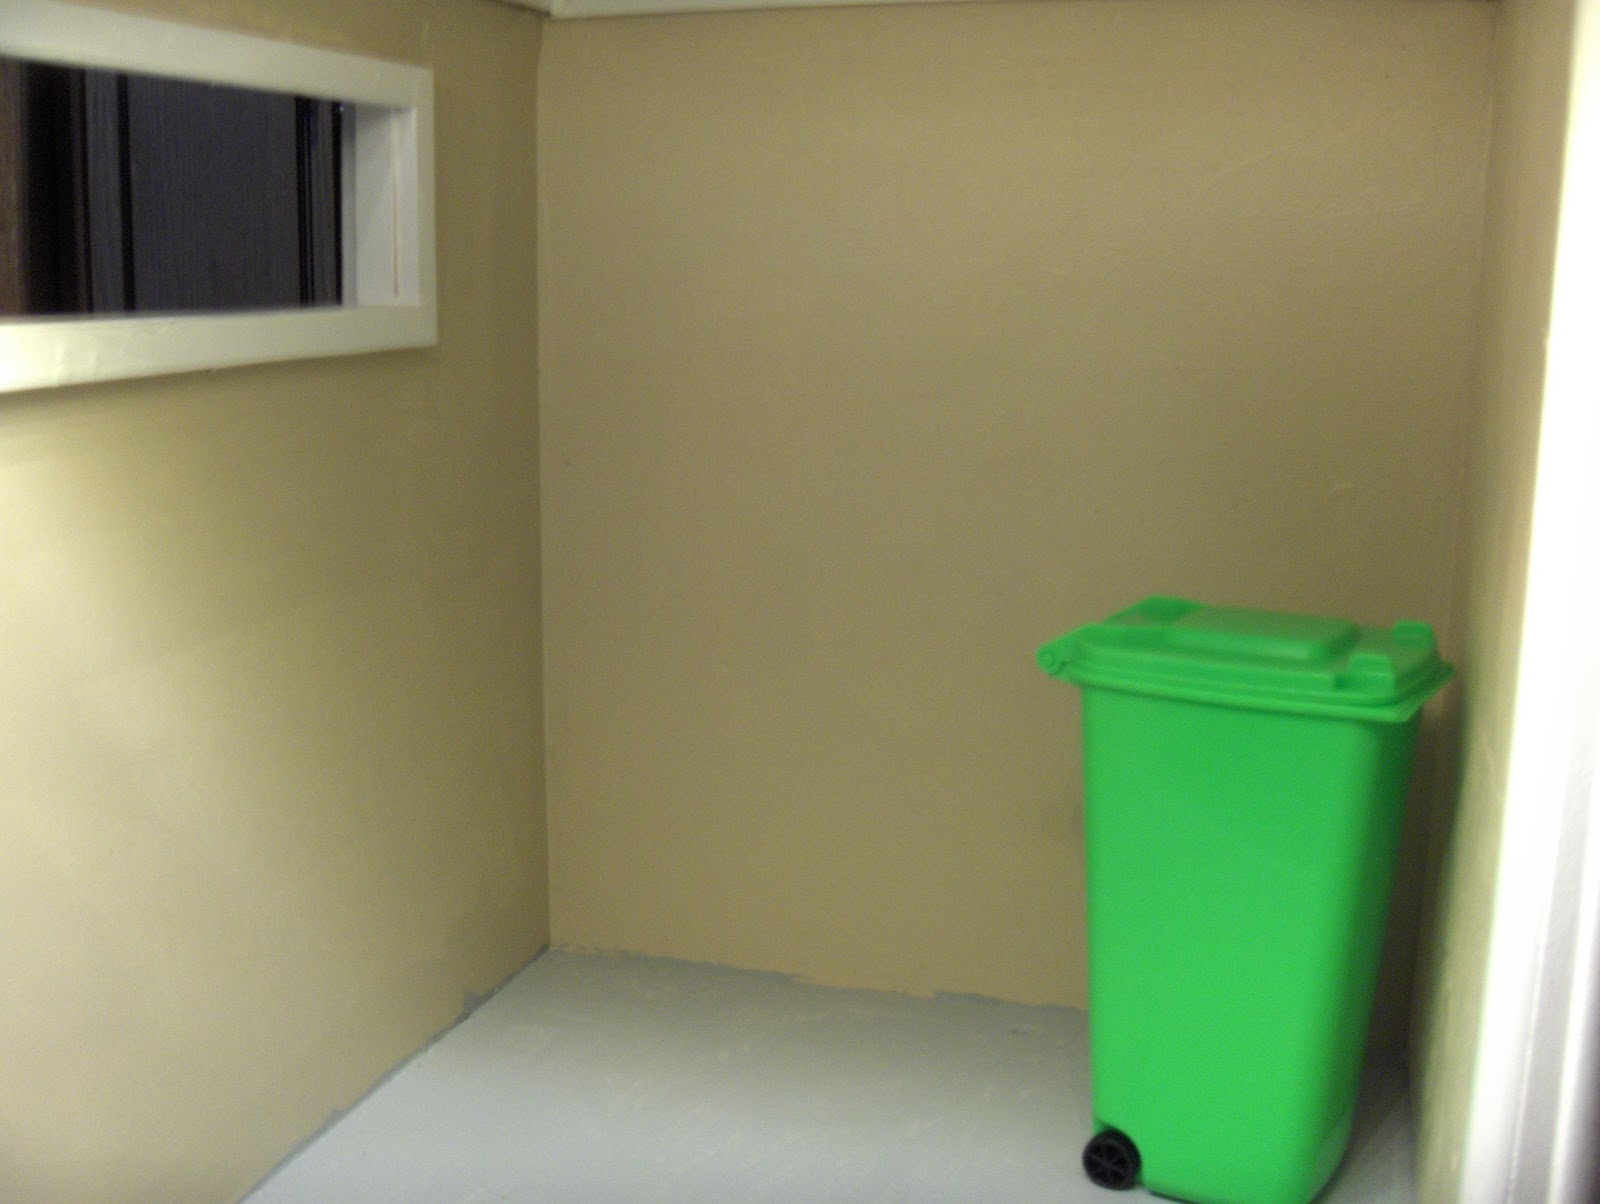
Here's the garage area with its gray painted floor and the garbage can---which was a pencil container in school promo from Walmart, for 1.99...and the perfect size, lid opens and has little wheels, tooo adorable...and GREEN.

oldnewgreenredo

 Completed stairway from the man cave to the second floor.  Temporary furniture arrangement in the background.
oldnewgreenredo

Close up of the moldings/trim all painted and Ken's closet/cabinet installed under the wierd windows. My daughter-in-law commented it was a custom fit, lol. The shower on the back left still needs to be painted and installed...you always have to wait for plumbers!

oldnewgreenredo
Hubby did take this picture with a flash...but you have seen how great the LED lights work. We have opted not to have any lit fixtures or lamps. There may be a couple of battery lights...but the rooms are nice and bright with the LED strips.  However, this post is not a recommendation of- or for- any products or use of products as safe for children. Please follow all manufacturer's suggestions and installation recommendations.

Now to get to working on all these furnishings--and make them not so retro, crazy colors. Everything begged, borrowed and thrifted needs to morph into some assemblence of a tastefully decorated home. More to follow on Barbie's thrifty and thrifted furnishings. I did buy the to toilets and Refrigerator new, and the green table and dining chairs. My daughter-in-law is constructing the hanging chandeliers and lamps...which will be for show and she will work on many of the miniature food, magazines, books, etc, things for th house.


Thanks for stopping by, and I will be happy to answer any questions or comments.


All the opinions and photographs in this blog are my own or I am in possesion of the originals, 
I have not been paid or reimbursed in anyway for my opinions, posts or products used. 
Please do not use my photos without linking back to this blog without my permission. 
Thank you for your cooperation, Sandi Magle 
Sharing at these fine parties this week, 
 Sandi


Sunday, November 1, 2015

DIY Barbie Dollhouse: Week#4 Part 1-House Assembly and Moldings


Last week was a busy week with the NEW DIY Barbie Dollhouse. Chicagoland had cold weather and rain from the hurricane. We had intended to get to the lighting, but all the moldings and house assembly came first.

Choosing some composite moldings was an easy decision from Home Depot and Menard's and were perfect in scale and prefinished. They are fairly inexpensive for an 8-foot length, cut clean and easily.


oldnewgreenredo


Some fancy moldings were purchased at Michael's for the roof edge shown here with our hand made straight moldings we used for the window frames.

oldnewgreenredo

Tools we used, were simple and complicated: the square from my tool box, pencil, scissors for cutting the uneven edges of the composite trim, an exacto knife for cleaning up the edges. Composite molding edges clean up nicely with just a scrape from the knife.

oldnewgreenredo

Tools we used, were simple: the square from my tool box, pencil, scissors for cutting the uneven edges of the composite trim, an exacto knife for cleaning up the edges. Composite molding edges clean up nicely with just a scrape from the knife. The mini mitre-box on a wood surface and lots of clamps and PATIENCE.


oldnewgreenredo

My trusty little mitre box and my husband insisted on using glue, (Tite-Bond 3-Ultimate wood glue) which was messy and marked up all the prepainted walls and surfaces, but he is the construction foreman, so I just gritted my teeth and thought of all the touch-up I will have to do.

His wood glue is amazing though, and it holds pieces totally tight. Set-up time is 30 min, and he clamped my cut door moldings.


oldnewgreenredo

My creative second floor landing opening for the stairs proved to be more of a challenge. My husband showed me how to make the complicated angle cuts.


oldnewgreenredo

Here the clamps hold the moldings in place so the angle cuts can be marked.


oldnewgreenredo

After I made the cuts, the molding are glued and clamped. The green side goes to the kitchen side of the second floor.

oldnewgreenredo

Next Hubby installed the inside walls. These were screwed or nailed from below and from the outside walls. My husband and his clamps held the walls straight while the glue (more touch-up) dried.

oldnewgreenredo

I set a few pieces of furniture pieces which need to be flush against the walls, to work around for the floor moldings. I did the measurements and cut all the pieces and set them in. At this time, the entire kitchen will be molding free because of all the cabinets will be built in. Just like a real house.

oldnewgreenredo
The kitchen (green) will be filled with appliances and cabinets, no need for moldings along the walls.
oldnewgreenredo

The bathtub will be up against the wall, the trim placed along the corner walls.

oldnewgreenredo

Floor moldings on the second floor living room. More glue to cover up, LOL.

oldnewgreenredo

Here are the outside edges, showing the shape of the moldings. Whoops-- touch-up needed on the outside window trim.

oldnewgreenredo

 The molding on the second floor opening, with floor molding installed.


oldnewgreenredo

Hubby used shakes for the roof. He said it went quick and gives a nice look to the exterior. The scallop trim finishes off the front edge. He still needs to add pieces on the side.  Another trip to Michael's.

oldnewgreenredo

 You can see the screws holding the floors together, on the outside. This will be covered up with wood putty.

oldnewgreenredo

The shakes are large, but small ones looked so busy, we opted for the large shakes. Hubby glued the shakes and used a nail-gun. The roof cap is still under construction.

oldnewgreenredo

DIY Barbie Dollhouse so far. Now, what's next?


oldnewgreenredo

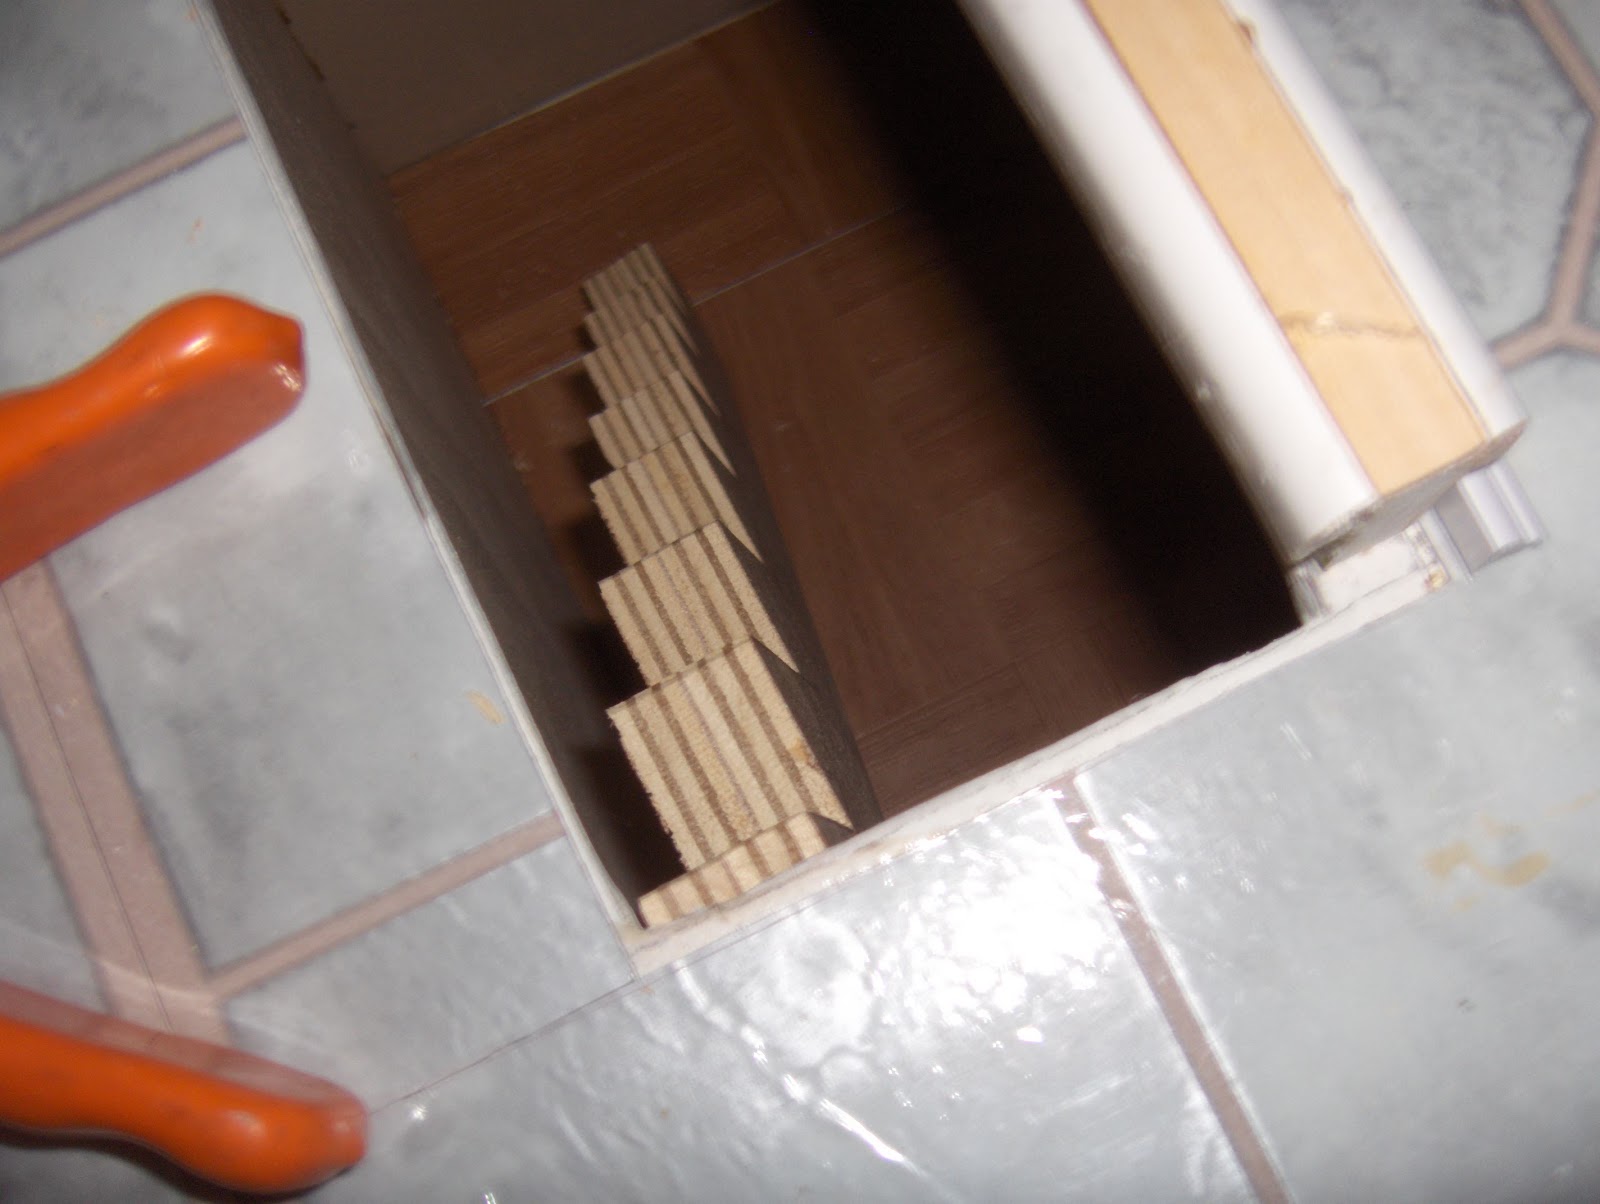
The stairs, at this point all the planning is out the window, we measure and build as we go. The risers are spotted through the floor. There are actually two being held together, you are seeing the stripes of the 1/2" plywood. Golly, I hope these work. Hubby has been delegated the stairs. More on next post.

oldnewgreenredo

I call this Fall Tablescape #2...LOL. With cookies for Halloween, all the tools and work going on in our kitchen.  Next week is supposed to be nicer weather, so the porch can be utilized. It's amazing I served dinner for 6 in the kitchen the next day with my regular Fall tablescape.


All the opinions and photographs in this blog are my own or I am in possesion of the originals, 
I have not been paid or reimbursed in anyway for my opinions, posts or products used. 
Please do not use my photos without linking back to this blog without my permission. 
Thank you for your cooperation, Sandi Magle

Thanks for stopping by and I will be sharing at these parties:
Sandi