Showing posts with label Paper Cutting. Show all posts

Wednesday, July 22, 2026

Mather Classes helped me Beat the HEAT!

Ad-Free Blog!  

Last WEEK, 
One thing about aging is you don't adapt very well to extreme cold or heat. And, yes, the upper Midwest is frying like the rest of the country. 

Gardening consists of turning on hoses and sprinklers and then running back into the house. 

To keep cool and busy, I've been doing a bunch of art classes. Here are some of the projects, not made for results but mostly as learning experiences. 


In my Mather Senior Art Journaling Class (I don't journal, I just take the class for new materials and techniques), this week we explored Pointillism through the works of Seurat, Van Gogh, and Monet. All of whom used dots, blobs, streaks of colors on top of colors to create shading in their works.


This was 20 minutes of making dots, ala Seurat, to make the leaf form and shadow. I used alcohol markers on simple sketchbook paper.


Alcohol markers are excellent for this technique of using dots/dashes next to each other and you get the benefit of transparency to build up a wide color range.


It looks like I used a million colors, but it is the juxtaposition of colors next to each other that makes your think...ooh what a lovely shade of green, when it is blue and yellow and even peach that makes the shading.


My trushty markers for these next projects also.


In Creative Mindfulness we worked in what you would define as slow drawing from reference photos. Again, experiencing rather than trying to achieve a finished product. Pencil underneath and colors added with markers. For me slowing down is really hard.


This one was easier, building up layers next to each other and on top of each other...lily pads...with my trusty dark blue green as a background. I did the background first and then built up the shapes....slow sketches on sketchbook paper. 
Repetitive motions are actually relaxing...and your mind eases into the process.


These are small drawings on one page in a sketchbook.


Here is something different in Paper Cutting class. Using card stock and thick foam double stick tape, I worked at a large (on 12x12 cardstock) petals of an asymmetrical flower pattern I made. I worked large, it's hard cutting small with my old hands.
 I created a pattern for the biggest petals, and then cut each smaller layer by cutting off 1/4-1/2" off the edge of the pattern. (You never know how things will work out when you make your own patterns.) Eventually it became very skimpy, I rounded the pattern off for the centers.


The separation of the petals were created by using foam stickum tape (dollar store)
and twisting the pattern pieces one quarter turn each.


This used up quite a bit of paper. The technique was from artist Jen Stark who works in multi-dimensional constructions of layers...google her work, so cool. 


Definitely a fun and a bit messy project.

Another Paper Cutting project of building up layers inspired by Jen Stark, was made by cutting from a pattern you created, then making smaller and smaller pieces...mounting them with spacers(I used cardboard bits on this one)


I also doodled ghere and there...this really needed mountin on something interesting, and I used the turquoise and yellow polka dots,  as that was what popped out among the warm colors.


The central circle bit was just glued flat, but the edge pieces were layered.

  
Very interesting effects by deconstructing  and reconstructing a simple circle.


I'm always making collage fodder, cleaning my palette, using up wet paint. The strong and dark  moody paper was perfect for the next piece...


Working on a theme of Women...and skin tones, I constructed a 'model' from different magazine images, male and female, different skin tones...plus using a multi- portraits historical page for the skirt.
This was fun, the circles were another addition as the prompt included mixint two different styles from two artists. 


The fishnet flesh was actually a male model photo in that fabric as a shirt.
I used watercolor gel pens, acrylic pens, posca-like pens, magazine pages, and lots of ink drawing and paint staining here and there...
Spent a fair amount of time on this 3+ hours assembling, not counting making the original papers. The 'dotted' white lace was used to intentionally bring out skin tones and faces.

I finally got in the garden Monday and Tuesday, we had a break in the weather, YAY~ Cucumbers had gone bonkers,

Now I have to make Overnite Dill Pickles
The best ever and so easy! 


All the opinions and photographs in

 this blog are my own unless

 identified, I have not been paid or

 reimbursed in anyway for my

 opinions, posts or any products

 shown.  


Tuesday, March 17, 2026

Something ARTY made of bits and pieces!

Ad-Free Blog
Well, this week I actually got to catch up with a couple of my classes. Tuesday we did Mather Class with Flor...a paper cutting class with a floral theme. 

oldnewgreenredo

We started with instructions history on an artist, and a really intricate handout with a pattern. I took one look at that, and knew I would never be able to handle that intricate of work, so I took it My Way.
I started with a piece of cardstock 12x12...using my painted junk sheets I made last summer I cut out a vase shape.

Quick Video of a bunch I did on the fly with watercolors, alcohol inks, sprays and watersoluable crayons. If you have (ugly) art work, chop them up into color groupings and save for collage)

My homemade Collage papers shortVIDEO


VIDEO

oldnewgreenredo

Adding a bit of magazine papers (the greens) cut into Matisse style wobbly leaves, I made some yellow floral shapes in gold and yellow. The orangey piece was from Tumeric painting in another Mather class.

oldnewgreenredo

Cutting was easy, the little reddish petals were all petal shapes, and the blues were supposed to look like forget me knots. 


oldnewgreenredo

Two and a half hours later I was still playing and gluing. Once I was content, I sprayed this outside with Krylon Workable fixative (to stabilize the water colors and keep them from bleeding). 

oldnewgreenredo

Then an even coating of DecoArt super clear sealer in Matte. to tack down all the edges and make it totally water safe. I plan to do some enhancing down the way after this cures. You can work on tip of sealers...and I hope to add some depth and fill in some of the whites. Next time I do a paper cut pot and flowers I will have a painted background/table and something behind it. 
But, for play this was so much fun...especially when you can work large and bold! 

Materials used for this project:

12x12 cardstock

Watercolor/ marker/ altered/painted, or scribbled soluable crayons and water, on  sheets of different types of papers.  See post HERE:

Krylon Workable Fixative

Scissors, glue stick, matte super-clear sealer,  and a brush.

MATHER FREE CLASSES FOR SENIORS HERE!

Have Fun! 


What's NEW on your Desktop?

If You enjoyed this post please FOLLOW IT in the upper right hand corner, to get just one email of each AD-Free post.

Thanks  ALWAYS  for visiting,
I will try and respond to every comment and answer every question.

I will post at the following Link Parties, 
I hope you visit them.


All the opinions and photographs in this blog are my own, unless otherwise designated. Please do not use my photos without permission. I have not been paid or reimbursed in anyway for my opinions, posts, or any products shown or anywhere I shop.

Thank you for your cooperation,
Sandi 


Thursday, July 3, 2025

Paper Explorations and Paper Cutting, Two summer themed projects!

 Quick post, such a busy week. We have two birthdays here and the 4th festivities...so hope you all are busy and having fun, too.

Paper Art Explorations and Paper Cutting!

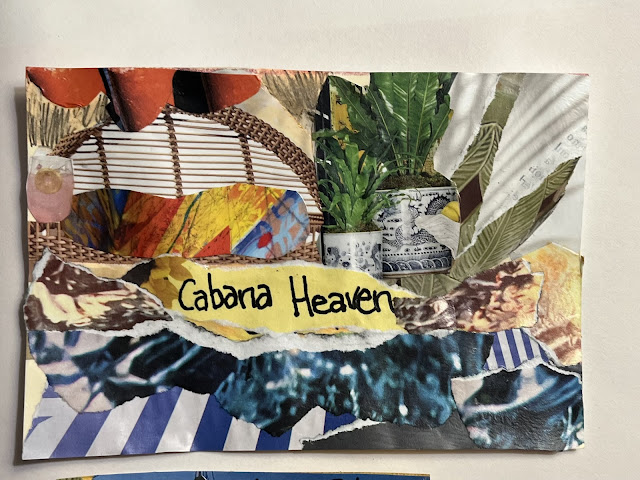
My first Paper class was assigned to do postcards of a vacation scene, cutting or tearing your papers. I had been in the garden all morning, so I was madly tearing bits and pieces from magazines and some papers I had in my file as the instructor talked about the concept of postcards.

This  Size of 4" x 6" is really small for me, but I followed the class guides. I worked on some card stock. The first one started with the cool potted plants image and a screen which I used as a back to an imagined deck lounger..the blue torn strips are water and the rest is jus shadows, colors, rocks...and bits of pebbly beach all from various papers and images from magazines.

Again, two little projects in roughtly 40 minutes. I use Elmer's school clear water-based glue and love it. It dries quickly and doesn't disturb the colors of anything, and you can work on top of it. The glue does slightly repel alcohol markers. 

oldnewgreenredo

If I had time I would have searched for an interesting vacation related word...for the center, instead of my lousy lettering.

oldnewgreenredo

Warmed up, the only thing I cut for this postcard was the tree shapes at the top...everything else is torn papers, in fact so much was off the page of 4"x6" that I just trimed all the edges even with my measured card base.
Niagara Falls is gorgeous and on a sunny day the water is every color and glistening. I tried to capture that memory with cool and warm blues and whites.

oldnewgreenredo

Tools and Materials Used for these were 
card stock, scrapbook papers, magazine pages
Elmers Clear school glue, 
magic marker...
oh, and a square/ruler! 

Paper Cutting Class
This Piece was from this week and it was supposed to be distressed by removing colors of the pieces and background by sanding/salt sanding with a texture underneath. 

oldnewgreenredo

I'm learning to work really fast. I have some of those expensive craft magazines, and create magazines besides files and files of articles on antiques, gardening and home decorating---these are from before Pinterest., When I purged my magazine collection I saved so many pages I have file boxes of them sorted according to topic. Now, with pinterest, there is no need to have printed materials...when you can have every image available there.

oldnewgreenredo

This is page is roughly 11" x 14" on some paper from inside a purchased thrift store frame, a little heavier than printer paper, and lighter weight than cardstock. It has a bit of a sheen to it, but accepted all the materials I used.

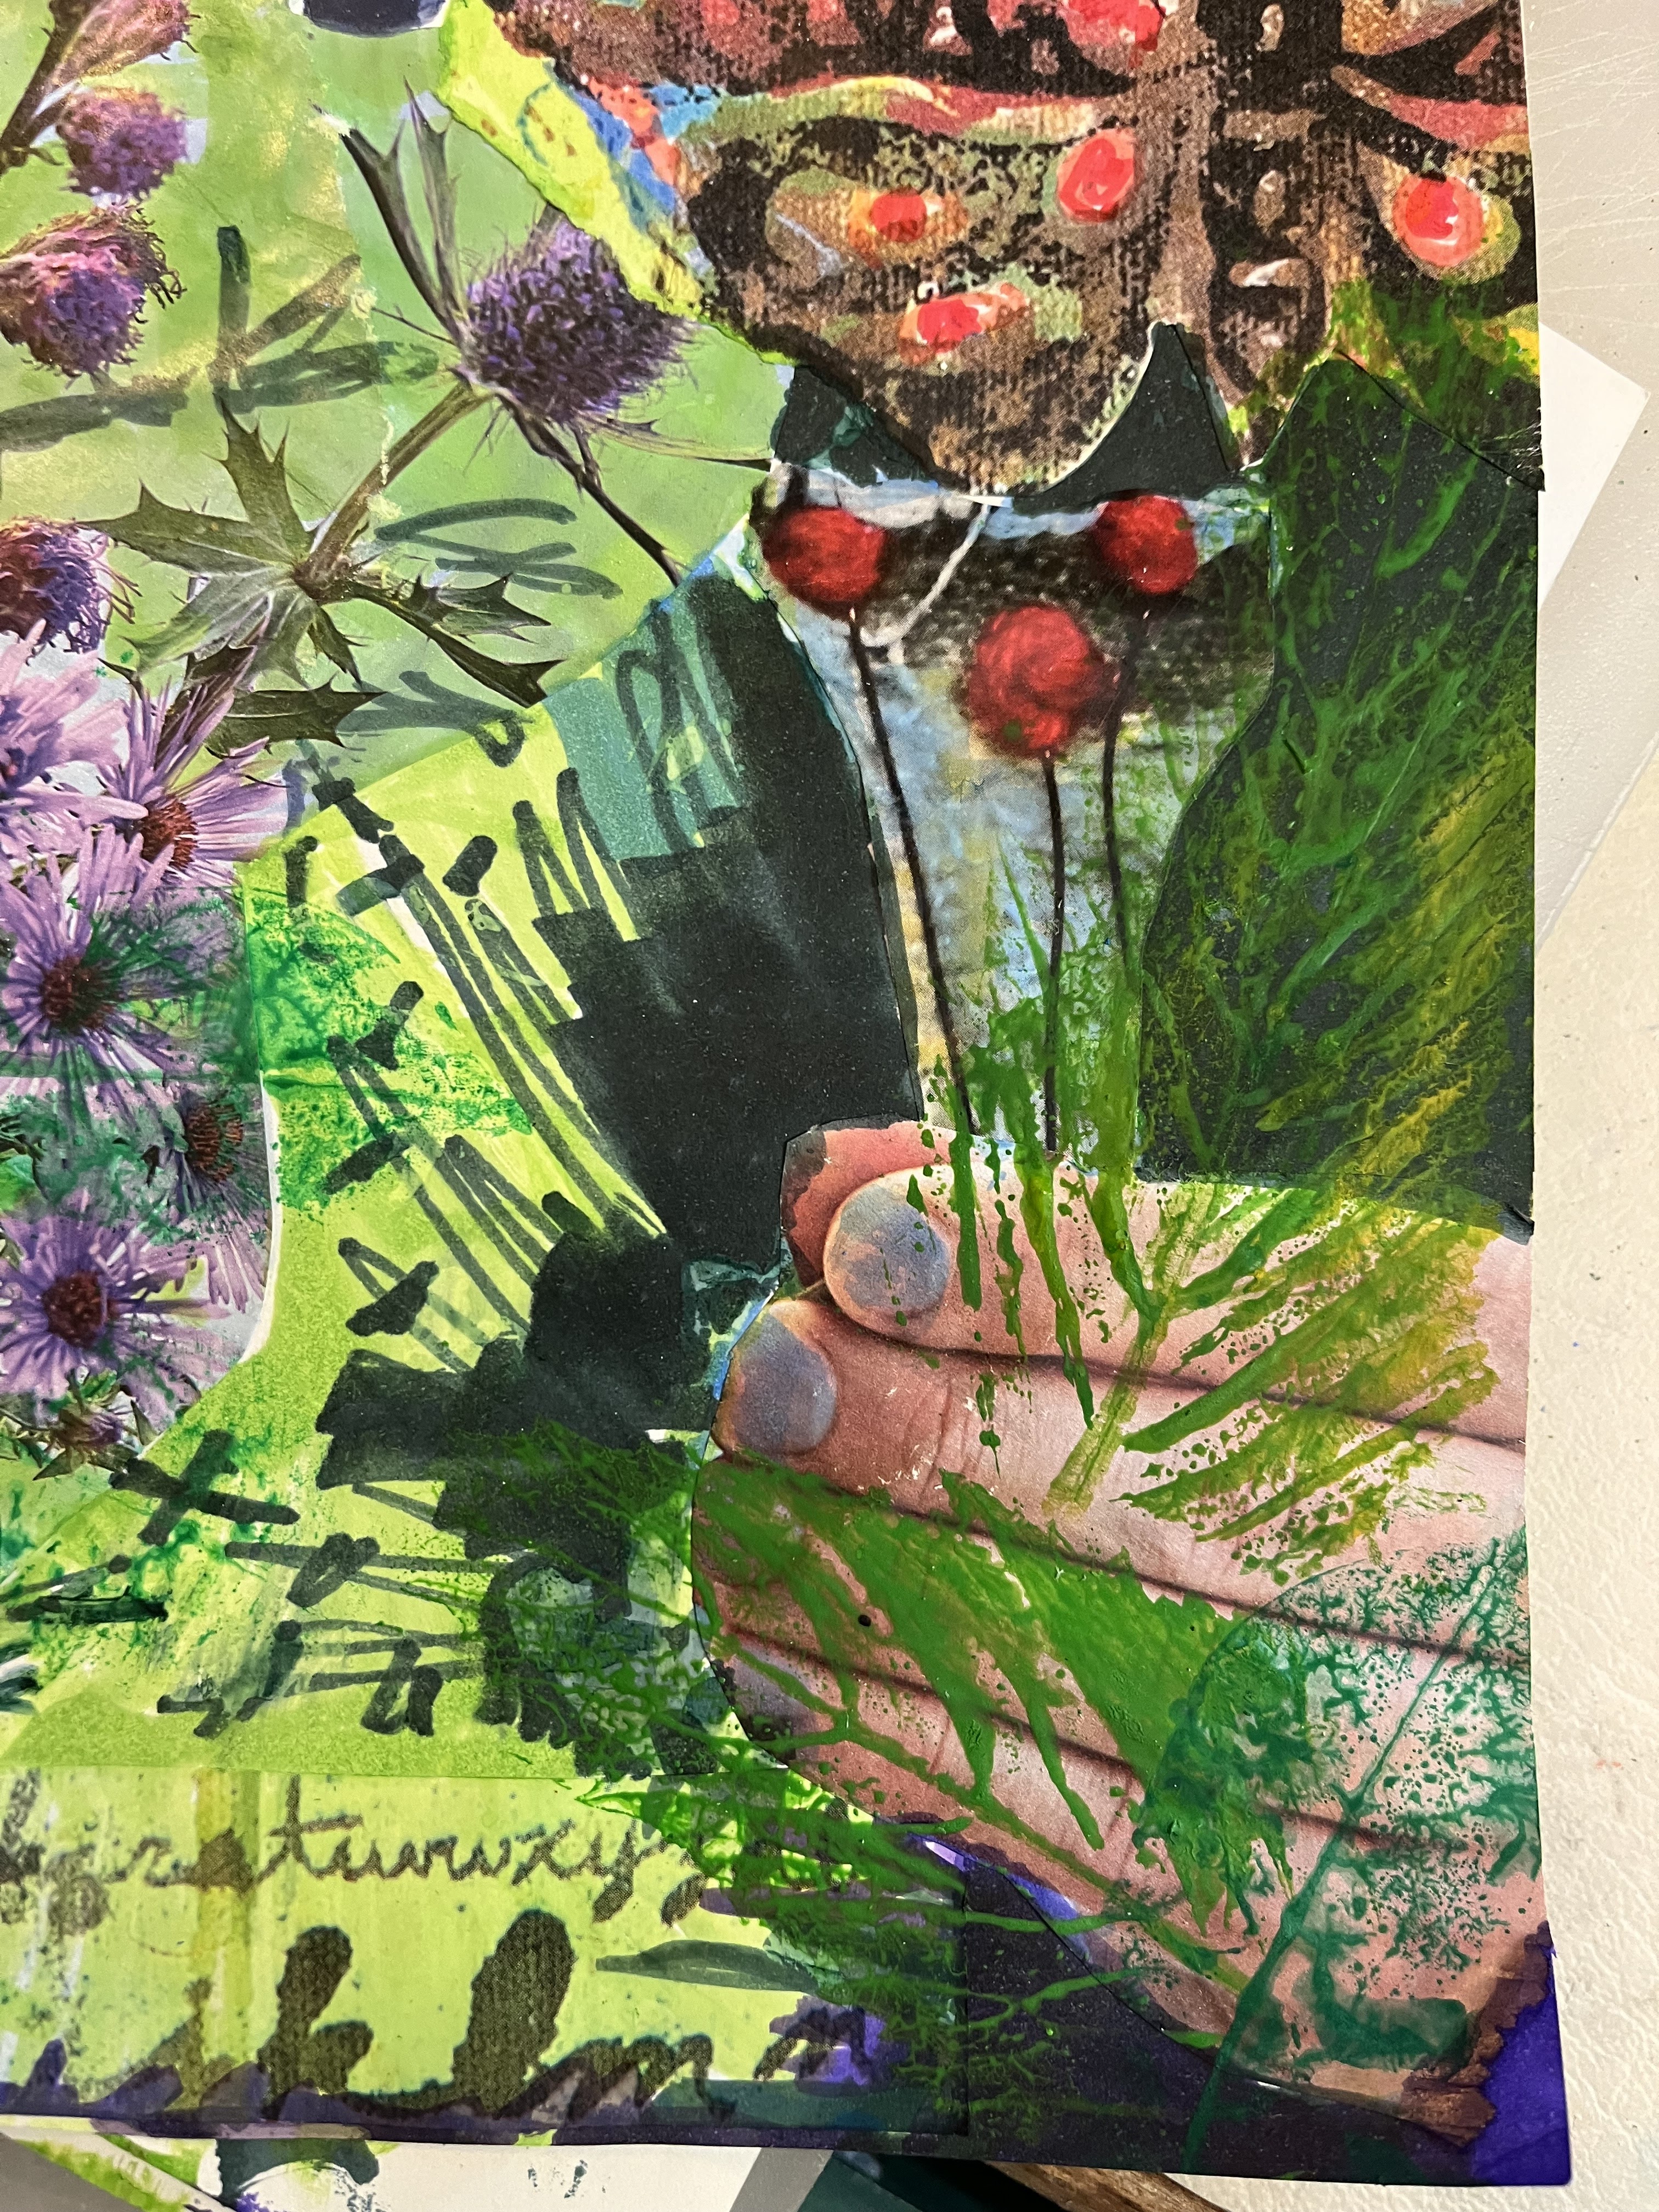
Gardening has been all I have been doing, and that great beetle image was the start and then the Hands...again, working within the 40 minute time frame...I'm getting really fast at making choices on the spot. Paralyzing indecision is really a stumbling block to making Art. Your brain is your worst enemy sometimes. 
Here,  The sun was a design from an article on stamping? 

I loosely cut out the beetle, the background was white, but alcohol markers were a quick fix of that. The dark background where I had planned to do leafl, twig rubbings/distressing were done in alcohol ink, which ended up entirely saturating the paper---which I didn't realize. I thought that sheen would cause the markers to sit on top. NOPE!

oldnewgreenredo

Heres my tools and scraps...the leaves twigs I wanted to use for rubbing/distressing.

oldnewgreenredo

The images of the hands really add a personal touch to this work...touching Nature...I think you can smell those mini Asters and Sea Holly.  I have two big branches of Sea Holly growing in the garden, can't wait until they turn dusty purple.

oldnewgreenredo

Well the distressing didn't work...because of the heavy saturation of alcohol marker and the images on the heavy magazine papers! These really didn't want to distress either...so I painted my leaves and printed the fresh leaves in several  greens of Gouache. (opague/semi opaque water-based paints from tubes.)
I've had the set for ages and just hadn't used them. 

oldnewgreenredo

I also altered othere areas with more ink...added some extra orange, marked the nails in blue/green, and disquised any white background in some shade of green, blue, or dark purple. Lines and business were added for the texture I was missing from not being able to distress.

oldnewgreenredo

The Moth/Butterfly image is marked up, I added more orange and red. The darks are dark blue and green markers in the background and around the leaves.  Here and there are some colored pencil enhancements, mostly in oranges and green.

oldnewgreenredo

To end on the Upbeat, I will try  another simple image and maybe a painted gouache background and then try some distressing with sand paper and stencils, or branches of heavier cedar or fir pieces.  
Lace, mesh, crushed papers/aluminum foil were suggestions. I think I will try them all and do another post. But, not today!

Anyway, I loved doing this and creating the positive message...which is perfect for this time of year!
Summer solstice and all! I do love the experimental aspect of this paper work, which is really a new lesson  for me. 

Thanks to Free Mather Senior Online Classes 


All the opinions and photographs in this blog are my own unless identified, I have not been paid or reimbursed in anyway for my opinions, posts or any products shown.  


Thursday, June 26, 2025

Mather Classes: Paper Art Explorations and Paper Cutting.

Ad-Free Blog

With the horrible heat this week, I'm adding a couple of new classes to keep me in the house.

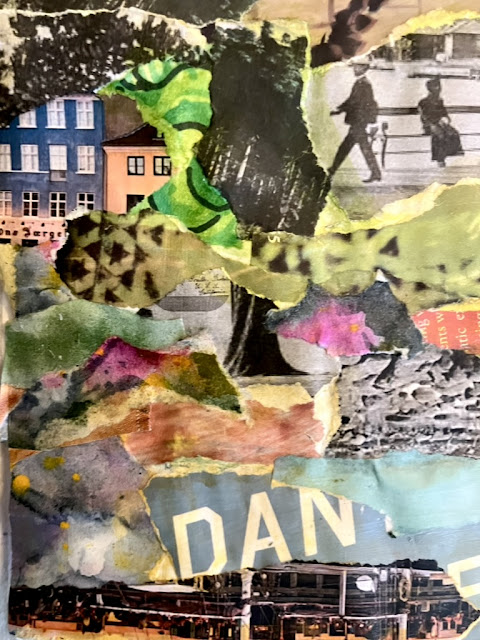
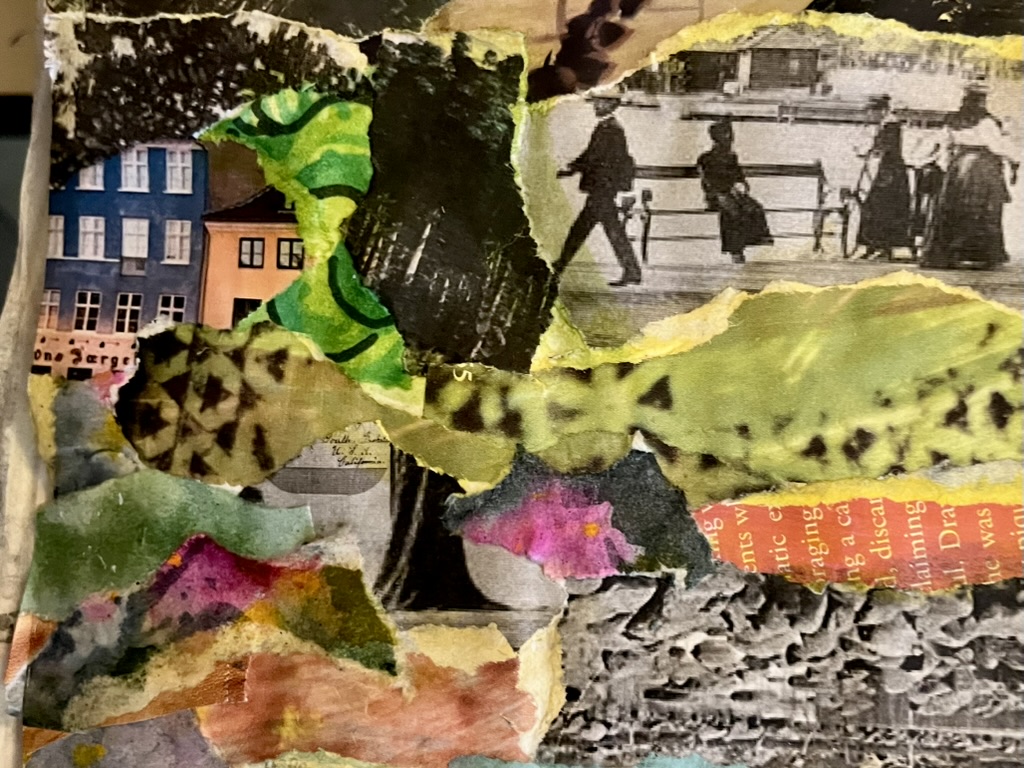
Paper Art Explorations was to be a  TORN landscape or a city scape. Very fast class, I ripped a bunch of paper up into strips and pieces, some from old photos I had enlarged on printer paper. I really didn't know what i wanted to do...and it just sort of fell together. 40 minutes isn't a lot of time to think...which I think is an asset...not getting lost in the muddle of my mind.

I confess the only bit I used a scissors on was this blonde head...this piece has been floating around in my scraps.....waiting, and yes, Denmark is a HAPPY place. Certainly happier than here in the USA.

oldnewgreenredo

Everything else was ripped. The church steeple is from Denmark and very old photo, also the shoreline. Bits of houses are from Copenhagen Nyhagen-the historic district.

oldnewgreenredo

The disjointed letters are DAN and an E. I forget what the original word was.
The textures and colors are all reminiscent of my summer in Denmark.

I used a clear washable Elmers glue to set my pieces and then coated the whole thing with my new  Golden Matte Gel medium. I wait for sales when I buy mediums or paints and then take advantage of the savings. Coupons are good too.


oldnewgreenredo

The family home I stayed in was right on the Skattegut, the part of the sea between Denmark and Sweden. I often walked the long harbor pier and beach behind the house. The greens and yellows are the lush vegetation and flowers that every home had.

oldnewgreenredo

The figures are from another old photo blown up ...turn of the century of a park. Denmark is big on walking and parks.

oldnewgreenredo

the reflection on the water, water is everywhere in Denmark which is many islands and a huge fjord slicing through the north part. The sea is life, food, and a source for vacationing.


oldnewgreenredo

Here you can see how it was attached to my sketchbook. After trimming and removing, I did a tint on all my raw white edges...I wanted the feeling of sunlight, then when that was dry I totally gave it a Gel Medium Coat. 


Denmark is often described as the Fairytale Country due to Hans Christian Andersen's Fairytales...so the eyes in the sea at the bottom of the piece of course
are Ariel, the Mermaid of HC's famous tale,
 "The Little Mermaid."

This technique was loads of fun...and I'm looking forward to the next class. 

I also took a Paper Cutting Class during this week of horrible weather. Since this was my first class, I did not know what to expect. 
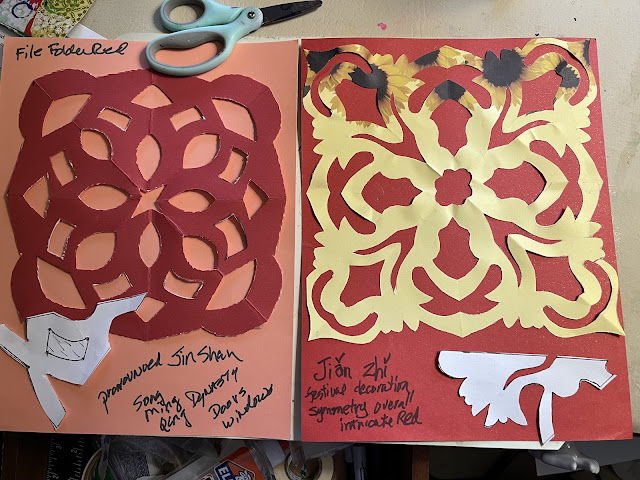
But the instructor, Flor gave us a quick history lesson on Chinese Paper cutting, a very old art form, some pieces have been actually found from the 6th century.

holdnewgreenredo

 Yes that is old. I wonder what kind of scissors did they use?

oldnewgreenredo


Actually, I think I will bring a cutting tool up from the basement next time, as my scissors strength isn't very good for details or thick folded papers.

oldnewgreenredo

We were taught how to fold a Square into 8 sections and used a template to cut out our first one. The only red paper I had in my room was a red manilla folder, which was very thick to fold and cut.

oldnewgreenredo

The second one I grabbed a sheet of yellow printer paper with a design on the edge...this was the perfect thickness for the project. 

Again, 40 minutes or so flies by, and we just finished and shared and the class was over.
oldnewgreenredo

This was very interesting and worth a look further for some research! 
Jian Zhi with accents above the 'a' and 'i'.  
Pronunced, Jin Shan, like I said very interesting.


All the opinions and photographs in this blog are my own unless identified, I have not been paid or reimbursed in anyway for my opinions, posts or any products shown.