Showing posts with label watercolors. Show all posts

Thursday, August 14, 2025

Color Washed Shapes and Designs

Ad-Free Blog

oldnewgreenredo

This was fun...simple washed watercolor blobs/circles. (I can't make a circle, well rarely) and then do scribbles on them. It was fun trying to do something different in each one. First one ended up being the new planet? they think they have found with multiple rings, the third one a jellyfish or a cabbage? 


oldnewgreenredo

Blobs are so organic... I think I see some shells, eggs, or/and rocks/geodes.

oldnewgreenredo

Experimentation is always good for stretching your skills and your imagination.
Play is good for your soul!

oldnewgreenredo

The black and gray one used Pebeo resist pen...great way to test new art supplies.

oldnewgreenredo

The shimmer looking lines are from metallic pens..with brush or line tip...I like that they are basically subtle in color and sheen.

oldnewgreenredo
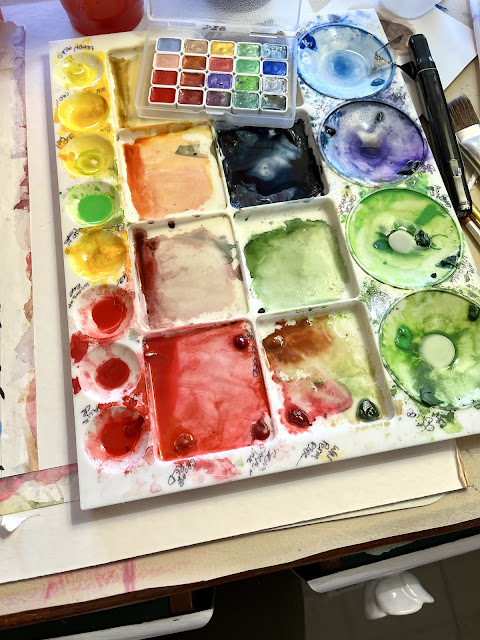
My poor old watercolor palette. I'm too cheap to wash it off, and just keep reusing colors over and over...altered or pure.

oldnewgreenredo

Simple materials, paper, water colors, two brushes, two markers and the metallic pens for the jewelry. I may do this again with different shapes. 

WHAT Do YOU make of your BLOBS! ???

All the opinions and photographs in this blog are my own unless identified, I have not been paid or reimbursed in anyway for my opinions, posts or any products shown.  


Tuesday, April 15, 2025

Mather Mixed Media Project with Interesting results

Ad-Free Blog
One of the reasons I take these Mather classes for seniors is to loosen up, experiment and work with new materials. After 45 years stuck in clay, I really wanted to spread my artistic wings and reawaken my childhood zeal over all art mediums. Mather offers everything from poetry, writing, crafts, exercise, educational classes free for seniors over 55.

Free online classes for seniors: Mather Classes

oldnewgreenredo

Creative Mindfulness classes are based on mindfully centering yourself, then letting go, add a little art history which leads us to working with prompts based on a particular artist's art. 

This week, Ketki Fadnis was the selected artist. Ketki is a self-taught Pune, Indian artist who states, 

"Art is a healing process of body to mind and mind to soul".


How completely true. When I was going through my third knee replacement and had to wait so long...I soothed myself through watercolor painting.


Mather handout

Ketki works in different medias, abstract as well as these amazing florals where she paints an entire canvas and then blocks out a background around a design, here she chose floral flower pots. I love the movement that crosses across her shapes. 

oldnewgreenredo

We were given the choice of any type of different materials. Here I am working with my alcohol markers  on 12x12 cardstock. I really like how well the cardstock accepts any media with minimal stretching or peeling. 

Here we were encouraged to fill a page with shapes, lines swirls and doo-dads. This scribbling was very quick, maybe 3-5 minutes.

oldnewgreenredo

I'm trying to empty this watercolor palette so I can clean and have a fresh start, so I was limited to what was left on the palette. Thinking I would use alcohol marker as the background in black..so I went bright in choosing my colors.

oldnewgreenredo

You can see I was pretty random with the colors, but I like how the blue lines show lighter under the transparent/translucent water colors. We had to work very fast. 
Some people worked in pastels, oil pastels, crayons, charcoal, colored pencils (tedious),  or markers as well as watercolors. The recommendation was to do acrylics to do the back spaces.


oldnewgreenredo

With a white (which didn't show up) then a black charcoal pencil I outlined my vases and then leaves. I originally thought of turning the paper around and cutting out my shapes an mounting them on another page, but I followed directions and used acrylic on top of the alcohol markers and watercolors. 

Since I used quick washes...the watercolors dried pretty fast. 

It took almost 3 coats of paint on the background to get it to this stage. I may enhance or add a table or line in black..as these are floating in space, which bothers me.

If I do this technique again, I'll wait long enough for it to be completely dry before doing the background. Bleeding was minimal but persistent, so that would be a good idea. Maybe working on three or four of these at a time would work giving you time to let everything dry. 

The Apple Barrel acrylic paint from a Mather kit (rate this as kid quality only) light blue acrylic was what I had on hand without trundling downstairs in search of some better paint...the class moves so fast. I would definitely use a better paint with better coverage and a more flat finish.


How About Give this Method a Try!
and HAVE FUN!

Even great for kids on a smaller scale, maybe turn the finished Scribble that's colored over into hand cut out shapes..houses, pots, plants cars and then mount them on colored paper.  Great dexterity project for all ages.

All the opinions and photographs in this blog are my own, I have not been paid or reimbursed in anyway for my opinions, posts or any products shown.  


Monday, March 10, 2025

All About Brushes for Watercolor

Ad-Free Blog
Brushes: Goodness do I have brushes, some 30+ years old, some are newish --last 10 years or so.

These are only the brushes I have designated as Art brushes...I have a whole container of 'craft' brushes that are really inexpensive/utilitarian brushes for furniture, stains, glues, modge-podge etc. I do keep them separate.

Since I started taking Mather water color classes...I haven't bought any new brushes, but have been using this and that, most of which are left overs from ceramics, acrylics or craft painting. 


So many of the questions in the classes are about  brushes. Because Mather isn't selling any products (neither am I), I thought I would analyze my brushes and figure out which are the best for MY needs. Just like testing my paints in this post: 

I thought I would set up my brushes according to styles and test them.

TESTING:
I dipped EVERY brush into clear water, squeezed the bristles and then dipped twice into prepared water color pans, once front and back. 

For this first page of what I call water carriers...I then made a flat stroke of color left to right, lifted, then made a stroke with the edge of the brush, then several side pressed down strokes to show how the brush spreads the colors.  These were all done with just the one dipping into the colors.


The biggest concern for Water colorists, is do synthetics work as well as Natural bristles. Natural bristles in large brushes carry a lot of color and water...they have a softer (slop or slide) type of application.

My Red grouping is Oval mops, I felt I had more control with the synthetic here, but for large areas of water or color...the naturals are great but $$$


The HAKE brushes at the bottom were originally purchased for glaze applications..which they are fabulous for, the bottom one is nearly worn out---I may be purchasing a few of these because of the water carrying ability.


For the Next Pages:
For this and all the pages following, I dipped the brush in water, squeezed, then dipped twice front back in color and did the similar stroke patterns across the page. 
If I had to re-dip the brush...I indicated so. 
Some brands of brushes are named, if I could read the print on the brush. Unnamed brushes were generally purchased in bag sets in craft stores.


Flats are just that---Flat brushes with a sharp edge at the top. My plan here was to show the first stroke as a zigzag---edge/to flat edge, then a line made with the skinny top edge, then blotches made by pressing down on the narrow edge.

I labeled these LONG Flats, but they are just known as Flats, while shorts are known as Chisels, which I don't have many in good condition (I used these a lot in craft painting)

Flats actually give you quite a bit of control for straight lines as well as making C or S shapes, great for shading.

Differences between Natural, Synthetic Taklon and Synthetic generic...you get sharper edges with Synthetics,  but,  there is a kickback on the synthetic brushes. 


Kick back is when the bristles leave the paper with a spring (see above) leaving some extra edges...most visible on the second from the bottom long synthetic.

Your Natural bristles carry a bit more water and have a softer feel to them. Flats actually give you quite a bit of control for straight lines as well as making C or S shapes, great for shading. 


I used only one paint load on all these but one...the no 8 had to be re-dipped, an unnamed synthetic brush probably from a craft assortment.


FILBERTS. I personally love Filbert brushes for florals and round shapes. 
They have been carefully trimmed to be oval and shaped. $$

You can see on the S and zig zag strokes--- it's softer than the flats. Side edges are softer and the blotches are more uniform. It's interesting that the edges are lighter, as the thicker center of the brush held more color.

Down below I made flower petals with one color dipping of each brush...these are all synthetics...Filberts in Natural hairs can be very $$$$


You can see the usage marks on the handles shows how old these brushes are!


Traditional bamboo brushes (general squirrel or other furs) were something I used a lot in Ceramics because they carry so much color and water. 
Control is a matter of learning...I'm used to heavier paints and I will need to practice control with water colors with my bamboos.
These were originally used in Japanese and Chinese watercolor and inks.


The newer Synthetic bamboos were wonderful to use and lots of control and they carried color well.  I purchased these online from Temu, I believe.


Other brushes I did with the same techniques.

First Grouping ANGLE brushes...another brush that can get expensive in natural bristles. I have four different angle brushes in synthetic. Of course they don't carry as much paint as the flats, but the edge handles differently and you can get great line/edges and lines with an angle brush.


The middle grouping of small flats, because they are small, I had to refill the paint on those to make the last blotches.They all carried the paint well, but Taklons seem to carry it the best,.

The Last group are Liners also known as Scripts...very long thin bristles. I thought the synthetics had more precision and held the color well.  I've used these for long lines and grasses. 


ROUNDS...are hairs arranged in a round grouping and not necessarily trimmed at the top. Golly this is what we used as kids. The all purpose brush...honestly you can do a majority of paintings with Rounds and Sharps(next grouping)


Rounds. This is another brush that I have as basically all synthetic. Again I only had to refill the smaller brushes to complete the marks. 


Sharps can make nice crisp ends on your lines and your blotches, great for leaves and flowers. They carry water/color pretty well. 

My biggest gripe about Natural bristle brushes is stray hairs, which is horrible in watercolor because if you leave it to dry---it leaves a mark, if you dig it out-- it leaves a mark. 


A Comment on brands: The Plaid/Folk Art brushes and the Susan Schwee watercolorist brushes were the most expensive in this grouping.

I also had lots of Royal garden brushes which have a special dyed Taklon which simulates pure red sable. They offer fine points, softness and flexibility like natural hair brushes. I wore these out in craft painting as they were my favorites...


Lowe Cornells can be pricy. When you want a really small sharp brush in 1, 0 to 10/0 you end up paying quite a bit. I keep a plastic guard on these brushes. My Royal Garden brush 0 is missing in the photo, I managed to misplace it for the photos. It has the flowers on white background on the handle...these are 20-25 year old brushes and still very usable.

ODDS or Whatevers.


Good quality foam (in paint depts at hardware stores) brushes are great for large paintings. I dipped this in water, squeezed and then painted...interesting. Windsor Newton's Paynes Gay is a fun color and I always have it in my pan next to an umber. 

The second brush is what I call a stiff bristled scruffy *(used and abused) brush. 
Wetted, squeezed and then dipped into side by side colors ...you can get some fun effects with a cruddy beat up brush.


The third line is a sea wool sponge..(try and get an assortment at a paint store/hardware store,) less expensive than a craft or art store. Again emmersed in water, squeezed out, then in paint...


Lastly this is FAN brush for acrylics...but... same process and see what you get...


I really recommend students to test their own brushes with a similar technique. Also how you would like to use them for reference. When you like the 'feel' of a brush---try others in that same brand or style...$$$ doesn't necessarily mean it is the best brand or brush for
how YOU paint. 


MORE About Branding: 

Walmart: Brushes in their assortments will be excellent/good/ and bad(cheap batches of kiddy brushes)  Cost effective its a great place to start. $  By all means buy your children/grandchildren at least decent or student grade brushes and teach them how to care for themn.

Artist's Loft brushes are mid-range $$ good buys, and are considered student grade. Michaels and Amazon carry these.

Bamboo brushes can be pricey. $$$ I've purchased from Art stores, Dick Blick, online and Temu($ cheaper with plastic handles but great bristles) over the years.

Loew-Cornell brushes: Amazon, Walmart, Dick Blick higher end brushes available cheaper in sets, but singles can get pricy. The white Taklons are strong and still flexible. $$$

Susan Schwee...apparently isn't selling brushes anymore...they were great...but she has what I call LADY watercolor books, almost made from patterns. But, she has a great use of color and shading...my motto is you can learn something from anyone.

Princeton/Heritage brushes can be found at Walmart, Dick Blick, and Amazon ...I have a few I think I bought in sets over the years as I have a few of each style in different sizes $-$$

Royal/Langnickel---student grade are pretty much sold in mixed sets by everybody...good buys and come in some great sets of what you might want to start with. $-$$

and many more...

NOW: Since China and importers have eliminated the middle man---Sable and Natural bristle brushes can be purchased directly from the manufacturer, so I may purchase a Sable set in the near future...

PS. I rarely paint with more that 5-6 brushes in a session, sometimes as little as two---it totally depends on how you paint. Some of these will go back into the 'craft' paint bucket and I will keep my favorites for
watercolors. You don't need a million brushes---honest.

 My Mather classes for Seniors 
are so much fun and they are free, 
if you are over 55 and interested, 


Thanks always for visiting. 
I will try and respond to every comment and answer every question?
???

All opinions and photographs in this blog are my own. I have NOT been paid or reimbursed any way for my opinions, posts, or products shown. Please do not use my photos without linking back to this blog without my permission. 

Thank you for your cooperation.


All the opinions and photographs in this blog are my own, I have not been paid or reimbursed in anyway for my opinions, posts or any products shown. Please do not use photos without linking back to this blog without my permission. Thank you for your cooperation, Sandi Magle


I'll be participating at these fun parties.


Sandi


Saturday, September 14, 2024

Playing with Paint: September #1

Ad-Free Blog

I've been PLAYING WITH PAINT on this in the mornings...very slowly, not my usual mode of operation. But, it's so relaxing and clears my mind. 


oldnewgreenredo

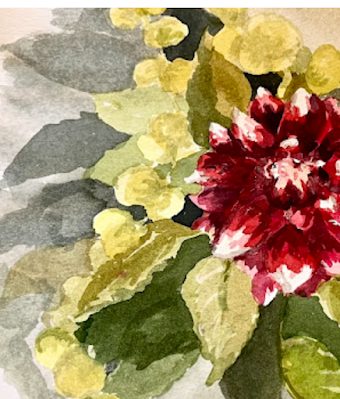
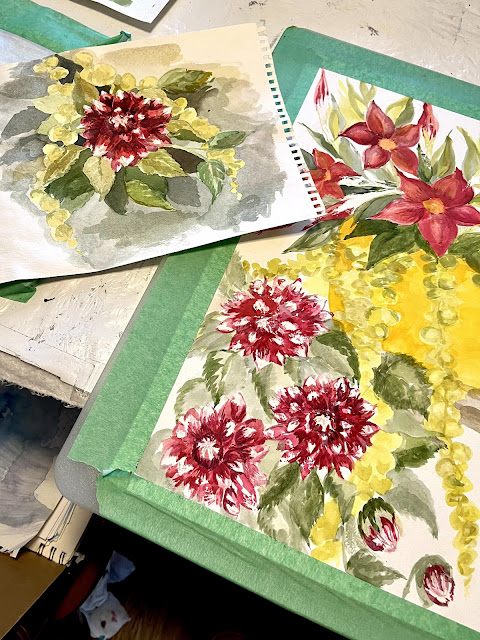
 Here is the stage I'm at now, at day three of painting.  I haven't been worrying about the background and I've been concentrating on building up layers. This is a painting and not a photograph, so you edit and add where your composition takes you.

oldnewgreenredo

This is the color study I shared before during my Mather Watercolor classes in August. Right now, I'm not worrying about anything other than building up layers...
This is much moodier than my new painting, I hope to capture some of this in my layers in the future.

oldnewgreenredo

My color wheel from my paints. I probably should have made one just for this painting, but that would seem so limiting, I do refer to this constantly.

oldnewgreenredo

My working Palette. I'll give you a list of the colors I've used  so far:

Lemon Yellow
Cadmium yellow Medium
Cadmium Red Light 
Carmine
Thalo red 
Sap Green
Foliage Green 
Yellow Green
Purple 
Prussian Blue
Burnt Sienna
Burnt Umber
Paynes Gray
Watercolor resist

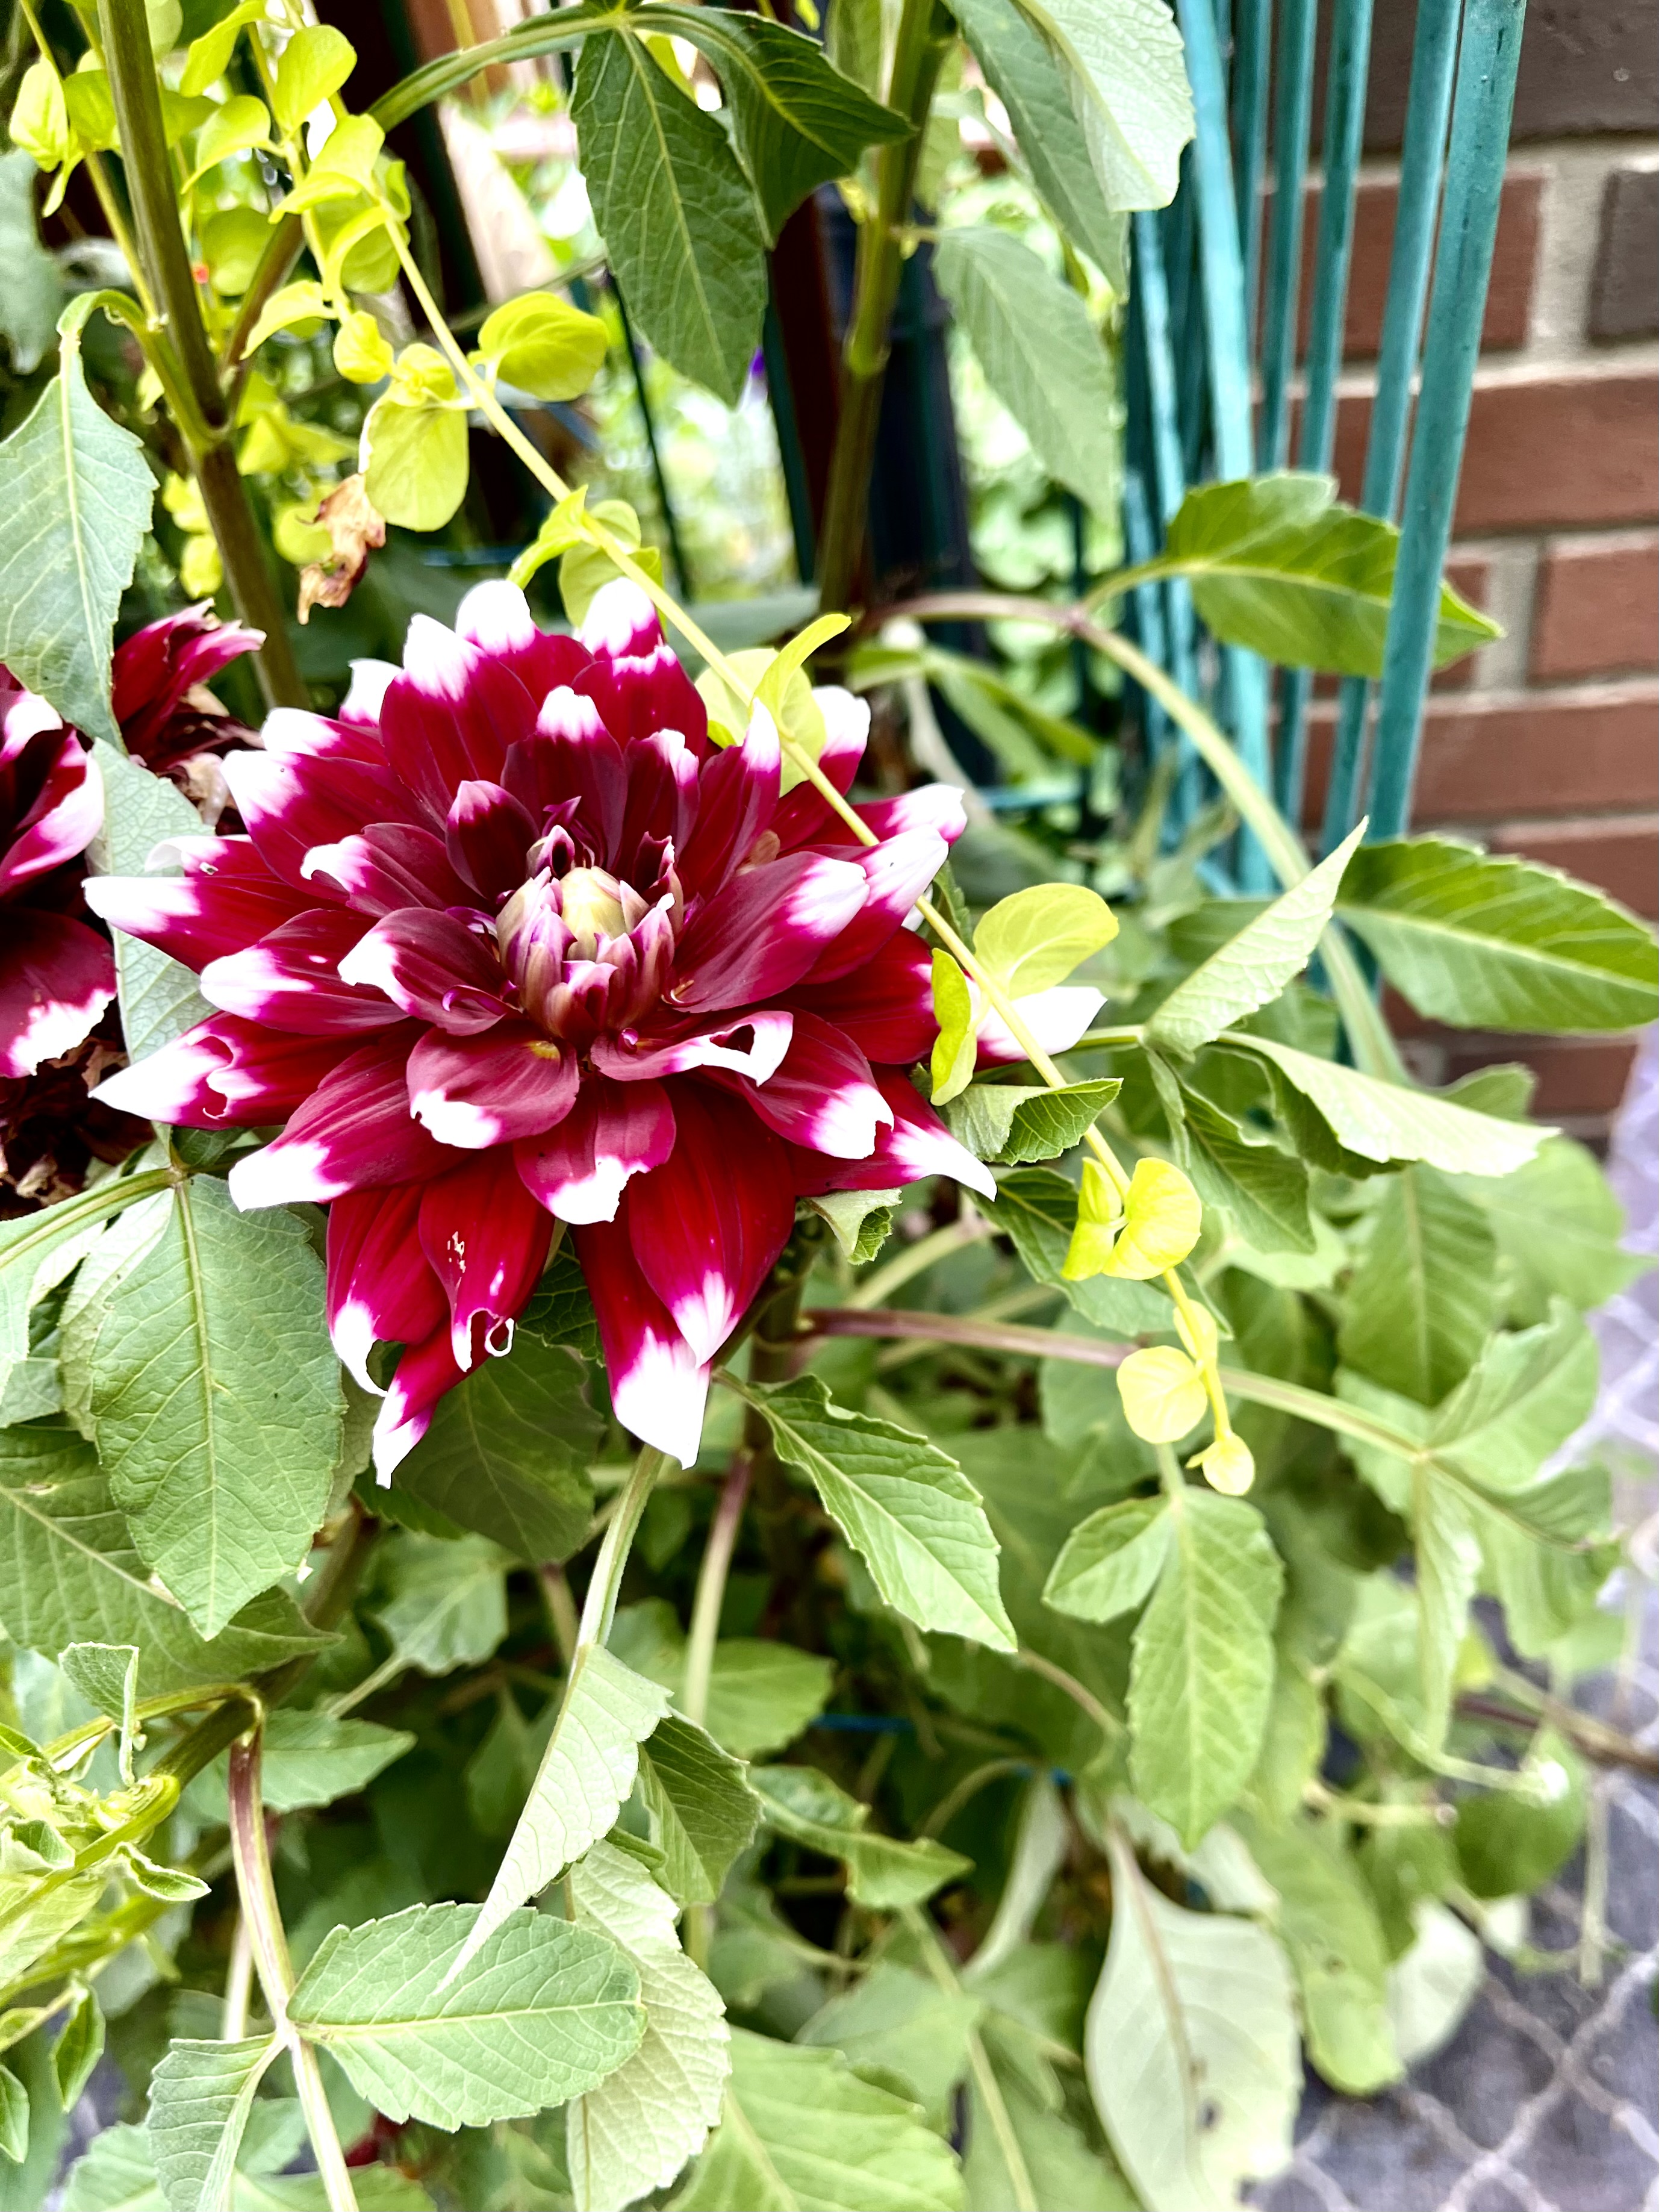
My reference photos which are very bright because we have had such brilliant sunshine this summer. 


oldnewgreenredo
Reference photo
Working from nature is always a challenge, as of course Nature is perfect.

oldnewgreenredo

reference photo

These Mandilla had drooped but I watered them again and again, and they are still going wild.


oldnewgreenredo

Reference photo

Early in the morning they seem to follow the sun. Note the white throats...I used resist on 

oldnewgreenredo

Dahlias...are amazing, you wait so long for them to bloom. Mine have tons of foliage to produce these few blooms.

oldnewgreenredo

I started with light washes of lemon, on the pot, yellow green on the baby tears and the leaves to the Mandilla. The Mandilla are Carmine, Cadmium light with brown under tones from mixing a bit of green for shadows. The white streaky stuff around the stems is where I had resist shich is now removed.


You can see how the mixing space has become very dark, watered down,  layers/washes are applied, and some is lifted to try and give the petals highlights.

I also haven't attacked the centers which will be much darker with yellow/gold highlights.


oldnewgreenredo

The opposite of the Mandilla at the bottom are the Dahlias with two layers of reds applied, Thalo and Carmine. I've added a bit of purple to a light wash to start enhancing the depth in the petal bases. The resist has been removed on the petal tips and in the buds, so I'm working carefully now. The greens are just in the early stages.

oldnewgreenredo
 

The tones in the study are not as bright...but I'm doing the flowers in the sunshine now. 

oldnewgreenredo

Mixing pan with Thalo, Purple and some Prussian blue, I think. Purple is very strong...so I'm trying to be restrained in adding it.

oldnewgreenredo

I think this was with three layers of color, I still have to deepen the petals to make them not appear so flat. I've done three layers of washes for the leaves, these will need deepening. and more leaves/deep washes in the background.


oldnewgreenredo

Balancing out the reds ...is a challenge, totally different and then with all that green in opposition. 
I may do another study, just to see how I should use the darks for the backgrounds?

oldnewgreenredo

The container got a second layer of  Cadmium Yellow Medium

oldnewgreenredo

I'm really glad I have labeled my pans...makes life easier to do these posts.

oldnewgreenredo

I'm pretty sure this is Burnt Sienna, Cad Yel Med. and maybe a bit of sap green, I used in some of the leaves in first wash. The yellow at the top is being used for shadows on the pot.


oldnewgreenredo

The pot is very flat now---I will add dark to both sides to make it appear rounder. In real life it is LEMON YELLOW.

oldnewgreenredo

Working on the baby tears...I seem to do here and there. I think they will really pop when I do that lower right corner. So far, they are a mix of Lemon Yellow, Yellow Green and a bit of Sap Green.
oldnewgreenredo

That's all for today, lots of other things have to get done around here.

oldnewgreenredo

I can't wait to see where this goes next! I'm considering using whites for veinings...as I've washed the leaves almost too much?  

Do I know what I'm doing, not necessarily!

If you enjoyed this post please follow this blog by Blogger or FOLLOW IT 
which you will find in the
 upper right hand corner of this page. 

Thanks always for visiting. 
I will try and respond to every comment and answer every question.

I will be sharing at these fine Parties!

I have not been paid or reimbursed in anyway for my opinions, posts or any products shown. 

Please do not use photos without linking back to this blog 
without my permission. 
Thank you for your cooperation, 

Sandi