Showing posts with label DIY remodel. Show all posts

Tuesday, May 1, 2018

Craft Room part 4: Final Bits!

AD-Free Blog

Hi! Last week and weekend were very busy. 


oldnewgreenredo

We used an insulating foam layer on the floor. I can walk around barefoot in the basement, now. It's really warm, will be easy on the knees, too. 


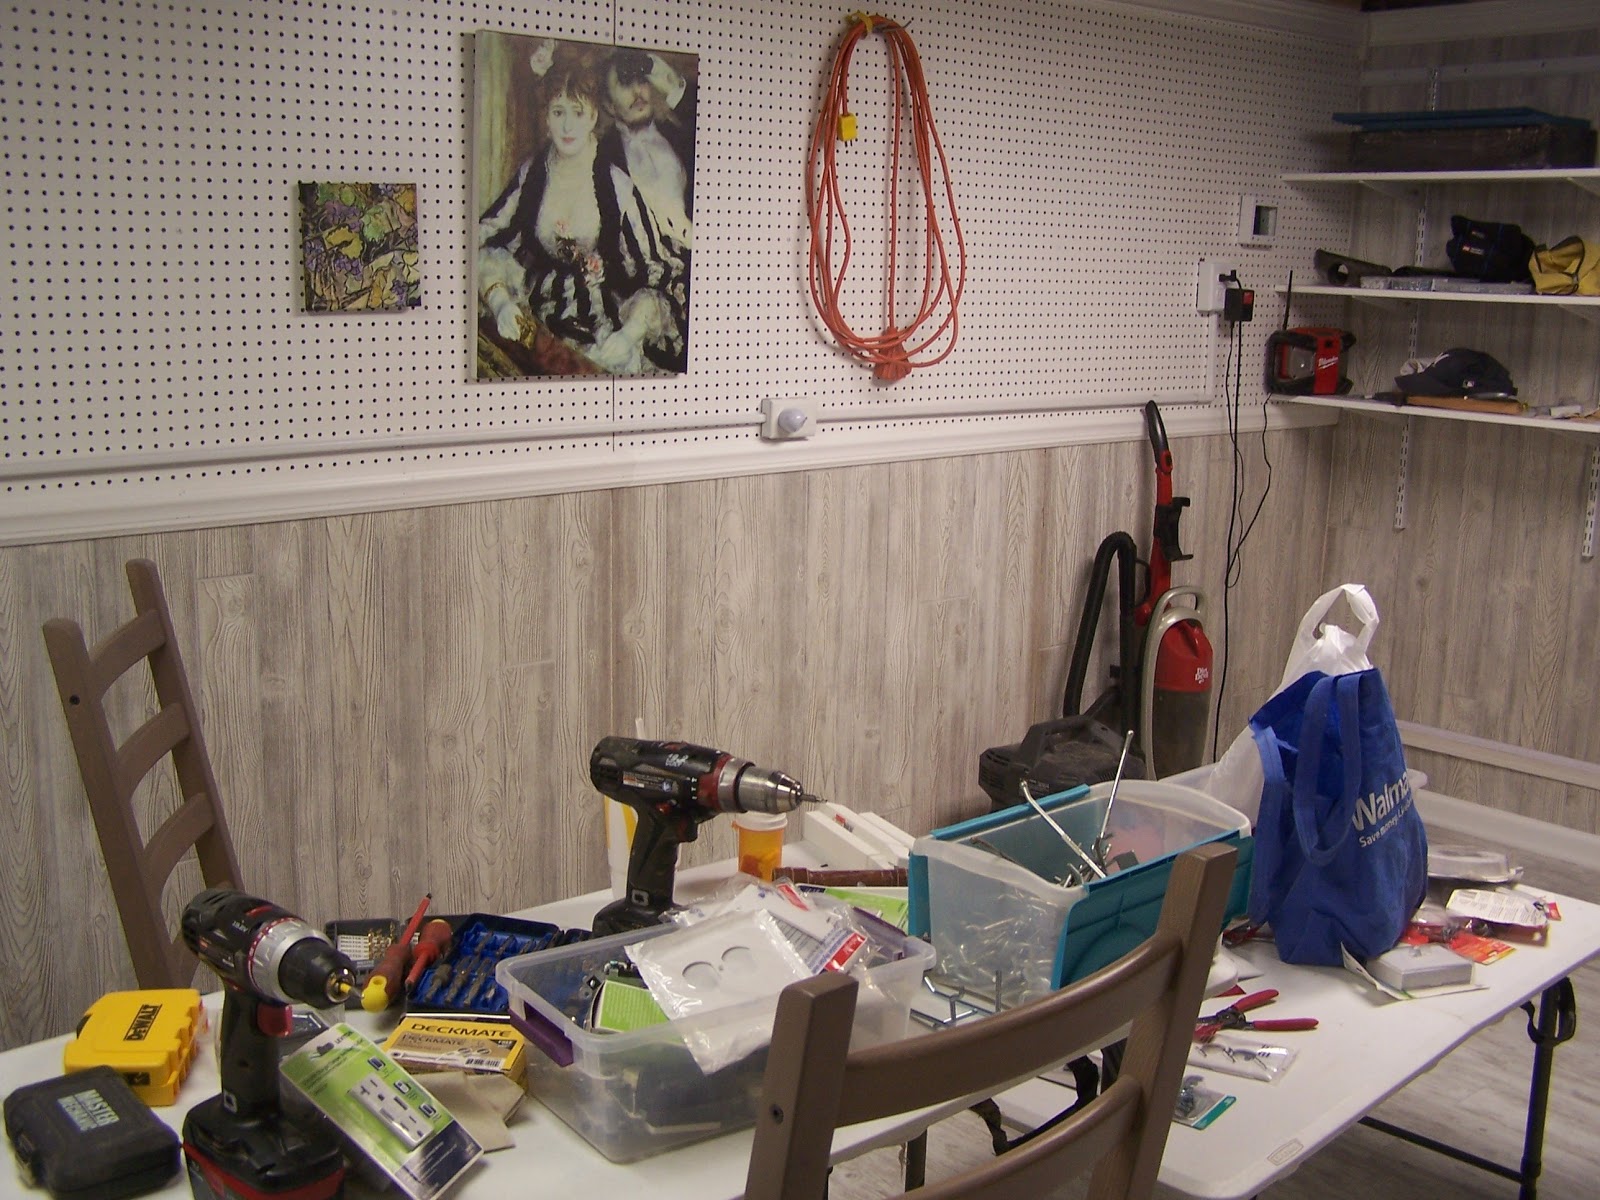
I had to hang a picture, print on canvas....from thrift store.

oldnewgreenredo

Click and lock, vinyl flooring. We will eventually have this in the whole house, one room upstairs to go. Love the clean up--and 18 months, and no issues anywhere.


oldnewgreenredo

Cutting is done with an exact knife. So if you dont' have tools, this is the flooring for you!

oldnewgreenredo

Gap at the end of the wall will be covered by trim and cabinetry.


oldnewgreenredo

Last piece and the guys are done!

oldnewgreenredo

This pattern almost looks seamless!


oldnewgreenredo

Trying to figure out the shelving.


oldnewgreenredo

Trim and electricity done.


oldnewgreenredo

Next repainting the pegboard and all the trim.
And always clean up!

My next post will be moving in.  All cabinetry and shelving won't be up and the sink will be later
We finally have decent weather and need to work in the yard.
And, we have exceeded our budget at this time.
The rest can be done--here and there. 
Besides, I like using a space before determining exactly what I need. 


All the opinions and photographs in this blog are my own. I have not been paid or reimbursed in anyway for my opinions, posts or any products shown or anywhere I shop.

Thanks always for visiting. 
I will try and respond to every comment and answer every question.

All the opinions and photographs in this blog are my own, I have not been paid or reimbursed in anyway for my opinions,
 posts, or any products shown, or anywhere I shop.
 Please do not use photos without linking back to this blog without my permission. 

Sharing at these Ad Free blog parties-with ads not in the middle of the blog (I'm going to try and see if this is possible)

The Scoop
Celebrate Your Story
Talk of the Town
Wonderful Wednesday
Share Your Cup
Friday Favorites

Thank you for your cooperation, Sandi Magle
Sandi


Saturday, May 14, 2016

Whole House Remodel #2


 I haven't posted for a couple of weeks, here is what has been going on. Blame this ugly post---on all your Spring---gorgeous ones!


 Gorgeous---buffet...with entire contents of the curved Victorian Oak cabinet on it!


 Our lovely porch---perfect for cozy family gatherings. Don't you want to sit down and have some tead?

 Can't wait to serve tea on the tea cart---over there somewhere! One thing about a remodel---you find goodies(crap) you forgot you had.


NOTICE MY FLORAL ARRANGEMENT---LOL. The vibrunum has tried to bloom in the middle of all our rain and cold.

I do need to do wash-over to the right,--sometime, SOON! That's our coffee table on top of the dining table---a new expression of interior design...wonder if it will catch on?


NEW Subfloor going over the old crappy---not thick enough--it was CDX 1/2" plywood, really icky stuff! And new subfloor is glued and screwed, boxes and boxes of screws and multi gallons of glue.

Most of the old nails were sticking through the air in the basement, no where near any studs. Kinda like visiting the fun house-when walking on it!


Each room had to be done in shifts. These pics were taken all yesterday---last of the subfloor went in last night. 

And we DO LOVE OUR NEW Vinyl Plank FLOORING! Can't wait until it's done.  Our kitchen eating area will be done but not where the cabinets are, as we will be replacing those later this year. For now, I will hopefully put my house back together tomorrow.


NOTE: All our friends who have had hardwood in their kitchens have hated it and have had to have refinishes done in less than 10 years. At our age, we went for the vinyl plank---because we won't be selling---it will be inheirited--and the easy care and somewhat easy switchout if their is damage. We've had the same product in our basement family room for two years and it really can take abuse.

And I still haven't planted anything pretty outside---we have frost warning out for last night and tonight....grrrrrr! Thank goodness for a greenhouse with a heater. Soon we will have Spring, soon.


Thanks always for visiting, I will answer any questions or comments.

I will try and post this, lol, if they refuse...sorry to these fine parties;

Sandi 


Monday, April 11, 2016

Master Bedroom REDO: Moving in!

 BEFORE: You can catch the whole...hideous process on ...What Stays behind your walls, shouldn't.

oldnewgreenredo

The before picture---the carpet and the lamp wall had to be ripped out.


 Discussing the situation after removing furniture. Next step a new 1/4" plywood sublfoor.  The process is here on Vinyl Plank Floors.


After all walls have been repaired and moldings around ceiling and windows added and the gorgeous
Pittsburgh Paints, satin FLEMISH BLUE. So love this color.


oldnewgreenredo

Installing theb vinyl plank floor. Fast work with two guys and only tools needed, scrap wood, knee pads, wedge, mallet and patience.


oldnewgreenredo

In the corner only room for one person to work.

oldnewgreenredo

 Last piece. TA DA! Great job guys! Now to install all the floor moldings.

oldnewgreenredo
We placed the old bedframe---a new bed was on order. We opted for one major new purchase---a storage bed which arrived about ten days later.

oldnewgreenredo

My everyday bedding---No more purchases with a whole house redo: we did acquire all the flooring for the rest of the house on sale, also with a 11% rebate.  I do have a gorgeous vintage bedspread I use for winter holidays...but this one is so Springy. Pillow shams are all TJMAX HOMEGOODS purchases.


oldnewgreenredo

I haven't even moved into the six big drawers under the bed.


oldnewgreenredo

With both guys were here, we moved in the big pieces of furniture. Notice the electrical to the far right and also one is the same on the far left. The switch plate on the left operates the overhead which will be replaced by an updated chandelier.

oldnewgreenredo

Here are my 6 pieces for $120.00 solid oak thrift store furniture. I am holding off on refinishing---mostly because of the weather and still wondering if I should leave it as is. The finish has a slight warm tone to it, pickled solid oak. We will see. The BLUE is a huge change---and I need to live with it first.


oldnewgreenredo

Next here is the ShabbyChippy chandelier installed I purchased at the Elkorn Flea Market in Wisconsin last year--in this post. There was really no location to hang a chained chandelier, but hubby made it into a fixture and it's on a dimmer...so LOVE it!

oldnewgreenredo

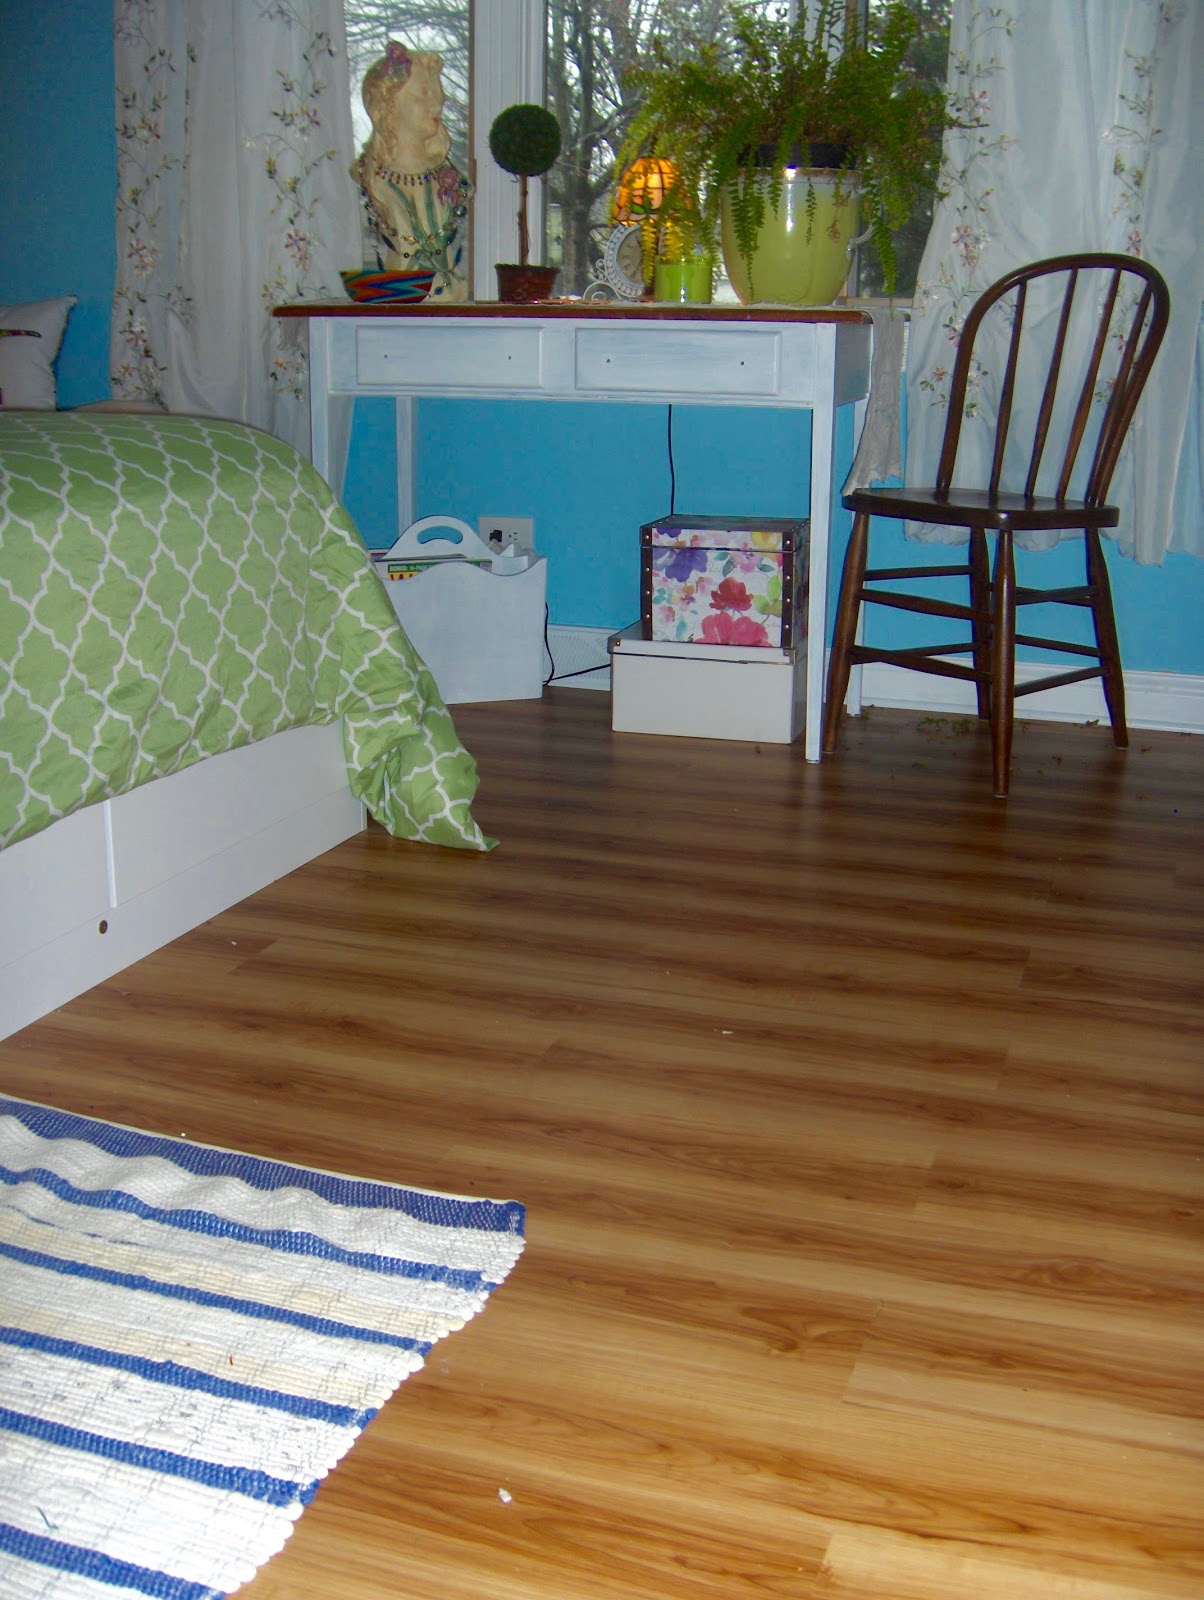
My $10 desk from the extra bedroom will be perfect for sewing in front of the window. I slapped  couple of coats of streaky white on the dark green legs.

Our weather wasn't decent to drag the table outside to sand it down. Chair is a give-away from my mom-in-law. It's old, bentwood oak and sturdy. The chair may get a cover...or not? I'm not sure of anything yet.


oldnewgreenredo

This picture was taken from the window. We did get the yard picked up two weeks ago. This picture was taken on one of the 4 days of April we didnt' have snow!

The birds fill the feeders, and the doves, squirrels, bunnies and chippies feed off the 'patio' we put below, sometimes all at the same time. This keeps that area from not being hip deep in wierd grasses/sunflowers.

oldnewgreenredo


Curtains are up..and I haven't washed the blinds yet----I know I will need them to block summer sun when the windows are open. But until then, I'm loving the view in the morning. The plant is so in need of outside...I will never keep ferns inside over winter again. Messy, messy, messy!

The desk is still missing knobs...I have a bucket of vintage knobs buried in the garage---too cold to go look for them.


oldnewgreenredo

The toy chest is covered with a green ticking duvet/quilt. Cute pillow with just the right colors in it, new from Steinmart. I'm not sure if I will upholster or refinish the trunk. Meanwhile it has four generations of photos/portraits inside and precious family memorabilia. I do have my eye on some quilt cotton for a possible vintage look cover, but I'm waiting---the budget.


oldnewgreenredo

 The closet wall just got touch up paint and all the moldings got two new coats of white satin.


oldnewgreenredo


The best part----the floor, and no more carpet. I will be on the lookout for a small rug for here---but am being patient to find just the right one.


oldnewgreenredo

 I have moved accessories around four times already. I think my girl here will stay on the table for the moment. I have other treasures inaccessible right now that may work their way into the new room. It's a whole new world, palette and mood, so I have to be patient. Hubby's loving it, sometimes we just stand at the window...lol, the view hasnt' changed, maybe our outlook though.


oldnewgreenredo

This little lamp landed in the middle of the desk, but I have a crazy--statement lamp packed away, I may use.


oldnewgreenredo


The sewing stand is the bed table now---not sure, because it needs refinishing/painting. The lamp was my grandmother's and is the perfect height. Not sure if it will stay. The shade is beige and I will be on the lookout for a different one, if I keep it.

The basket below is my reading.

Besides magazines, it holds: "Son of a Witch" by Gregory McGuire, "The Misunderstood Jew, The Church and the Scandal of the Jewish Jesus," by Amy-Jill Levine, a foot deep of manuscript edits for my unfinished thriller mystery, and "The Rise of the Taliban in Afghanistan, Mass Mobilization, Civil War, and the Future of the Region," by Neamatollah Nojumi.--Don't even ask on that one. 
Thanks for visiting always, and I will happily answer any questions and comments.

 All the opinions and photographs in this blog are my own unless noted.  I have not been paid or reimbursed in anyway for my opinions of products or posts. Please do not use photos without linking back to this blog without my permission. Thank you for your cooperation, Sandi Magle


Sandi


Monday, April 4, 2016

Master Bedroom or What's stays behind walls...shouldn't!

 Do you know what's behind YOUR WALLS?

The second part of our whole house redo was the masterbedroom. Pretty good size for a small ranch the bedroom measures 11x14 feet. Here was the bedwall with the wall lamps inplace for next to the bed.

oldnewgreenredo

 The carpet and wall paper are old. We have had issues with cold spot in this wall. Part of the redo will be finding out why. Cold as in frosty and sweating? on a half/interior/exterior wall. About dead center is where the exterior window wall in the living room ends at the edge of the buffet. To the left the jog is where the furnace exhaust pipes go to the roof.


oldnewgreenredo

Opposite wall is our closets, which we did quite sometime ago, but never finished that little nook above the far left bathroom door. The doors were a splurge they were custom and solid wood, after some homemade ones didn't succeed.


oldnewgreenredo

 Hardest part was removing all the furniture and finding a place for it in the dead of winter. Most ended in the extra bedroom, on the screened porch and the living room. My trunk from when I was a kid, somewhere down the line ---will be a redo. Don't you think the decals are so 50's adorable.

oldnewgreenredo

 My bed wall---before---really was the country look of the late 80's. The carpet was pale peach and I was really glad to see it ripped up and gone. But on the sub-floor were water marks along the wall.


oldnewgreenredo

Ripping out drywall wasn't hard, just messy. Here is a problem....behind that patchy spot in the middle is a void area betweent he 2"x4" a 3"x3" hole floor to ceiling uninsulated. The insulation to the right is only rated an 8...so Hubby planned on replacing it all.


oldnewgreenredo

 I'm going to miss the wallpaper---I still love it.


oldnewgreenredo

The uninsulated area actually backs up to the buffet in the living room. That all seemed okay. But there were stains on the subfloor indicating water issues(sweating?) around the furnace corner.


oldnewgreenredo


 Hubby braved the small walls around the furnace. When the dust cleared, this is what we found.


oldnewgreenredo

The furnace flue was askew and not connected to the furnace...merrily pumping hot air into the uninsulated space that went directly to the 20 degree attic. This created our own little weather system. Very hot meets very cold equals condensation, not too mention carbon monoxide? Which apparently escaped through the well ventilated attic.

oldnewgreenredo

When did this happen? 2008 or so we had a near miss with a tornado and roof damage---which could have lifted all the connected pipes...? Or it wasn't properly installed when we got a new furnace a year or so before that.
oldnewgreenredo


This took three of us with straps to lift the insulated pipes, juggle a flash light and get the stack reset.  Hubby contacted our furnace maintenance guy (not the original furnace installer) to find instructions on what to do and what not to do.
oldnewgreenredo


With the exhaust pipe reset and properly taped, and the go-ahead to insulate the space with foam between the studs. Hubby began the overall insulation project. I wasn't any help here. He did the complete wall as we saw other water marks along that wall from condensation.


oldnewgreenredo

Canned expansion foam was used to fill  the exterior corner to the far right. Too many cans though---because most oozed out onto the floor.

oldnewgreenredo

Around the furnace corner thick foam insulation was carefull cut and fitted between the studs.


oldnewgreenredo

Hubby's plan was to make access doors on the one side...so if anyother problems occur with the flue...we can check on it.

oldnewgreenredo

 Next Hubby and a friend applied drywall, and screwed it in.


Add caption

The foam insulation took a bit of jiggering before measurements for the access doors could be made.
Next came taping and plastering.


oldnewgreenredo

Hubby is a super plaster man---with the proper corner tools he made short work of the three coats necessary to get a smooth surface. Forgot to mention the electrical was all updated and moved before the drywall went up. The outlets are now in the far corners and an original in the lower center of the wall.

oldnewgreenredo

With the furnace wall and the old bedwall being a new surface...we decided to remove the rest of the paper. It was expensive paper---highly washable, but with a flat finish. Turned out not easy to remove.

Removing Wallpaper

I tried scoring the surface, even beat it with the needle sharp paddles of my antique wool carders. Nothing really saturated the smooth but tight surface of this washable paper. Finally by saturating the edges of the paper, we peeled the top layer off when you could get an edge. The under paper (the dark tan you see), came off with multiple soakings and lots of scraping.

oldnewgreenredo

 Hubby did above and I did below...working in about two square foot areas at a time.

oldnewgreenredo

I was successful at getting the initial peel off and he was better at scraping. So we worked together, but this wall took about three hours.


oldnewgreenredo


Finally all the paper was scraped off  and then I had two scrubbings, and a vinegar rinse to finish it off.


oldnewgreenredo

 Here is the patched bare wall---with the peach original paint ala 1988 maybe?


oldnewgreenredo

 And the window wall.... another day and lots of team work.


oldnewgreenredo

 The wallpaper bagged up for the garbage men. Six bags of gooey wet mess.

oldnewgreenredo

While hubby painted the blue, I painted white trim...everywhere---everything needed new paint. The blue---is Flemish Blue from Pittsburgh Paints. We use satin as I really like being able to wash my walls. The blue and peach had me wondering if I would like it...cause together they were YUGH!


oldnewgreenredo

And, then there was all the unfinished moldings, trims, etc. Here Hubby frames out the trouble spot over the door.

oldnewgreenredo

 More painting, eventhough there was primer in the paint most areas took two coats.


oldnewgreenredo
 
More molding and trim. One day I painted all the pre-primed baseboards, and primed framing trim that were new. LOTS of trims and they all took at least two coats.

oldnewgreenredo

When the windows were finally all completely white I was ecstatic. LOVE the blue---it changes so depending on the light. This is a south facing window and is 86" wide, so there is plenty of light in this room.

This part of the redo---took about three weeks, because of all the waiting time between coats of plaster and paint. Curing paint between coats is a very good idea.  The fitting of all the pieces, cutting the trim, and painting multiple coats everywhere.

Next....the flooring, furniture, and hopefully the chandelier. I'm still playing with accessories and moving things around, but later this week!

Thanks always for stopping by. I'll be happy to answer any questions or comments.

All the opinions and photographs in this blog are my own unless noted.  I have not been paid or reimbursed in anyway for my opinions of products or posts. Please do not use photos without linking back to this blog without my permission. Thank you for your cooperation, Sandi Magle

Sandi