Showing posts with label garden food. Show all posts

Sunday, October 5, 2025

Relishing Homemade Country Corn RELISH

 Ad-Free Blog


Country Corn Relish.

Yay! 
This is a family favorite, and really quite easy and 
a must on our Thanksgiving Table.

oldnewgreenredo

You can use fresh frozen corn---or fresh. Really simple ingredients...Corn, onions, peppers, celery.

oldnewgreenredo

This corn was Full kerneled, moist and sweet. I actually adjusted the sugar because of this. Just taste the raw corn and if it really sweet trim your sugar to taste.

oldnewgreenredo

Celery, Onions and red and green peppers. I use red and yellow onions, again for color.
I cheat and use a chopper for the veggies.

oldnewgreenredo

Simple flavor palette: canning salt(do not use iron infused salt) celery seed, mustard seed, turmeric, brown sugar and apple cider vinegar(a MUST).

oldnewgreenredo

You can blanch the corn for 5 minutes and then do this, I chose to blanch the kernels for a couple of minutes drain, then dump into my liquid solution.

oldnewgreenredo

Setting up a large bowl---with a smaller bowl inside (I put a damp piece of paper towel to keep it from slipping. I then began the water to blanch the corn.

oldnewgreenredo

In my kernel bowl I added all the chopped veggies and liquids, and spices.

oldnewgreenredo

Draining the corn, I then added all the veggies and liquids. 
Simmer for about 20 min. 

oldnewgreenredo

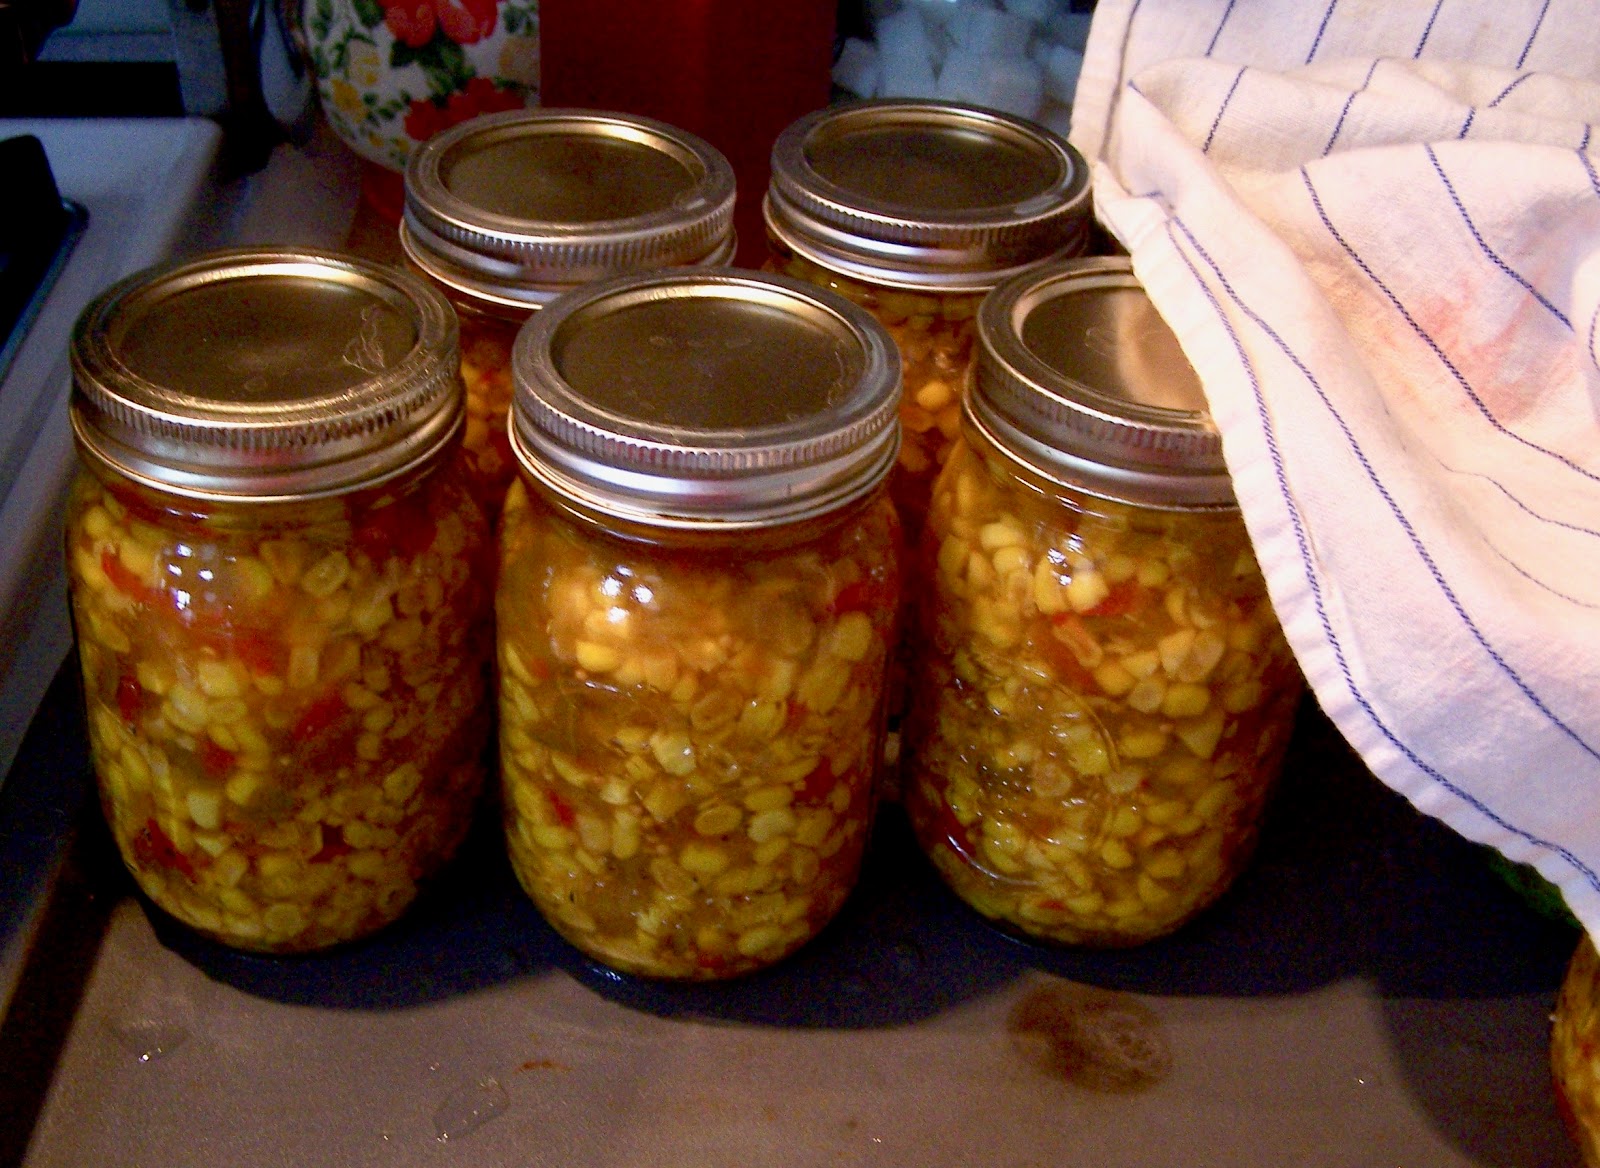
Fill your jars---these look really stubby because of the refraction from sitting in half boiling water.
Fill up your canner water covering lids...and boil for 15 min. Remove jars and cover
with a cloth so they cool slowly. 
All my lids popped down, but one---which is still good and that one will be refrigerated and the first we use.
oldnewgreenredo

Isn't the color just wonderful---not enhanced. 

Recipe tweaked and adapted from my food bible for canning, the 
Freezing and Canning Cookbook, by the editors of Farm Journal, Double Day, 1963, 1964.

I'm on my second copy(using my mom's as I obliterated mine, it fell apart into so many pieces from using.) Like I said, it's my Food Bible.

Country Corn Relish (adapted from Iowa Corn Relish pg. 283) Yield: about 10 pts. 

21 ears of fresh corn-kerneled (this yielded 14 cups) Blanch before or after kernel removal.
(Frozen Corn--I would thaw and use as it is thawed, it has already been blanched)
1 1/2 cups of chopped green pepper
1 1/2 cups of chopped red pepper
2 cups of chopped onions
2 cups of chopped celery
1 1/2 cups of brown sugar
2 Tbsp. of mustard seed
1 1/2 Tbsp of CANNING salt
1 1/2 tsp. of celery seed ( or more to your taste)
3 cups of Apple Cider Vinegar
2 cups of water

  • You can blanch corn cobs for 5 min.. put in cold water---to chill and cut the corn, OR you can cut the corn fresh, and blanch the kernels-2min. drain and then put back in the pot with boiling vegetables, liquids and seasonings (EASIER).
  • Combine all the ingredients, bring to a simmer for 20 min.
  • Pack into clean hot jars one inch from the top. Make sure your liquid covers your veggies. Usually I just press down with a spoon.
  • Wipe rims clean and put on clean boiled (NEW) hot and lids and you can reuse clean rims. Screw firm but not tightly-air needs to escape in processing.
  • Process covered in boiling water bath for 15 minutes, remove and cool covered. 
Refrigerate any jars that are not sealed---store the rest in a cool dark place.
Excellent with almost any barbecue, roasts, chicken, hot dogs, brats. ENJOY!

These keep on in a pantry shelf for at least a year.

All the opinions and photographs in this blog are my own, unless otherwise designated. I have not been paid or reimbursed in anyway for my opinions, posts or any products shown or anywhere I shop.

I will try and respond to every comment and answer every question.
Thank you for your cooperation,


 Sandi Magle


Wednesday, June 21, 2023

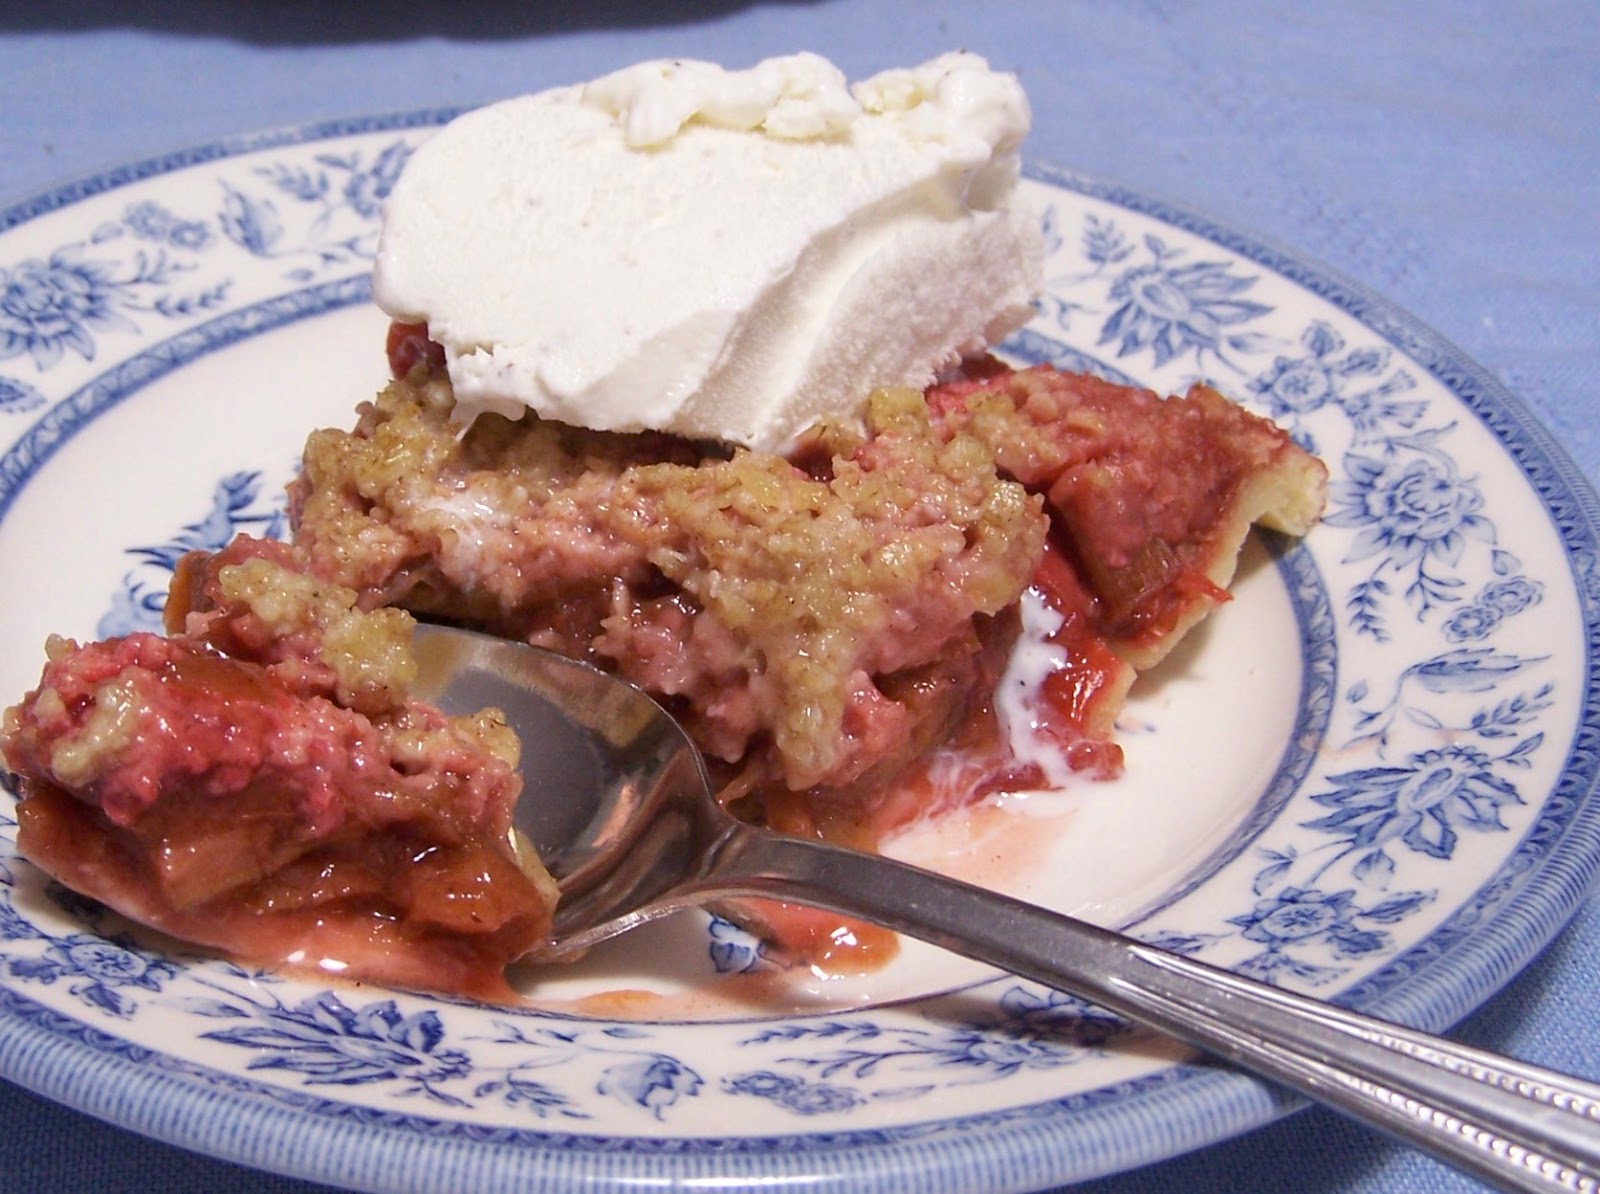
Danish Rhubarb Strawberry Torte/Pie

 AD-Free Blog


It's our favorite time of year---RHUBARB TIME.
This was a post from five years ago of our  Family's favorite pie/tart recipe and adapted from my Danish  grandmother's.

One of the first fresh fruits to ripen in the upper Midwest is Rhubarb. Tart and tangy it is one of our favorites.  This recipe includes some quick tips and variations.

oldnewgreenredo

We have two Rhubarb plants and they were huge, below is a photo from May12th I think, and they are 4 times as large now.

oldnewgreenredo

I always pick the biggest and reddest stalks for pie. The leaves immediately go to the compost pile.  A wonderful compliment to the Rhubarb are Strawberries, which are plentiful and reasonable right now. 

oldnewgreenredo

So, I just had to make some Strawberry/Rhubarb pie. At this point this recipe is mine or one learned long ago and from memory. 

Sandi’s Strawberry Rhubarb Pie or Tart  

Fills 2-8” pre-made pie crusts or one very large tart pan. (I allow thawing time for the pre-made pie crusts) A cookie crust adds some extra flavor in a tart. (I'll use a lemon/vanilla cookie recipe for tarts.)

Mix:
8 cups of diced rhubarb 
2 cups sugar or sweetner
½ tsp of salt

Stir in large microwaveable bowl. Cook on high for 4 min, and stir and then another 4 min on high. ( Pre-cooking the rhubarb gives a warm solution for the corn starch to dissolve and helps to shorten baking time).

Add:
4 cups of sliced cleaned strawberries
2 tsp of vanilla or more-this is what makes it Danish!
Stir together into rhubarb
Here you can add 2 tsp of vanilla if you wish, we always do.

Make a mixture of
2 TBSP of cornstarch or thickener of your choice
½ tsp nutmeg
1 TBSP of cinnamon (we love cinnamon)
Stir into warm fruit until well mixed-
Split into pie shells or tart pan.

Mix 2 cups of rolled oats (Not quick-cook) in bowl or chopper
1/2 cup of sugar
1/2 cup of flour
5 TBSP of cold oleo/butter
1 tsp cinnamon
(you could add chopped almonds to this also) 

Pulse in chopper or mix with a pastry cutter in bowl, until well mixed and crumbly.
Spread over fruit

Bake 1 hour to 1 hour 15 min at 350 degrees.

Serve with icecream/whip cream/ or cool whip.

Delicious warm or cold! 

As a girl when I stayed a summer in Denmark, we had rhubarb and strawberry treats all through the summer. Also, rhubarb pudding with fresh scraped vanilla bean was my favorite and of course drowned in rich cold cream. I will have to make that next!

I'll be sharing at these fine parties:


Thank you for your cooperation, 
Sandi 


Wednesday, November 2, 2022

Midwest Gardening: Drying Herbs---Sage Smells so Good!

Ad-Free Blog

Part of Gardening of course is eating all the wonderful fresh vegetables and fruits you can produce in your garden or pots. Then there are the herbs which make everything taste better!

Two years ago, our over 10 year-old Sage plant croaked. It was huge one year and then dead the next, probably from our Midwest freeze/thaw cycles. So, I planted a new one---last year, and I had enough sage to do Thanksgiving and that was about it. 


oldnewgreenredo
Here is the second year plant (center) in Spring of this year, and another variegated sage that I planted this year. The plant to the lower right is Marjoram which is still growing and is also hardy here in NE Illinois.
oldnewgreenredo

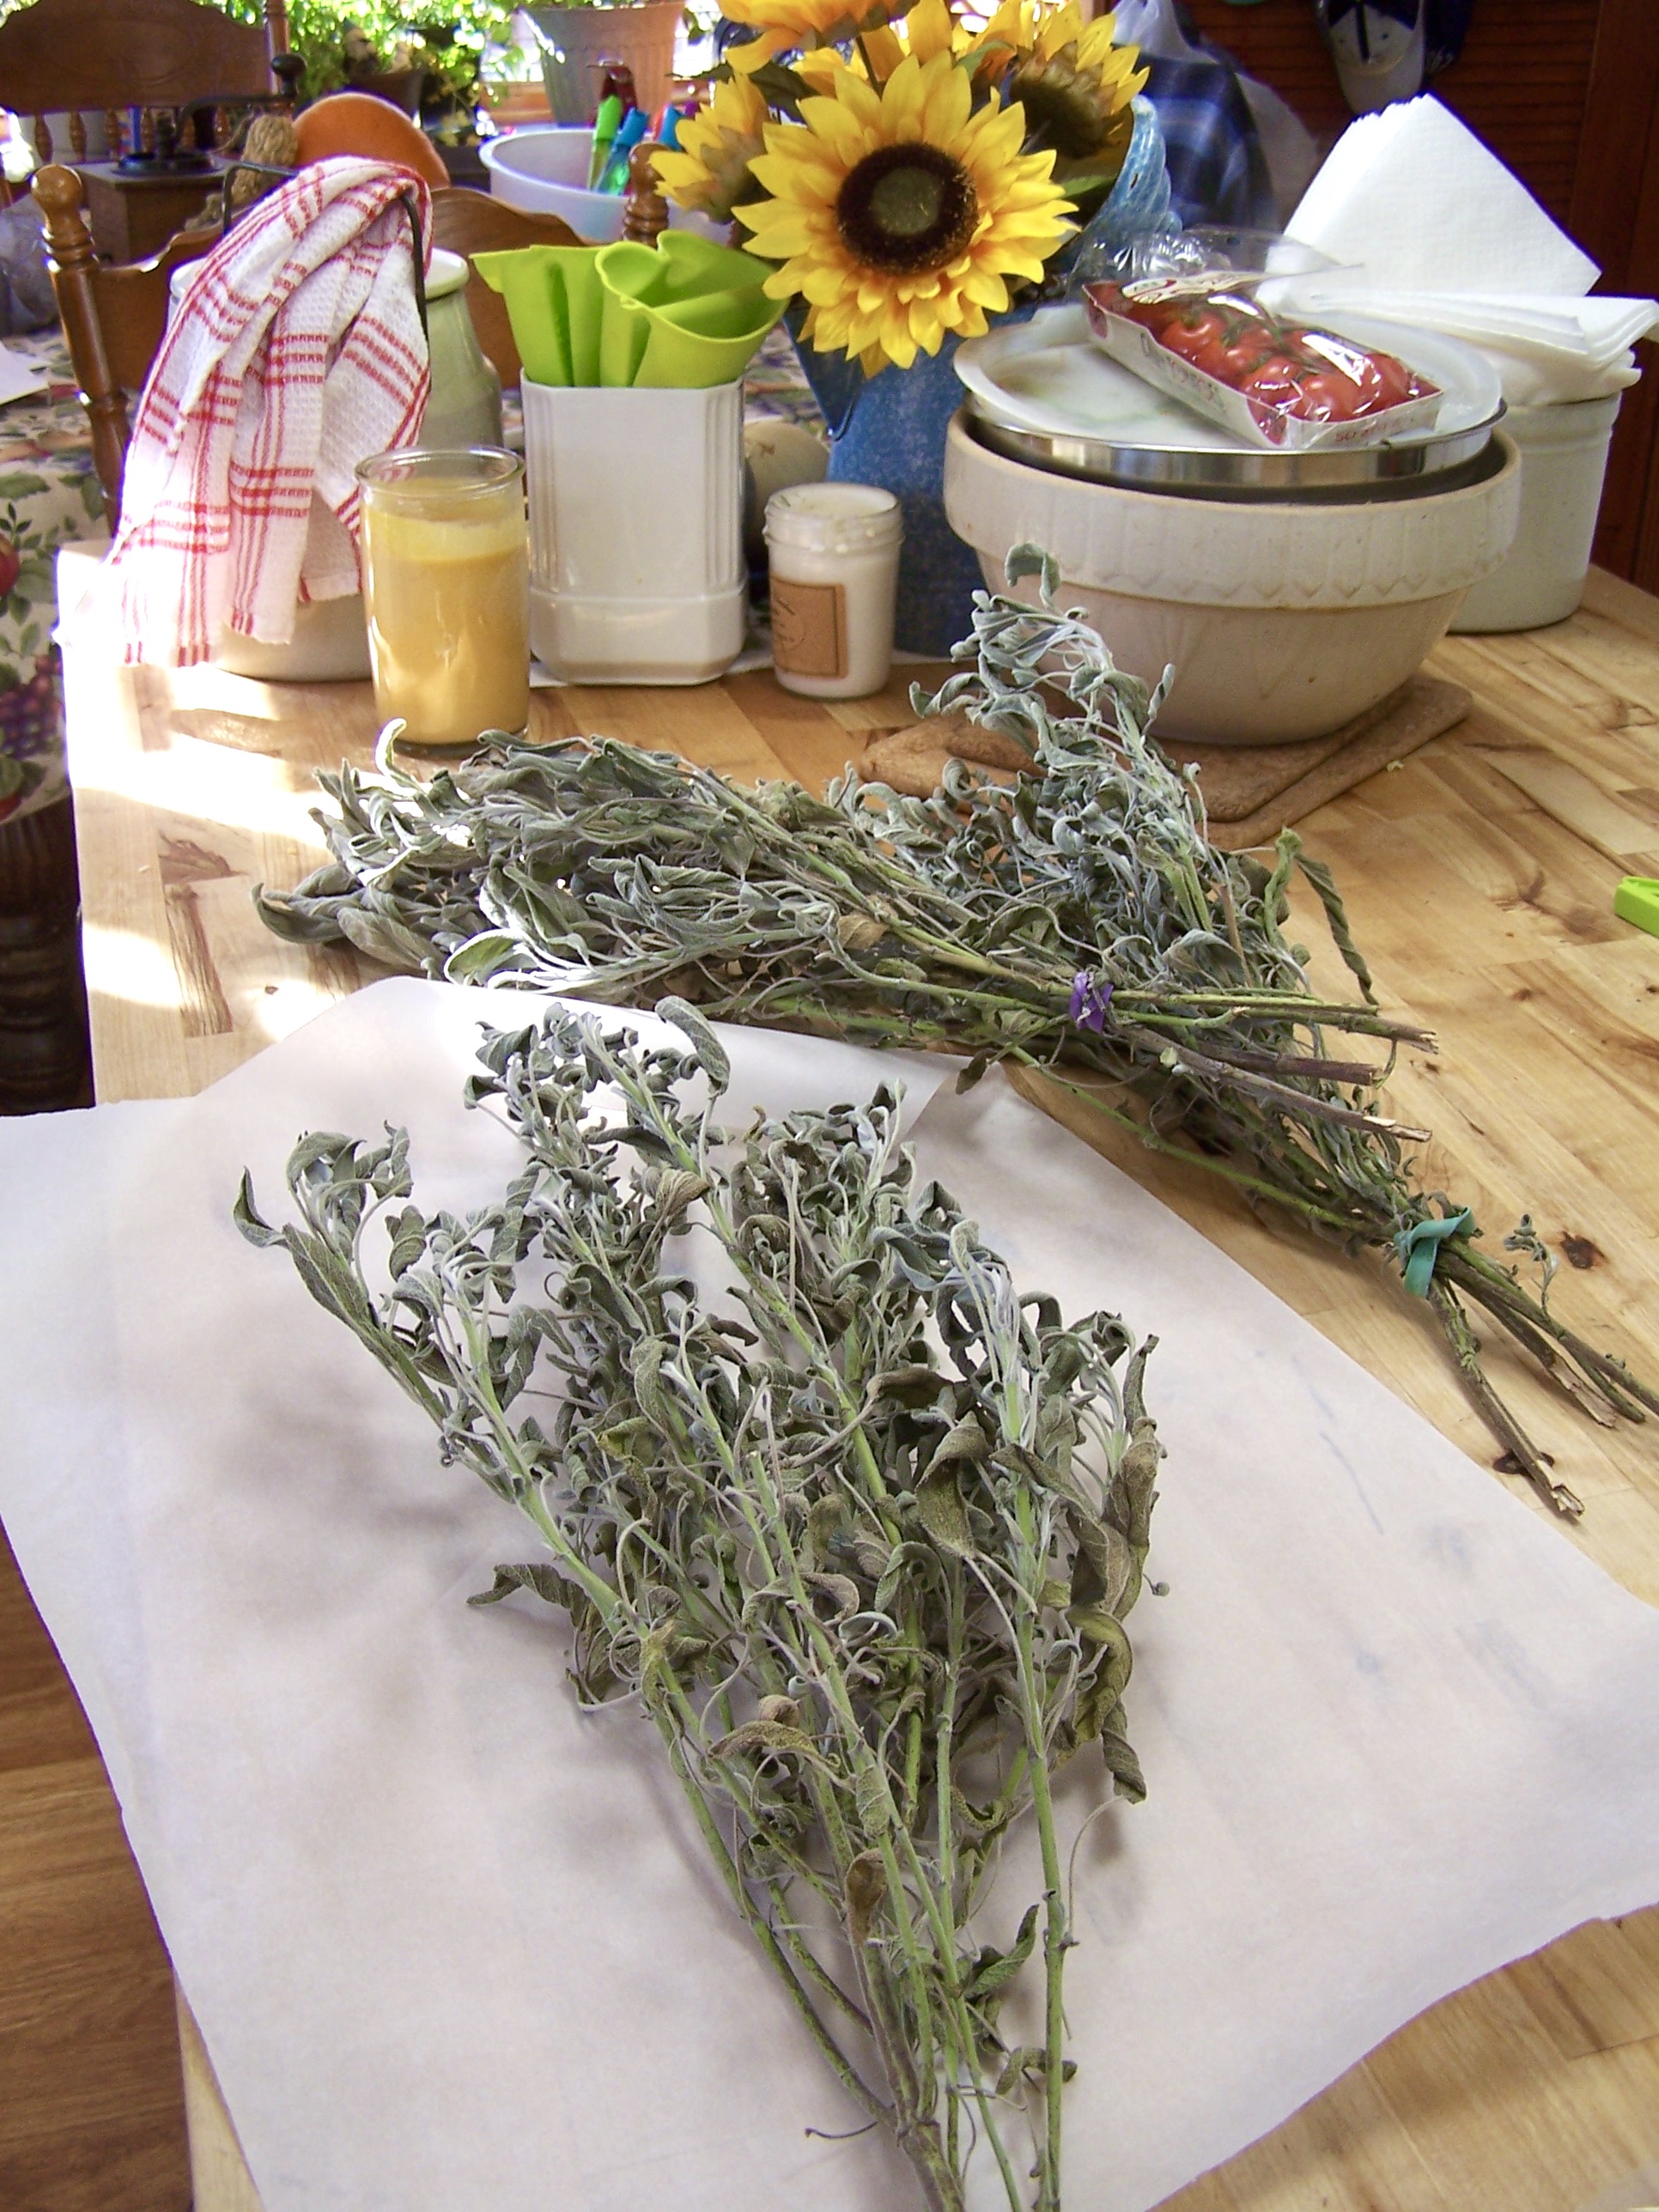
Well this year---the Sage was huge and luscious with tons of leaves and tall hardy stems. I cut it all before our first frost and hung generous bunches up where the air circulation is good in our house: *the stairway to the basement---we run a fan down there all the time, and the dining center in the kitchen---the overhead fan is always on low.* It took three weeks for the sage to be totally dry. 

Here's a Fabulous Article by an expert on all the benefits of Sage---right HERE ! I just know I love using Sage in cooking, and who knew it was so good for you!


oldnewgreenredo

Drying herbs is so easy---and you can dry and harvest just about any herb like this! Simply wash and clean, tie up in loose bunches (I reuse rubber bands from vegetable purchases) and hang them up.
This is the sage after drying for almost three weeks. Definitely dry enough to harvest.

oldnewgreenredo

First I undid the rubber bands holding the sage, and placed a bunch on a large piece of parchment paper. Any leaves that are browned I pick off and throw away.

oldnewgreenredo

It was easy to just roll up the paper on the diagonal and crunch all the leaves inside the paper---very little mess this way.

oldnewgreenredo

Of course not all the leaves crunched off. But they were 'cracked' and easy to scrape off with my fingers. I leave the bits clinging to the stems. 

oldnewgreenredo

Again, the generous size of the paper controls the mess. Fold the paper and just pour all that luscious goodness into an air-proof container. Today I used a freezer bag.

oldnewgreenredo

Then, I took all the remaining stems and folded them ---into little clusters or sage rolls and tied these with cotton string. These will be for 'purifying' a room by burning, and I will send these sage rolls to a friend who enjoys this. I prefer roasting and cooking, I can easily throw a few leaves on a tray in the toaster for the scent.

oldnewgreenredo

It is a nice gift from the garden....and smells so good---the stems hold so much scent and oil.

oldnewgreenredo

This is what I got from one plant---that's a gallon bag, and six sage rolls. More than enough for a Year of Nummy goodness and health.

My kitchen smells so delicious now! I will transfer the dried Sage to a large gallon canning jar as soon as it come out of the dishwasher and is totally dry. 
Sage will keep in an airtight jar for well over a year...and is just as flavorful as the day you dried it! 

WHAT HAVE HERBS HAVE YOU PRESERVED THIS YEAR? 


IYou enjoyed this post please FOLLOW IT in the upper right hand corner, to get just one email of each AD-Free post.

All the opinions and photographs in this blog are my own, unless otherwise designated. I have not been paid or reimbursed in anyway for my opinions, posts or any products shown or anywhere I shop.


Thanks ALWAYS for visiting!

I will try and respond to every comment and answer every question.
Thank you for your cooperation,

 Sandi Magle

OldNewGreenRedo


Monday, November 1, 2021

NOVEMBER----It's Pumpkin Cooking Time!

ALWAYS AD-FREE BLOG

Well, it's finally NOVEMBER...and Thanksgiving is just a few weeks away. Much of the country is sliding into a more wintry weather pattern, we are hunkering down inside, but looking forward to family and friends for the holidays.

We always learned in school that Pilgrims had pumpkin at the first Thanksgiving.
Pumpkins are assumed to come from the Americas. When the Pilgrims landed the local Indians already had pumpkins and squash under cultivation. 

copyright free image

Colonists called the vegetable pumpkins or 'pompion' They hollowed them out raw, filled with milk and spices and then roasted whole in the fire into a sort of pudding. No bakery or pie pastry shells were involved as there were no ovens for controlled baking. 

Nutritionally pumpkins were a welcome addition to the Colonists' meals. Rich in all kinds of minerals and vitamins, pumpkins had vitamin C which helped to prevent scurvy. Over half the pilgrims died the first year from the lack of proper nutrition and resulting disease.

Here in the Midwest Pumpkins are plentiful. In 2020 Illinois produced 564 million pounds of pumpkin,  as much as the other top 5 states combined: California, Indiana, Texas, Virginia and Michigan.

oldnewgreenredo

Today, we use our own homegrown pumpkins outside as decorations and as food.  After a heavy frost---I bring them in and they become a source of garden produce, and then our favorite Fall foods.

oldnewgreenredo

This is one of 2018 pumpkins, growing on our antique cultivator.

oldnewgreenredo

Another large one hid in the vines.

oldnewgreenredo

Last year, REMEMBER THIS!!!?
October 24th, 2020...The GREAT PUMPKIN!


Now for the best part---roasting!

oldnewgreenredo

Roasting Pumpkin for Puree is easy, and ecologically sound,  and beats canned pumpkin---hands down!

 Scrub your pumpkin off, even if it is store-bought. Slice it open. You don't have to remove the seeds, just layer the pieces skin side up in a roaster as high as you like. Pierce all the skin with a sharp knife as much as you want to--this promotes a circulation of moisture. 

Add 1 cup of water to the pan and cover tightly with foil. Roast at 350 degrees for 1 1/2 hours or more---test by piercing the thickest part of a piece. Pierce to see if  done or I just push down on the humps of pumpkin and see if they are soft right through the foil.  To keep the pumpkin moist, I leave the pan covered until cooled to finish roasting for sure.

When cool, scrape the seeds and slimey parts off, discard. Then scrape the flesh and with the skin removed, process the flesh in your food processor/blender until smooth. If it is too thick to process,  add a bit of water from the roasting pan to process. Measure into specific quantities, bag, label and freeze for recipes. 
 I think this is far superior to canned pumpkin.
When thawing, you can drain excess water out by putting paper towel in a strainer, the resulting puree is more the consistency of canned pumpkin.

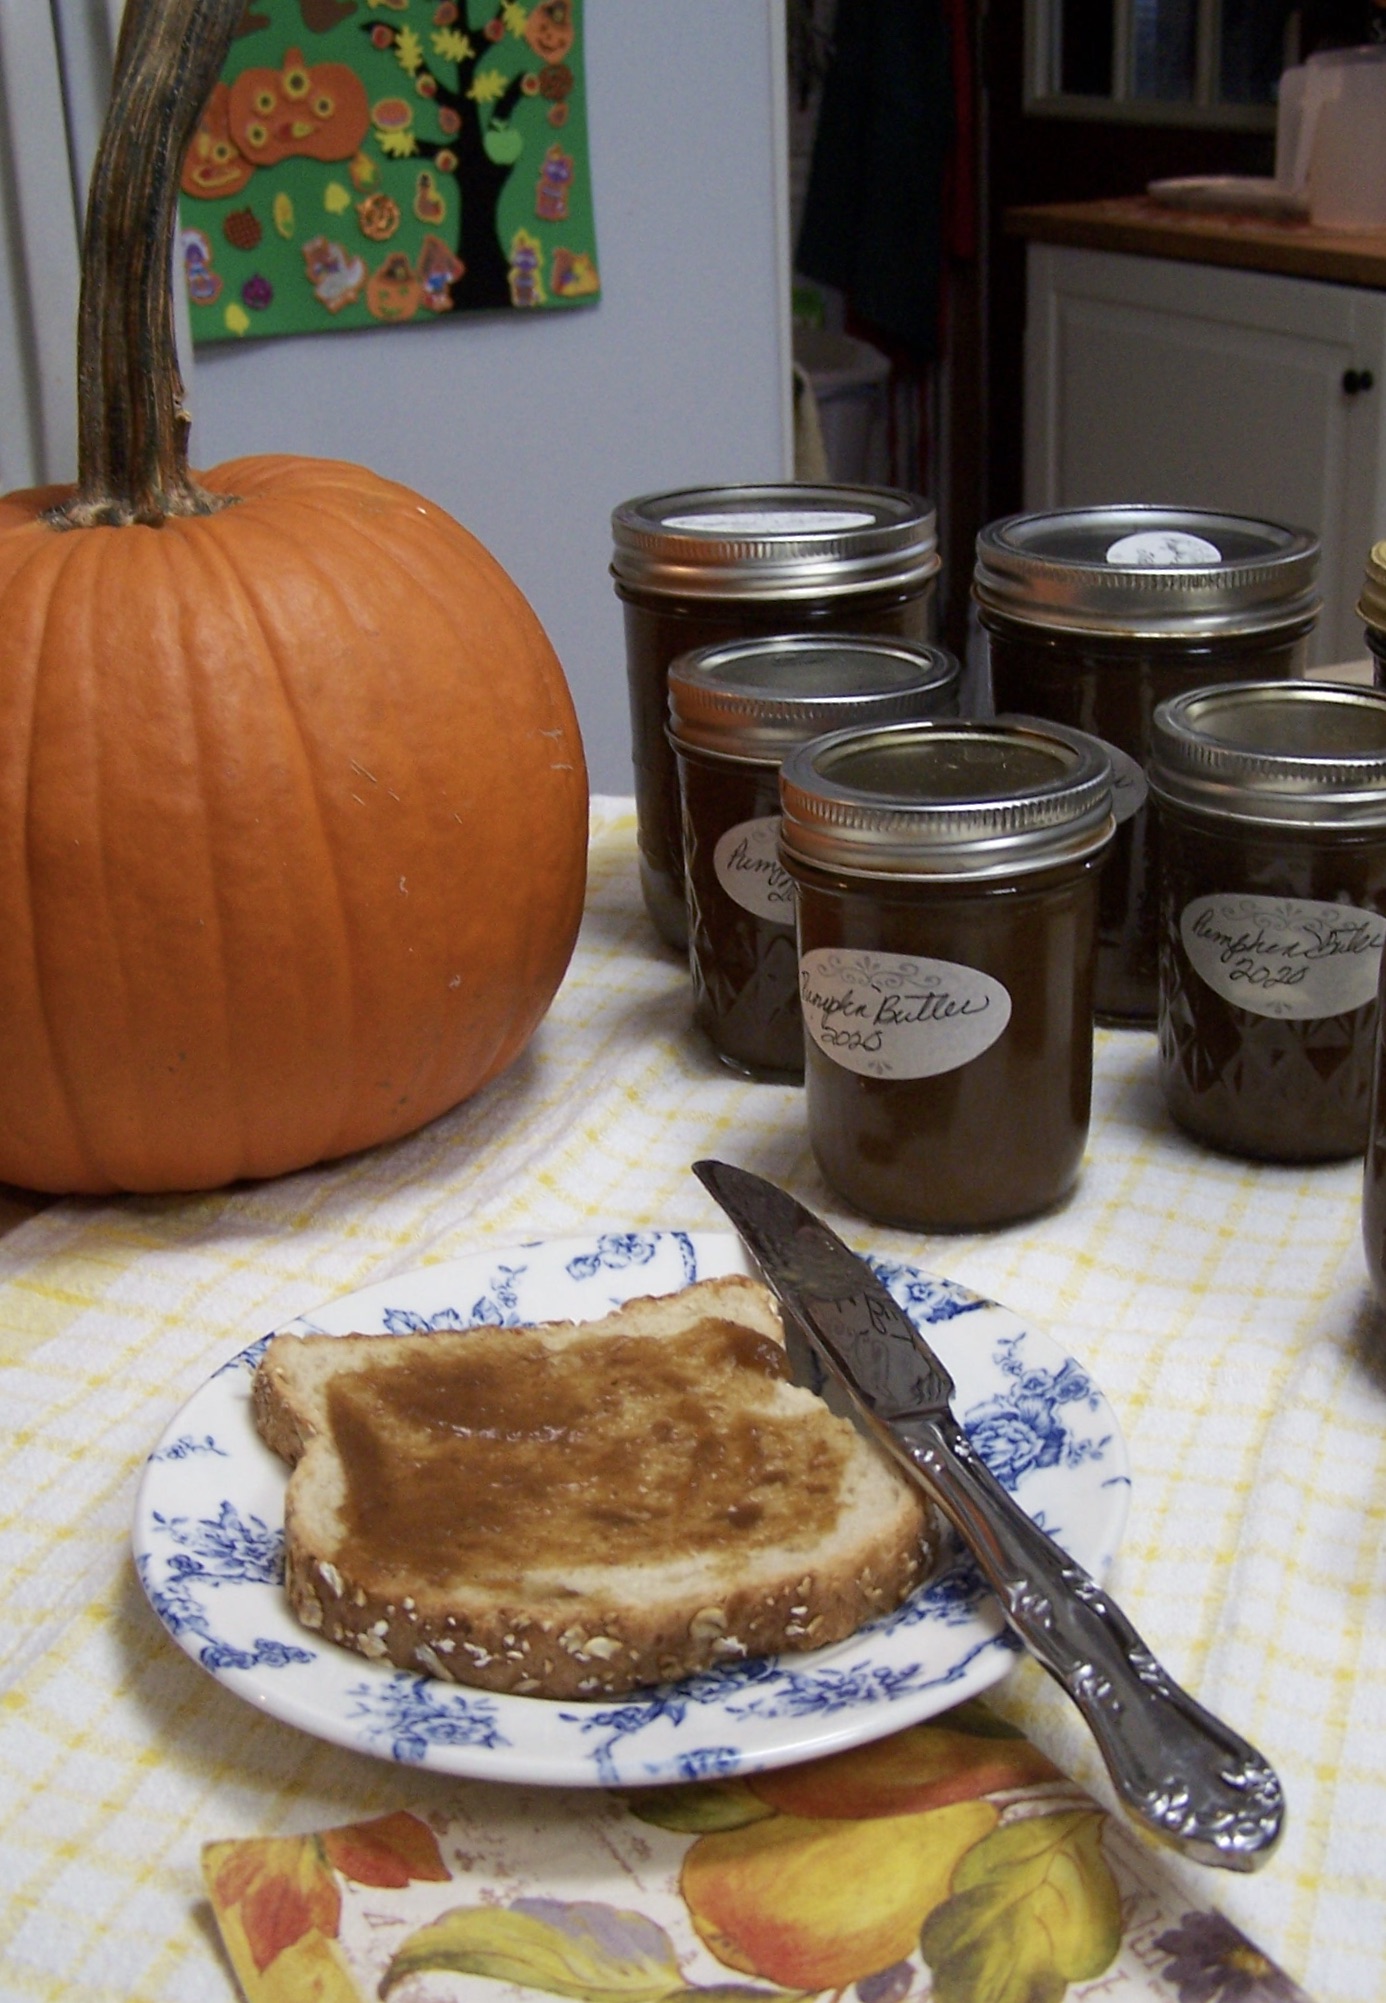
Every other year or so, I make our friends' and families' favorite---PUMPKIN BUTTER! Worth the effort and the smell is delicious! Canned pumpkin butter will keep as long as the seals are good.

oldnewgreenredo

Why not make some spicy pumpkin butter with me! 

Sandi's Pumpkin Butter

Place all ingredients in a heavy pot with lid

10 cups of Fresh Pureed Pumpkin
3 1/3 cups of sugar (1/2 white and 1/2 brown sugars)
1/2 tsp salt
1 Tbsp lemon Juice
1 Tbsp of cinnamon
1/2 tsp of allspice
1 tsp of ginger
1/2 tsp nutmeg
1/2 tsp cloves
1/2 cardamon

Add at the end.
1/2 cup of salted butter

Add Apple juice or pumpkin liquid to get the pot to start boiling. Bring to a bubbling boil, and then lower heat to maintain a slow simmer. Stir frequently to avoid burning on bottom of pot. Cock lid open to allow steam to escape, so the contents will reduce. 

Simmer until the pumpkin is thick and flakes off the spoon. It should be very thick and dark. Another test of consistency is to pour a Tbsp of hot pumpkin on a chilled plate. If no rim of liquid forms around the edge it is ready to add butter. 

Add butter stir until glossy and thoroughly combined. 

Ladle hot pumpkin butter into hot clean jars, seal and process in rolling hot water bath for 10 minutes, (completely covered). Remove and cover jars with cloth as they cool.

Perfect on toast, in oatmeal, or in pastries. This Will keep in fridge once opened. I store ours upside down. Remember there are no preservatives in the pumpkin butter, it's just pure food.


oldnewgreenredo

How about another favorite

Fall Pumpkin Spice Apple Muffins  Post: HERE.

Don't forget Pumpkin pies, breads, soups are all delicious and very high in nutrition. I reduce the sugar in most recipes. 
copyright free image

So ---remember, there were no pies at the first Thanksgiving. Sigh!

But of course we can have them NOW and all the other goodies...more recipes coming this month!

If You enjoyed this post please FOLLOW IT in the upper right hand corner, to get just one email of each new post.


All the opinions and photographs in this blog are my own, unless otherwise designated. I have not been paid or reimbursed in anyway for my opinions, posts or any products shown or anywhere I shop.


Thanks  ALWAYS  for visiting!

I will try and respond to every comment and answer every question.